
Zendesk
Flow integrates seamlessly with Zendesk to combine messaging automation and agents.
Prerequisites
You must have a Zendesk account or you can sign up here.
Installation
Following the steps below, you can connect Zendesk with a Flow project.
Step 1. Add the integration
- Sign in to the Flow dashboard.
- Open the integration section
- Click + and select the "Customer service" tab and click on the Zendesk integration.
Step 2. Configure API client
- Copy the
Redirect urlfrom the integration settings. - Sign in to Zendesk and go to Settings -> Account -> API & SDKs.
- Add API client.
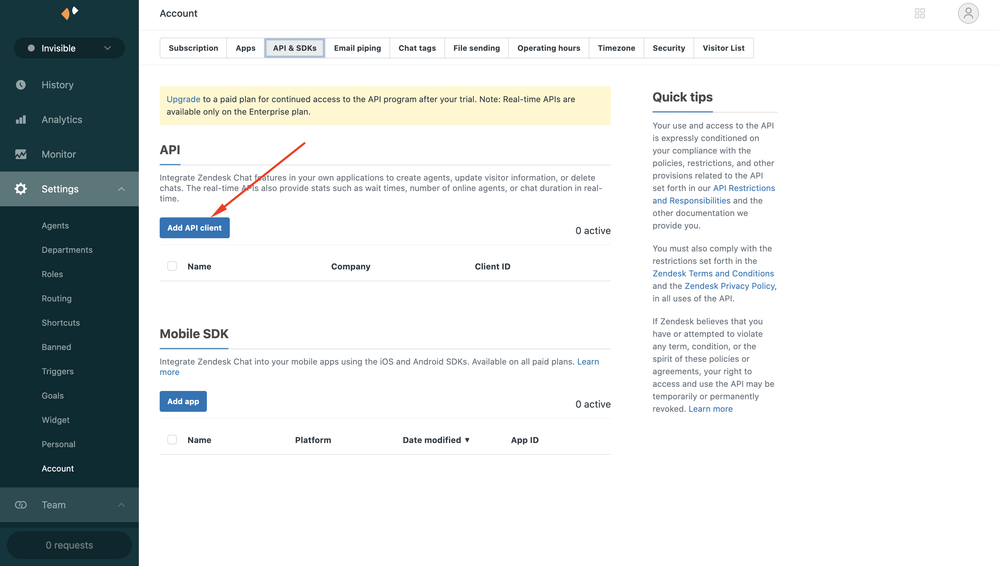
- Fill in the
Client name,Companyand paste copied redirect url inRedirect URLs. - Click Create API client .
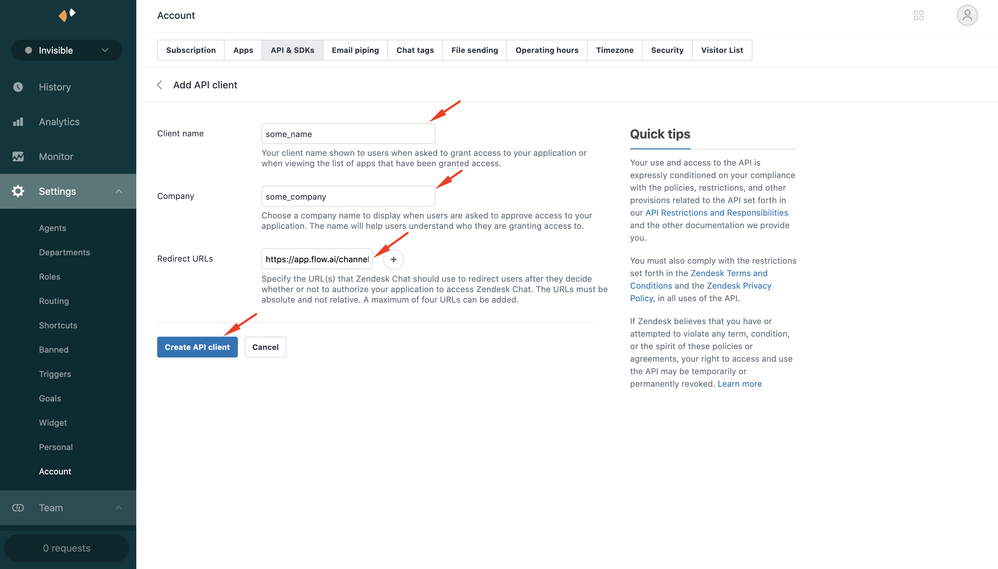
- Copy received
client IDandclient secret, go back to the Flow integration screen and paste them.
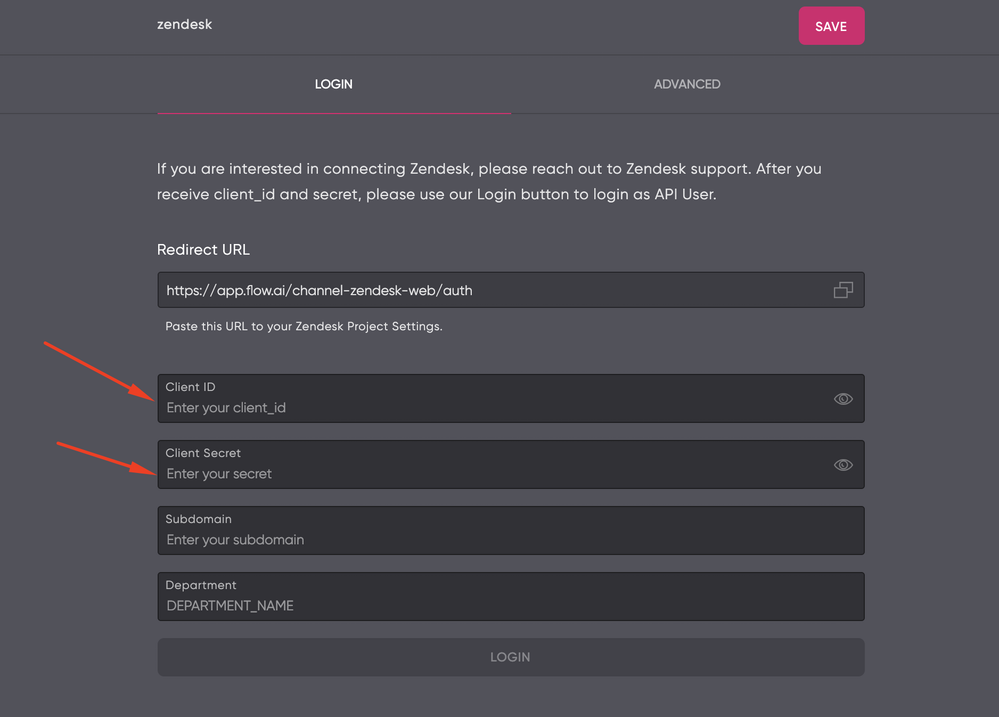
Step 3. Configure Subdomain
- Go to zendesk and see your
subdomain. - Copy your
subdomain, go back to Flow integration screen and paste it. - When everything is ready click Login.

You will be redirected to Zendesk where you have to allow access.
Advanced settings
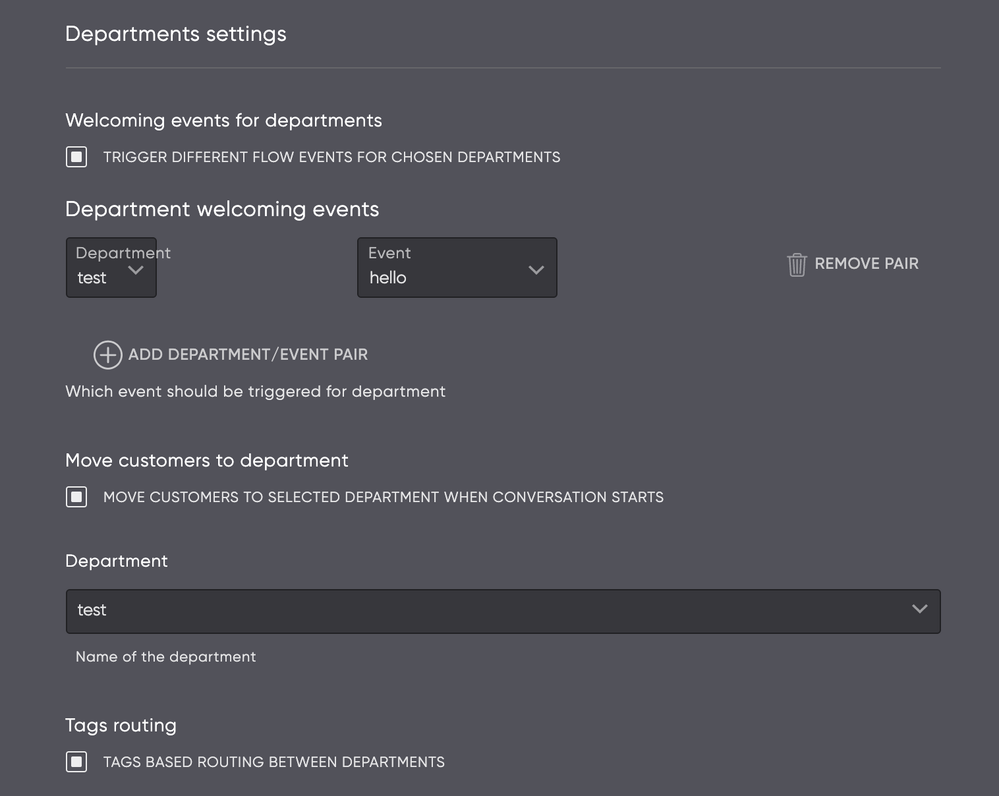
You can customize your integration with advanced settings. There is an opportunity to choose Departments settings such as providing welcoming events for departments, tags routing and moving customers to department.
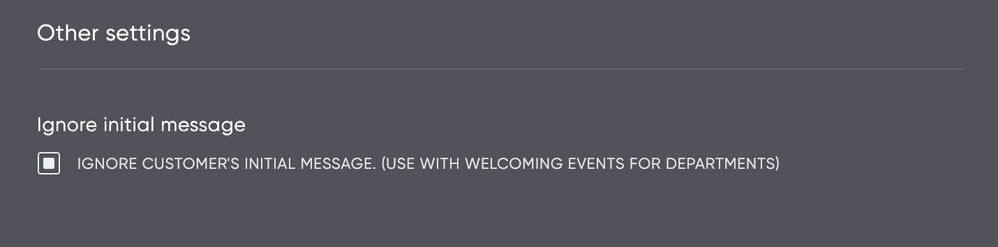
There is also an opportunity to choose Other settings such as ignoring the initial message.
Receiving messages
Go to Zendesk -> Settings -> Widget, copy the script and insert it into your website's HTML source code between the head tags. Now you can talk to bot through Zendesk widget.
The conversation will be displayed in Zendesk where agent can write messages. When an agent archive or removes the conversation, the bot will automatically resume.
Channel-specific
Zendesk has specific restrictions for sending lists. You must set URL in Action field and enter a valid URL in order to send a list.
Updated 2 months ago