
Web Widget
Flow provides an easy-to-use web widget that can be placed on a website. This allows visitors to the website to directly chat with a chatbot or human agent.
Capabilities
The web widget supports a wide variety of reply actions as seen in the messaging capabilities grid. Below is a detailed view of each capability.
Text
Web widget displays any plain text messages.

Emojis
Web widget displays any unicode emoji sent in text messages. Mobile users can use the emoji keyboard on their device to send them.
Emojis docs - JS template docs
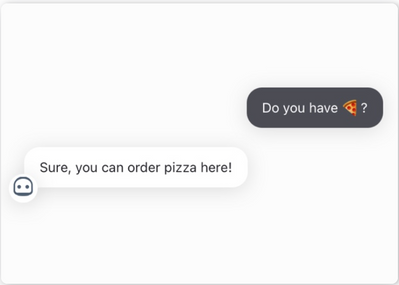
Image
Web widget displays static images.

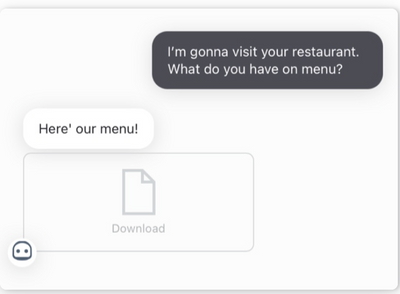
File
Web widget displays files and allows users to download them.
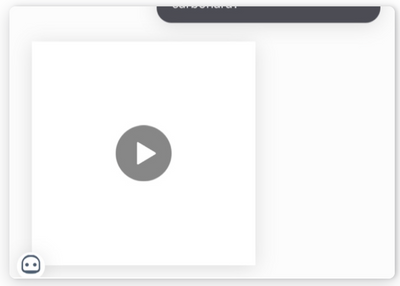
Video
Web widget displays videos and allows users to play them.
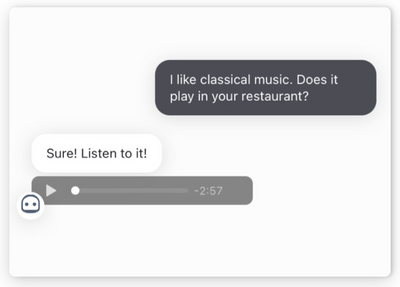
Audio
Web widget provides audios and allows users to play them.
Location
Web widget displays Google Maps link of the location. Location messages include longitude and latitude coordinates.
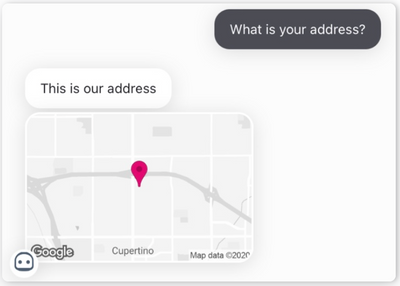
Location docs - JS template docs
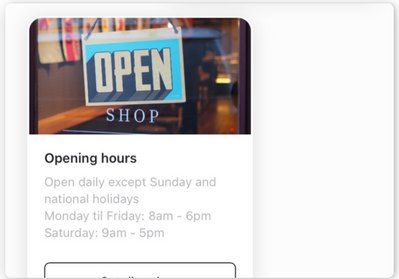
Card
Web widget displays cards. Cards must include title and optionally can include subtitle, media, action and buttons.
Carousel
Web widget displays carousels that contain cards.

Carousel docs - JS template docs
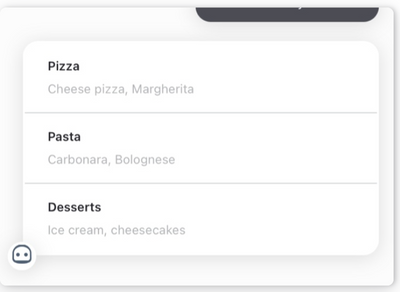
List
Web widget displays lists that contain cards.
Buttons
Web widget displays buttons.
Buttons docs - JS template docs
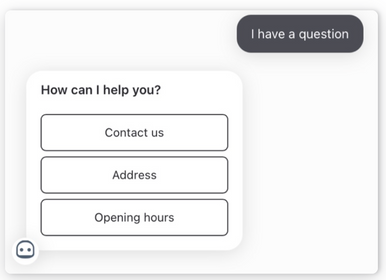
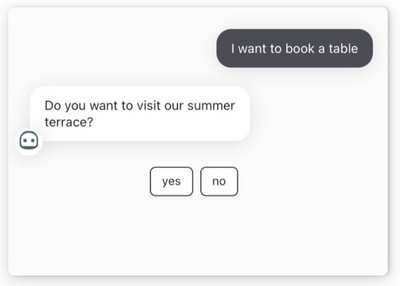
Quick replies
Web widget displays quick replies. They are ideal for yes / no type of questions.
Quick replies docs - JS template docs
Configuration
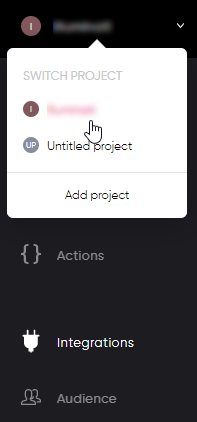
To get started, first add a Web widget integration to your project
- Choose the project to which you would like to connect WhatsApp using the top left drop-down menu:
- Go to the “Integrations” section and press the “+” sign:
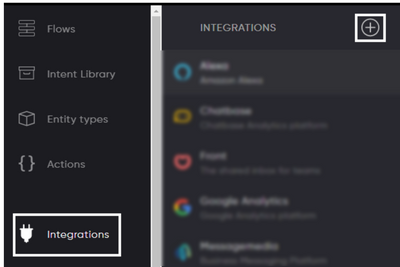
- Select the Web widget integration
- Copy and paste the embed code within the HTML of your web page.
Here is a simple example showing the embed code:
<html>
    <head>
    </head>
    <body>
        <script src="https://widget.flow.ai/w/[your token]==/flow-webclient-1.1.2.min.js"></script>
    </body>
</html>
Customization
There are various customization options for the web widget that can be applied within the dashboard settings
Language
Specify the language of the web widget. This will update button labels etc to the specific language.
Opening message
The message displayed in the center when opening the chat widget
Tint color
Specify the color used for the background of the header and button
Widget position
Adjust the location on the screen where the button will be displayed
Button type
Choose the type of button to use. The default is a message balloon icon colored by the tint color.
You can also change the button appearance by uploading a custom image. This must be a square image with a 256x256 pixel resolution.
Disable upload button
This option allows you to prevent users to upload and send any files using the upload functionality.
Header
Change the default title and description that are shown in the header section of the widget
Avatar
By default we show a bot avatar for each message sent by the chatbot. You can disable this entirely or upload a custom avatar image. Make sure the image is square. Preferred size is 228x228 pixels.
Character limits
Users are limited by 140 characters for a message intentionally There is an option to disable this behavior and allow text of any length to be send.
NoteNote: Having a 140 character limit makes it impossible for users to copy and paste long texts like the content of an e-mail.
Client nonce
This security setting is turned on by default and reduces the risk of another party trying to send messages by using just a threadId.
We recommend leaving it on for client side connections. If you make use of the flowai-js SDK we'll store and track the client nonce automatically. If you just connect using the Socket API you'll need to make sure you store and send the nonce with each HTTP request.
NoteThis setting prevents sharing a threadId between clients. For use cases where this is required, we you can disable this setting.
Embed settings
There are additional settings and functionality you can use to customize how the web widget behaves on your website.
Pro-active messages
You can configure a pro-active message to be displayed using the dashboard settings. If you want more control you can also do this using the following on-page settings:
<script type="text/javascript">
var userName = "Jane";
__flowai_webclient_proActive = {
  message: "Hi " + userName + ". Let me know if I can help",
  delay: 10,
  autoHide: 0
}
</script>
<script src="https://widget.flow.ai/w/[your token]..."></script>
Trigger event
Automatically triggering an event is especially useful for showing a welcome message or pushing a dialog into a specific flow when a user opens the web widget.
An event can be triggered by adding a global javascript variable called __flowai_webclient_autoTriggerEvent. The following example will automatically trigger the event SHOW_WELCOME whenever a user opens the web widget for the first time.
Example
<script type="text/javascript">
window.__flowai_webclient_autoTriggerEvent = 'SHOW_WELCOME';
</script>
<script src="https://widget.flow.ai/w/[your token]..."></script>
NoteOpening events are not considered as a new session. Read how we measure sessions.
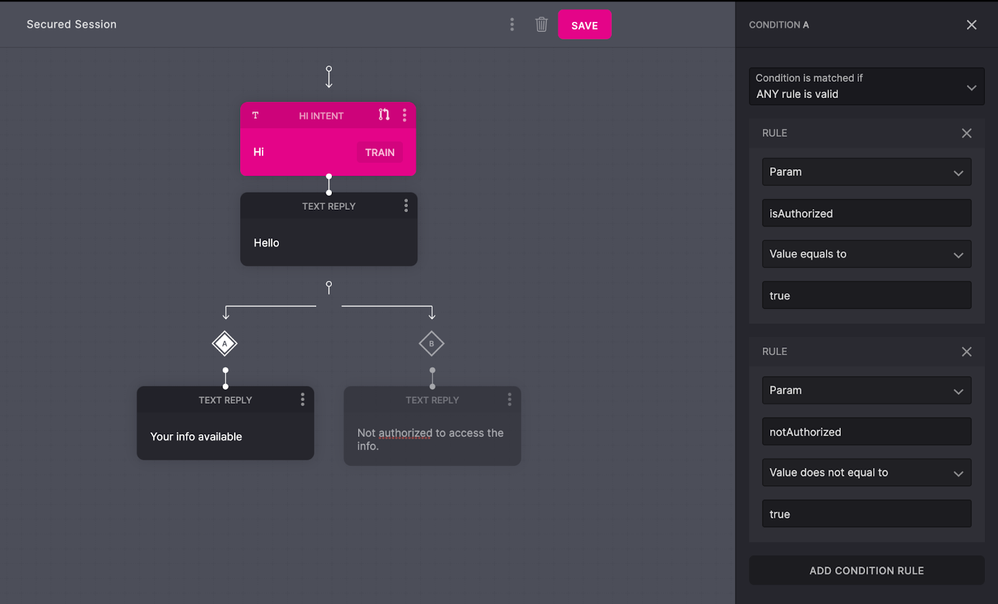
Security settings
Khoros Flow has improved the security mechanism for the web widgets by incorporating Socket Security Layer (SSL). SSL helps to validate the one-time token for the customer web requests.
For a secured channel, you need to enable Secure Token validation for the session. Without a valid Token, a session is not established or communication will go not through the secured channel. Configure the Secure Token validation Webhook for the channel, validate and enforce HTTPS protocol to establish the session.
Enable Web Widget Security
- You need a backend environment to validate One-Time Token (OTT) requests.
- Update the widget code to generate the OTT and embed the code on the client-side before the widget gets uploaded.
Example
//Generate and set up a One-Time Token
    window.__flowai_ott = "3587acb9aba75972b8f9280c2187e037d27e99e17a6c6cd27b15c7a45496d91c"
    const widget = document.createElement('script')
    widget.src="https://flow.dev.aws.lcloud.com/channel-webclient/w/YTl2WTYyeDVPfGNFNk4xMzlwUA==/flow-webclient-1.1...."
    document.body.append(widget)
Follow the below steps to enable the security settings for the Flow:
- In a Flow, click Integration from the left panel.
- Click + to integrate the web widget.
- Click the Customize tab.
- Select the applicable options for the session security.
- Enter the webhook URL in the Secure Token Validation field for token verification.
- Enter the generated token in the Authorization token for validating the OTT field.
- Click SOFT MODE.
NoteIf you enable SOFT MODE, the validated result is accessible via isAuthenticated param. You can provide access to secure flows only. The session will be established even though the token is unauthorized.
- Click Save.
Test the Flow Design
You can test the secured session status using the Flow condition trigger.
Attach widget to specific HTML element
You can attach the widget to some specific HTML element on your page by setting __flowai_webclient_embed to your_element_id. This allows you to run the widget full screen or embedded within an element on your page.
Example
<div id="my-div"></div>
<script type="text/javascript">
window.__flowai_webclient_embed = 'my-div';
</script>
<script src="https://widget.flow.ai/w/[your token]..."></script>
Auto send message
This works pretty similar like the triggering of an event. The big difference is that a message would be send as if the user did it him or herself.
Example
<script type="text/javascript">
window.__flowai_webclient_autoMessage = '3 pizza hawaii please';
</script>
<script src="https://widget.flow.ai/w/[your token]..."></script>
Auto open
Automatically open the web widget when it's loaded on the page by setting __flowai_webclient_autoOpen to true.
Example
<script type="text/javascript">
window.__flowai_webclient_autoOpen = true;
</script>
<script src="https://widget.flow.ai/w/[your token]..."></script>
Alternative button
We have an option you can use a custom button in HTML to open or close the web widget. Provide a query selector that matches the button you want to use to toggle the widget.
Example
<script type="text/javascript">
window.__flowai_webclient_triggerSelector = '#alternativeButton';
</script>
<a href="#" id="alternativeButton">Click me!</a>
<script src="https://widget.flow.ai/w/[your token]..."></script>
The example above shows a HTML <a/> link with an id attribute alternativeButton. The corresponding query selector is #alternativeButton. You can specify any valid selector with the window.__flowai_webclient_triggerSelector option.
Hide default button
You can hide the default button by setting the __flowai_webclient_hideButton to true.
Example
<script type="text/javascript">
window.__flowai_webclient_hideButton = true;
</script>
Hide download button
You can hide the download button by setting the __flowai_webclient_hideDownloadButton to true.
Example
<script type="text/javascript">
window.__flowai_webclient_hideDownloadButton = true;
</script>
Hide header close button
You can hide the header close button by setting the __flowai_webclient_hideHeaderCloseButton to true (works only after hiding default button).
Example
<script type="text/javascript">
window.__flowai_webclient_hideHeaderCloseButton = true;
</script>
Hide header
You can hide the header itself by setting the __flowai_webclient_hideHeader to true.
Example
<script type="text/javascript">
window.__flowai_webclient_hideHeader = true;
</script>
Hide opening message
You can hide the opening message by setting the __flowai_webclient_hideOpening to true.
Example
<script type="text/javascript">
window.__flowai_webclient_hideOpening = true;
</script>
Custom font
It’s possible to use a custom web font within the web widget. We support Google Fonts, Adobe Fonts (Typekit) and custom hosted fonts.
Example of using a Google font:
<script type="text/javascript">
 window.__flowai_webclient_font = {
   family: 'Crimson Pro',
   url: 'https://fonts.googleapis.com/css2?family=Crimson+Pro'
 }
 </script>
 <script src="https://widget.flow.ai/w/[your token]..."></script>
You can also use your own hosted web font but providing an absolute URL to a CSS file.
Example Using a Custom hosted web font:
<script type="text/javascript">
 window.__flowai_webclient_font = {
   family: 'Gilroy-Regular',
   url: 'https://flow.ai/assets/fonts/widget.css'
 }
 </script>
 <script src="https://widget.flow.ai/w/[your token]..."></script>
Example of the loaded CSS file
@font-face {
 font-family: 'Gilroy-Regular';
 src: url("https://flow.ai/assets/fonts/31BF8D_6_0.eot");
 src: url("https://flow.ai/assets/fonts/31BF8D_6_0.eot?#iefix") format("embedded-opentype"), url("https://flow.ai/assets/fonts/31BF8D_6_0.woff2") format("woff2"), url("https://flow.ai/assets/fonts/31BF8D_6_0.woff") format("woff"), url("https://flow.ai/assets/fonts/31BF8D_6_0.ttf") format("truetype")
 }
Session storage
By default the widget stores messages accross browser sessions. By setting __flowai_webclient_storage to session you can change this behavior. When set to session all messages are removed when a user closes the web browser.
Example
<script type="text/javascript">
window.__flowai_webclient_storage = 'session';
</script>
<script src="https://widget.flow.ai/w/[your token]..."></script>
Sending params
The Flow.ai contextual AI engine will find and use entities within flows. Sometimes you might already have certain information available inside the front end the AI could use. You can send this data by setting __flowai_webclient_params.
The format of the params is identical to the way you receive data within cloud code or a webhook.
Example
<script type="text/javascript">
window.__flowai_webclient_params = {
  departure_city: [{
    value: 'Amsterdam'
  }],
  destination_city: [{
    value: 'NYC'
  }]
}
</script>
<script src="https://widget.flow.ai/w/[your token]..."></script>
Custom originator
We call the sender of a message the originator.
By default anyone using the web widget has an anonymous originator. You can however send information that allows you to identify a user. This is useful if you are using the web widget in a secure environment where you have identified the user.
Example
<script type="text/javascript">
window.__flowai_webclient_originator = {
  name: "Jane",
  profile: {
    fullName: 'Jane Doe',
    picture: 'https://my-user-images.com/jane.png',
    email: '[email protected]'
  },
  metadata: {
    userName: 'janedoe21',
    userRole: 'admin'
  }
}
</script>
<script src="https://widget.flow.ai/w/Aasdasdada132424234..."></script>
Event handlers
We provide a __flowai_webclient_events.addListener method to add custom event handlers.
The events that are triggered are similar to the Flow.ai JavaScript SDK.
Reply messages
Whenever Flow.ai sends a reply to the web widget you can subscribe to handle these reply messages.
<script type="text/javascript">
__flowai_webclient_events.addListener('received', function(reply){
  // Called when a reply is received
  // Do anything with the reply
})
</script>
<script src="https://widget.flow.ai/w/[your token]..."></script>
Sent messages
You can also subscribe to messages that are send by the user. Whenever Flow.ai has received the message it will trigger a delivered handler.
<script type="text/javascript">
__flowai_webclient_events.addListener('send', function(message){
  // Called when a message was sent
})

__flowai_webclient_events.addListener('delivered', function(message){
  // Called when a message was delivered
})
</script>
<script src="https://widget.flow.ai/w/[your token]..."></script>
Other events
__flowai_webclient_events.addListener('error', function(err){
  // Called on error events
})

__flowai_webclient_events.addListener('connected', function(){
  // Handle connected event
})

__flowai_webclient_events.addListener('reconnecting', function(){
  // Handle reconnecting event
})

__flowai_webclient_events.addListener('disconnected', function(){
  // Handle disconnected event
})
Other
Fullscreen mode
Flow.ai allows you to open web widget in a fullscreen mode. Simply add fullscreen=true to your web widget's query parameters. For example
https://widget.flow.ai/try/Y2IwOGE4OGItOGU2My00MGE0LTkyMDAtYmM1N2Y0ZWIzMzcxfDVmMmZhNDk2LWNjMDQtNDA4Ni04YTA2LWY3MDcxMzYxMzMzYQ==?fullscreen=trueNon-rounded bot avatar
Flow.ai allows you to remove rounding from bots avatar. Simply add nonRounded=true as a query parameter to the URL of your web widget.
For example:
https://widget.flow.ai/try/Y2IwOGE4OGItOGU2My00MGE0LTkyMDAtYmM1N2Y0ZWIzMzcxfDVmMmZhNDk2LWNjMDQtNDA4Ni04YTA2LWY3MDcxMzYxMzMzYQ==?nonRounded=trueUpdated 3 months ago