Flow other Integration: Zapier
Zapier is an online service that enables you to integrate your bot with all sorts of different apps and tools. You can easily extract user data within Flow and push that data to other tools like Hubspot, Google Sheets, Salesforce, and many other services.
Before you begin
As long as our Zapier integration is in Beta, you need this invitation to get access. Make sure that you have a Zapier account and apply by clicking the Install Now button on our Zapier integration page. We'll send you an invite by email manually.
Zap triggers
Currently two events can cause zaps to be triggered.
Zapier action
The Zapier action works similar to any other action. Whenever a match is made and the action is executed, it will trigger the Zapps that are connected within Flow.
Before you can select a Zapier action within your Flow project, you'll need to create a zap and turn it on.
Note: Turning Zaps on and off will make them selectable within your Flow project.
Handover
Whenever a handover takes place any Zap of this event type, connected to the project, will be triggered.
Zaps triggered by a handover don't require any configuration within your project.
Create a Zap
The following instructions demonstrate how to create a Zap that is triggered whenever a specific Zapier action is called within your bot.
First, log in at your Zapier Dashboard and choose Make a Zap in the top right corner.
Any Zap starts with a When this happens and ends with a Do this section.
When this happens
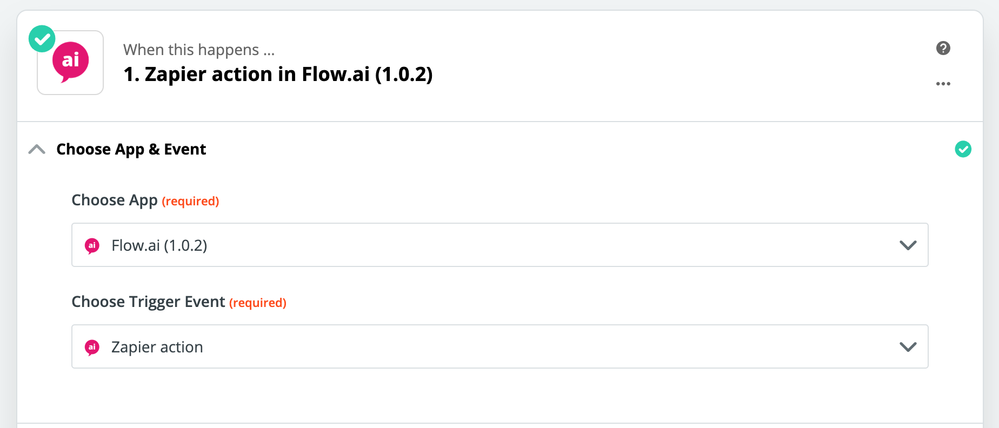
1. Choose App & Event
Search and select Flow as the App and choose the trigger event that will trigger the zap.

2. Choose Account
Sign in to the Flow account that is member of the Flow project you'd like to connect.
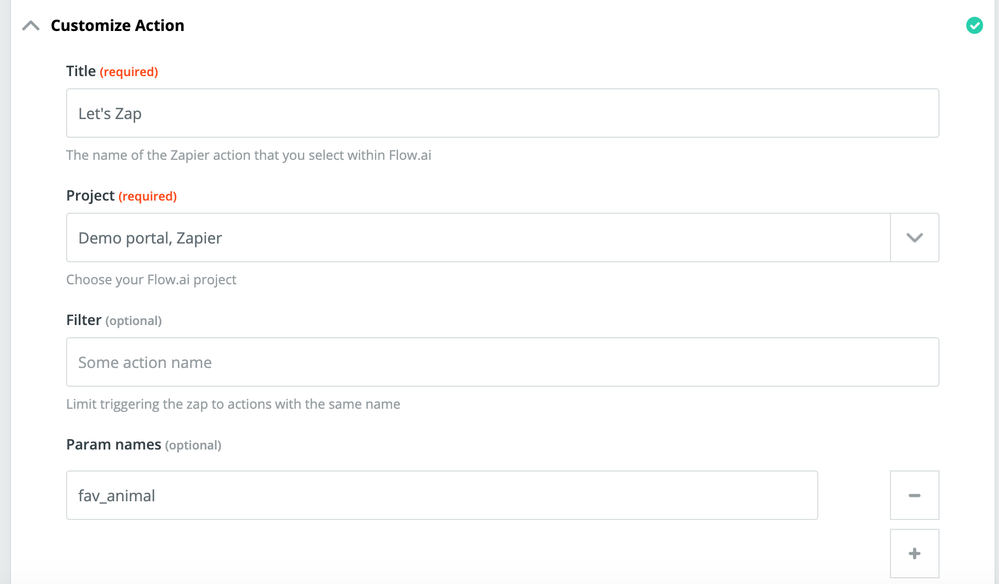
3. Customize Action
Enter a title for your Zapier action (required) and choose the Flow project where you would like to integrate your Zap with (required).
If you are planning to incorporate parameters from your Flow design you can add those Param names here (optional).

4. Find Data
Choose the test & find data and proceed to the next step.
Do this
There are over 1500 different Apps to use and each have slightly different options.
For these installation instructions, we'll show you how to create a new row in a Google Sheet.
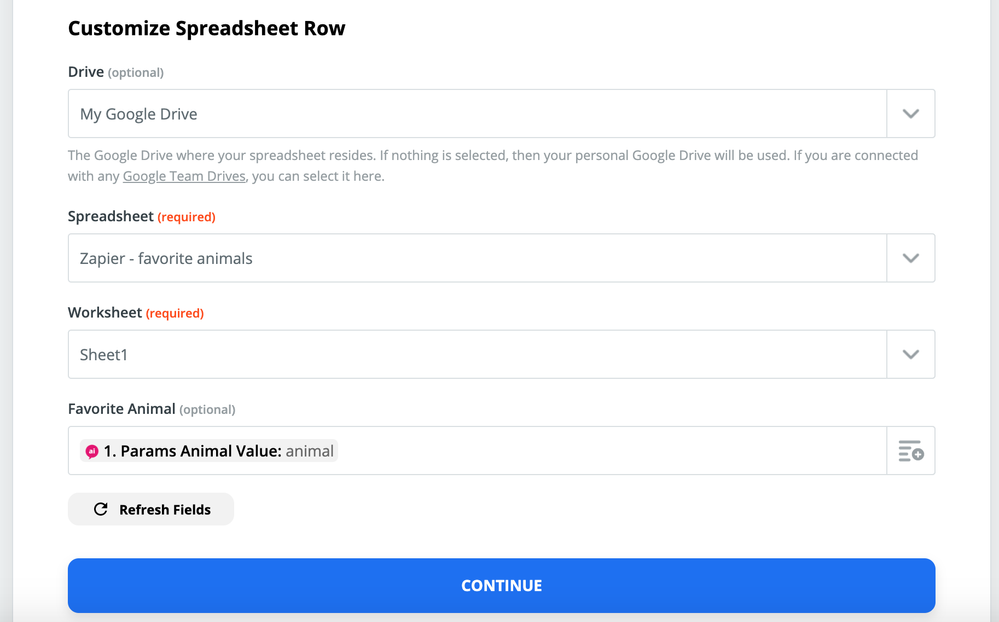
Start by selecting Create Spreadsheet Row in Google Sheets and choose your Google account, spreadsheet and worksheet.
Note
Make sure to add header names within the selected Google sheet.
In this example we're using params from our Flow design and insert them within new rows. Therefore we fill the Favorite Animal field with the value of a param that we obtain in Flow. Press continue, test and turn on your Zap.

Read more
Updated about 2 years ago