
Flow Designs: Branch your chatbot
When designing a flow with multiple options, you might want to branch or split your flow. This article shows how to branch your flows by combining multiple triggers.
Create a Flow
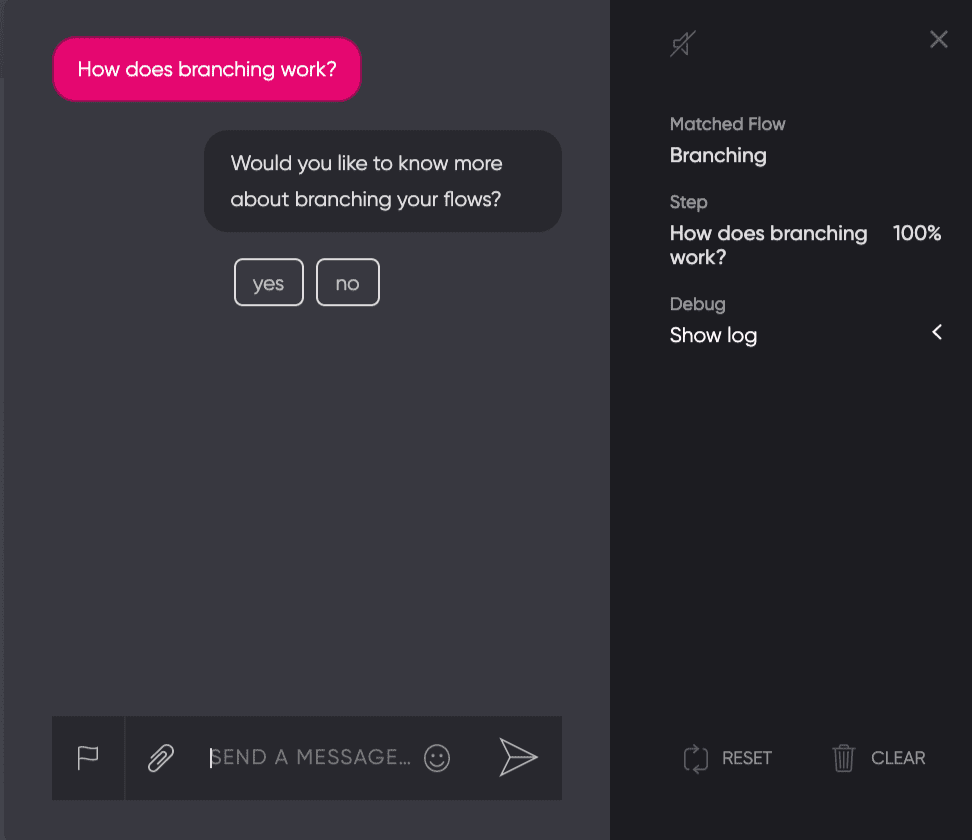
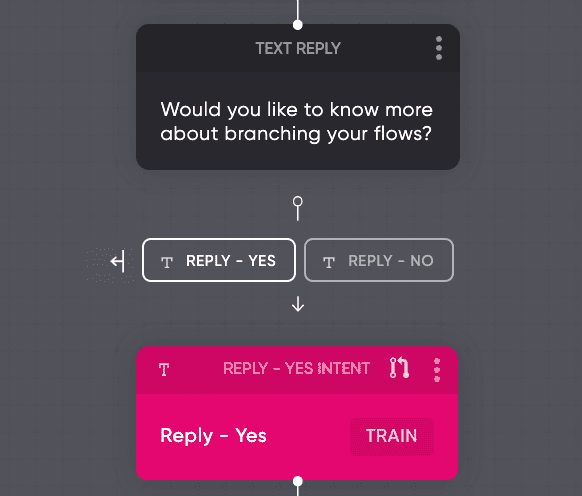
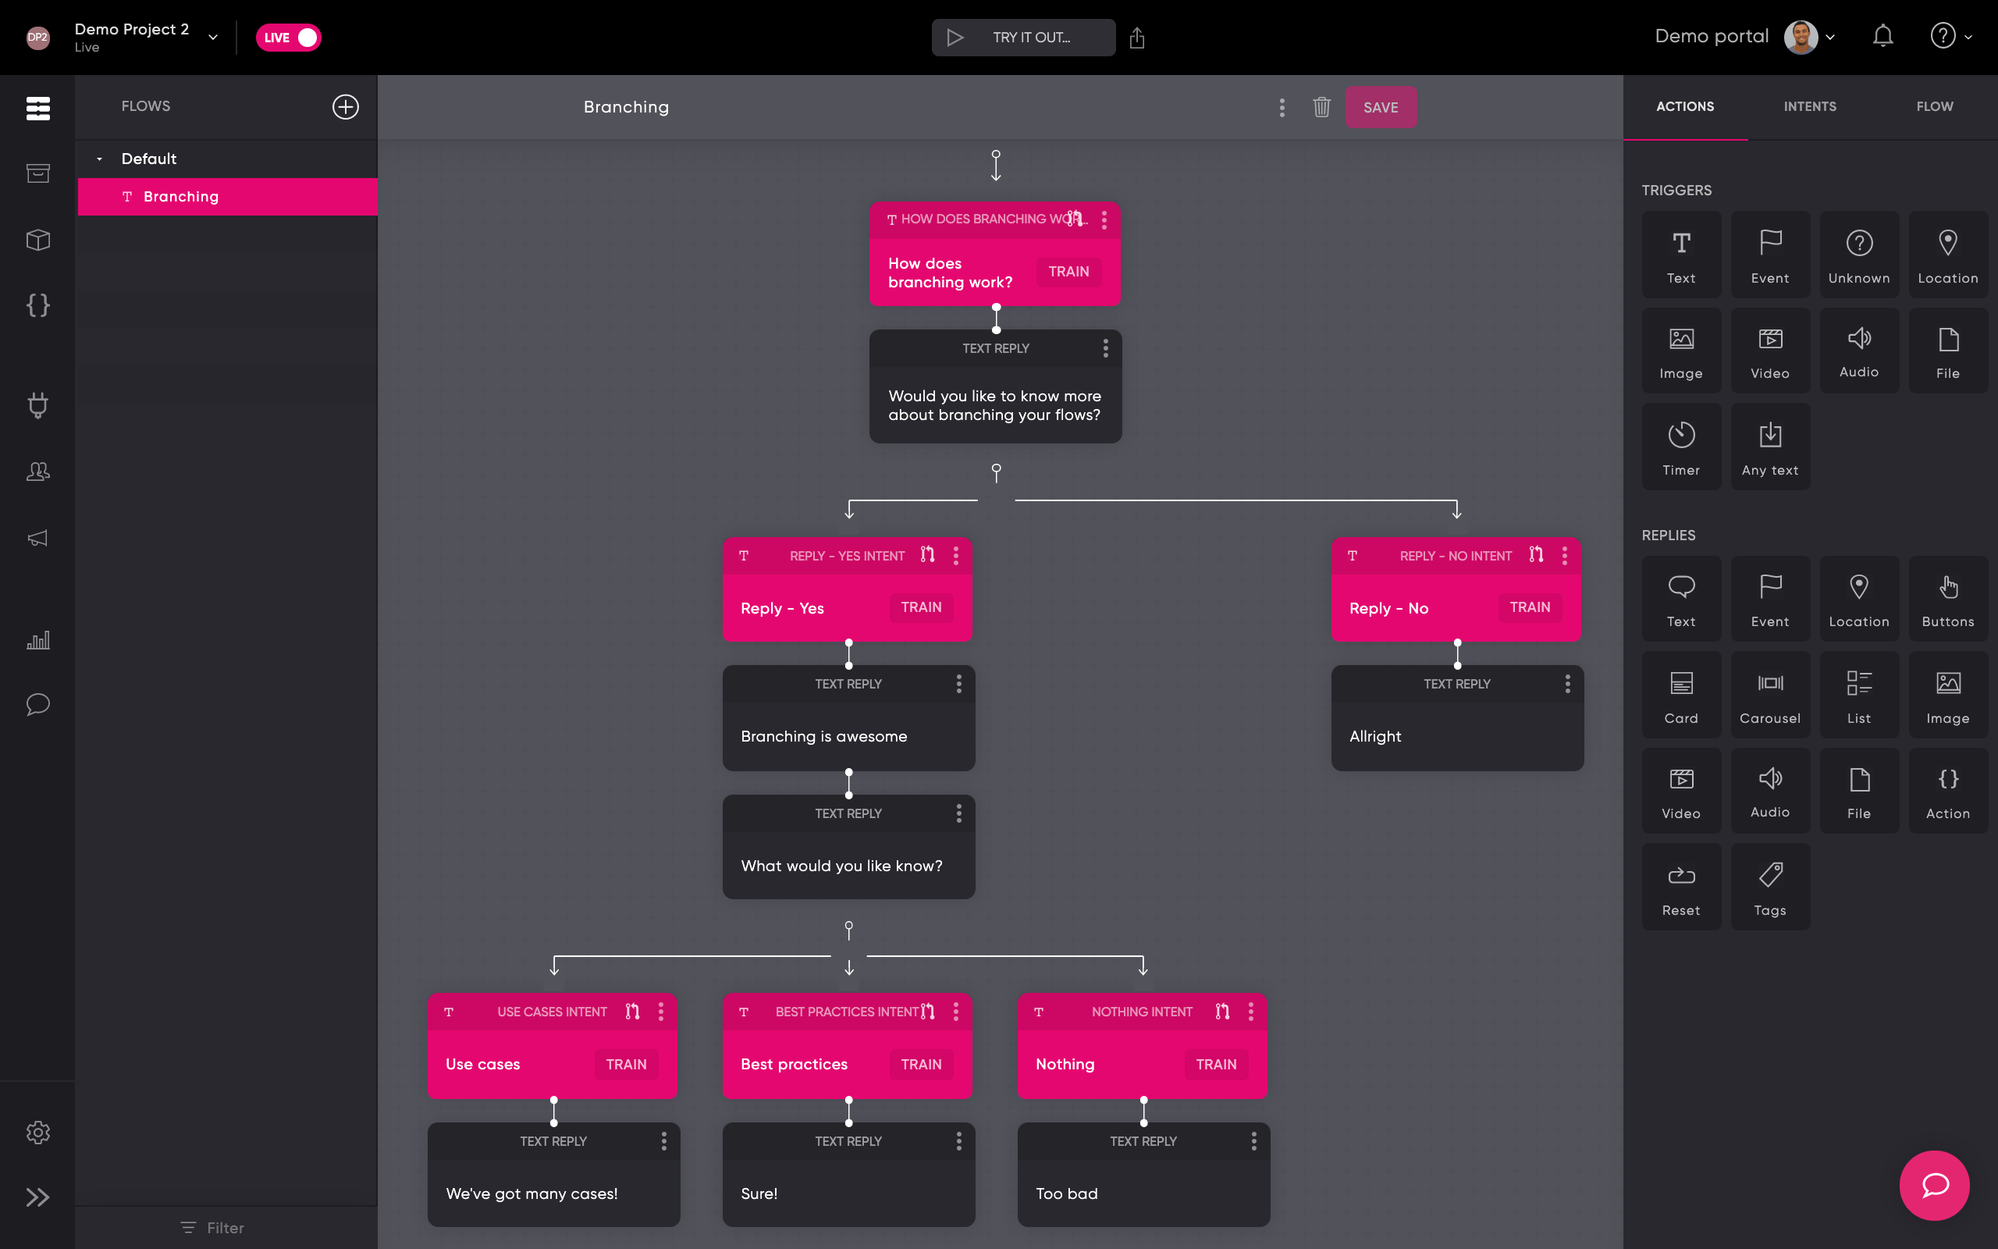
Create a new flow where you would like to create a branch. In most cases, a question is asked prior to the split or branch. In the example below, we will be use the question: "Would you like to know more about branching your flows?".
Add Triggers
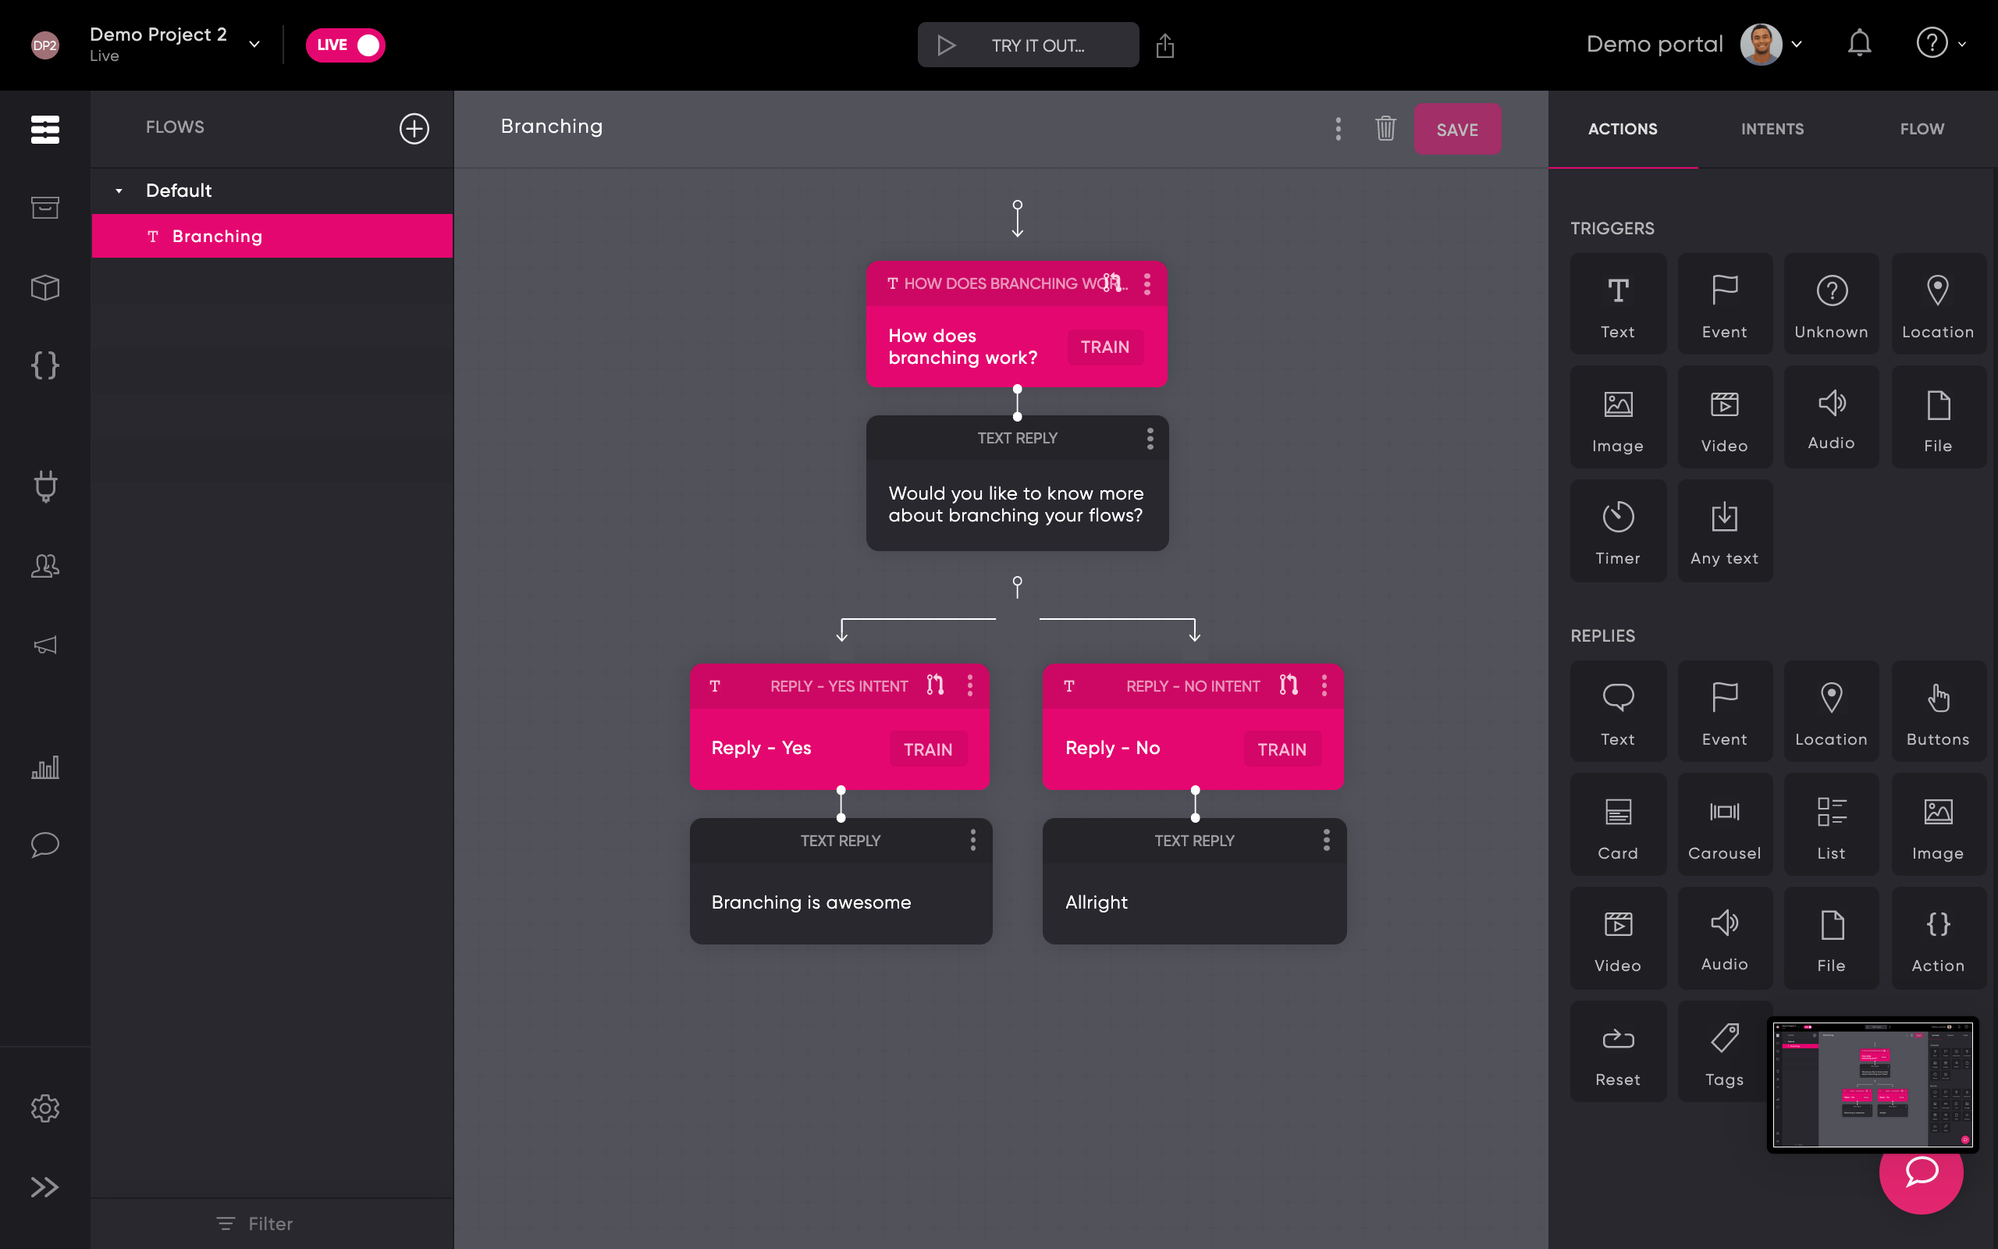
The closed question above results in a yes or no answer from the user. Our next step is to make sure that the user-input triggers the bot. Therefore, we drag and drop two text replies next to each other.
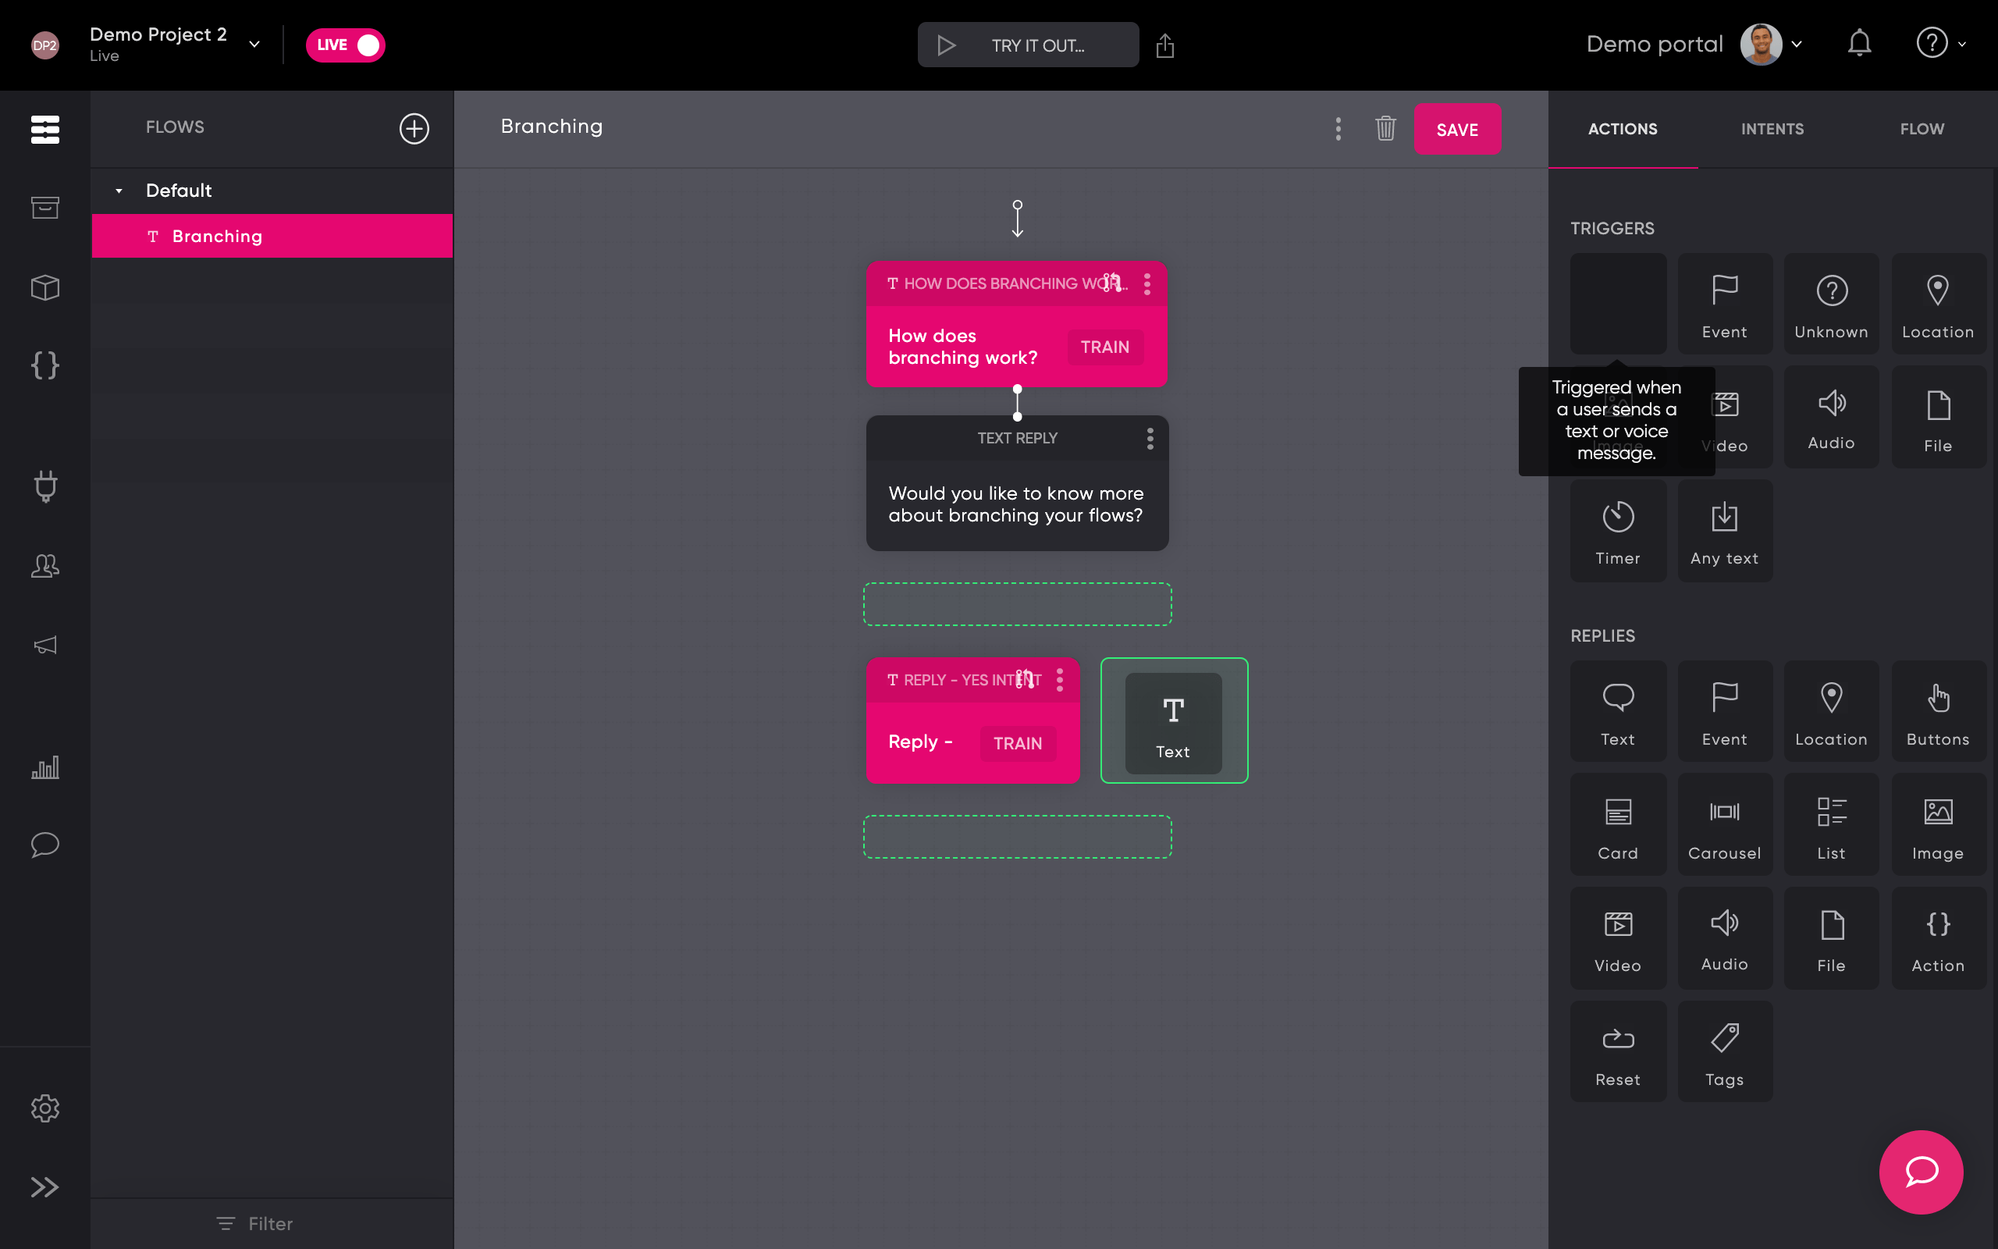
Add content
After adding both of the triggers, you can now follow up with a reply by the bot in both branches and your done. You've create a branched flow.
Combine branching with Quick Replies
Branching flows and Quick Replies are a great combination. Improve the speed of interaction and reduce errors by using quick replies. Read more about Quick Replies .
Expand and collapse branches
While branching your flows, you can change between views. The expanded view is great for visualizing but takes more space on your canvas. The collapsed view is great for narrowing down your view.
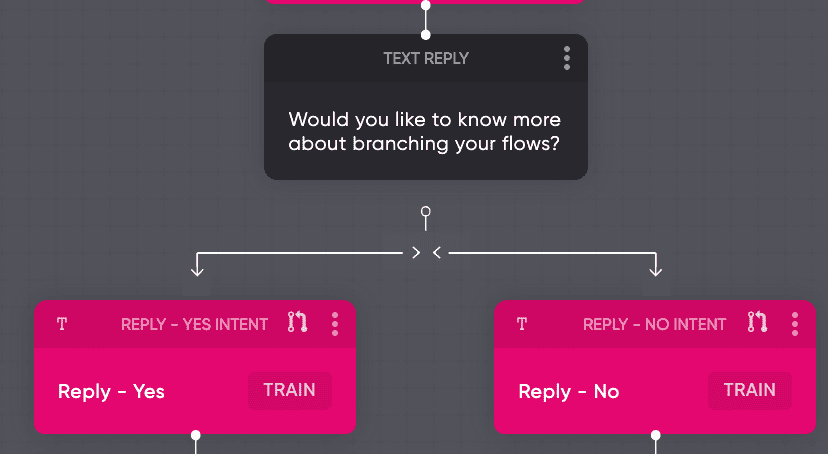
You can switch between views by clicking the "> <" sign in your expanded view or by clicking the "<-|" sign in your collapsed view.
Multiple branches vs. linking flows
Branching is great but branching to often within the same flow might affect the readability of your design. You might want to branch in some cases but link to other flows in other cases.
Updated 2 months ago