
Flow Designs: Implement Reply Delays
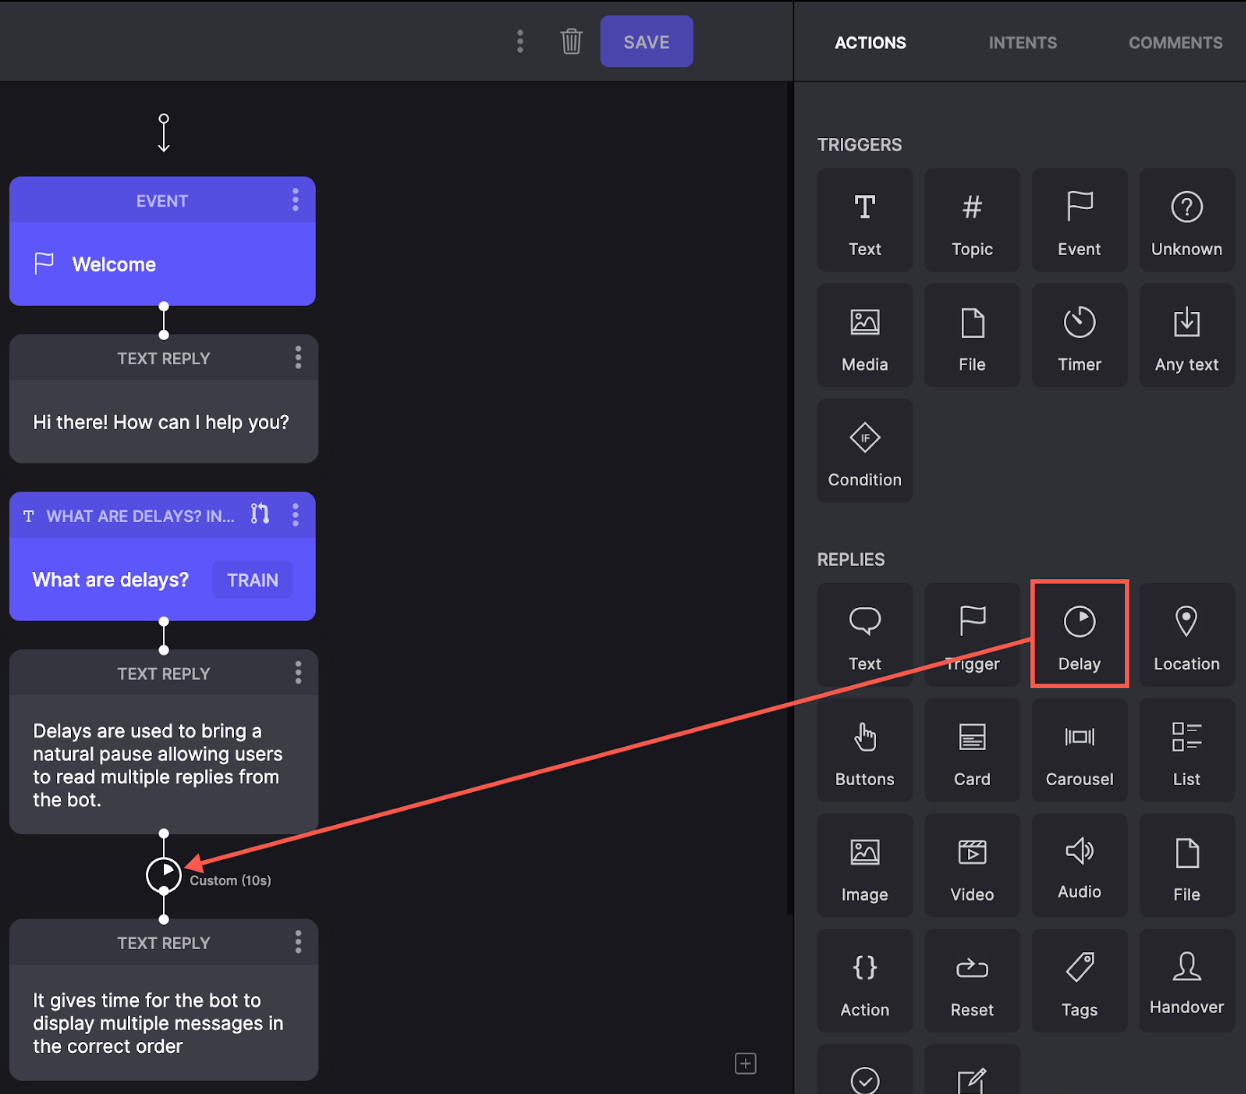
When the bot sends multiple replies, you can add short pauses between messages to create a more natural conversational flow and enhance the user experience. These delays help ensure messages are processed and displayed in the correct order. In flows where the bot sends multiple text replies, a delay in delivering each message gives users enough time to read them.
Delay actions versus Timer Triggers
Delay actions are similar to Timer Triggers but are primarily used for adding pauses between text messages to prevent the chatbot from sending multiple messages at once, improving the user experience. Timer Triggers, on the other hand, are better suited for waiting on user input or sending follow-up messages after a period of inactivity, such as when awaiting contact information or sending a reminder after a few hours.
To add delays in your flow:
-
In your Flow project, drag and drop Delay replies between multiple bot replies.
-
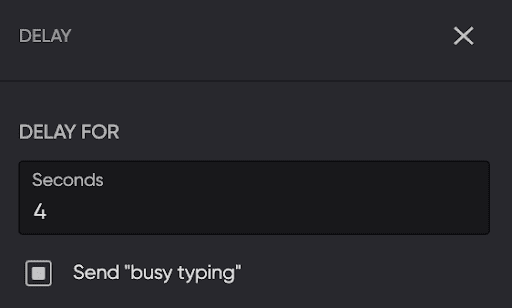
Select the Delay reply that you just added.
-
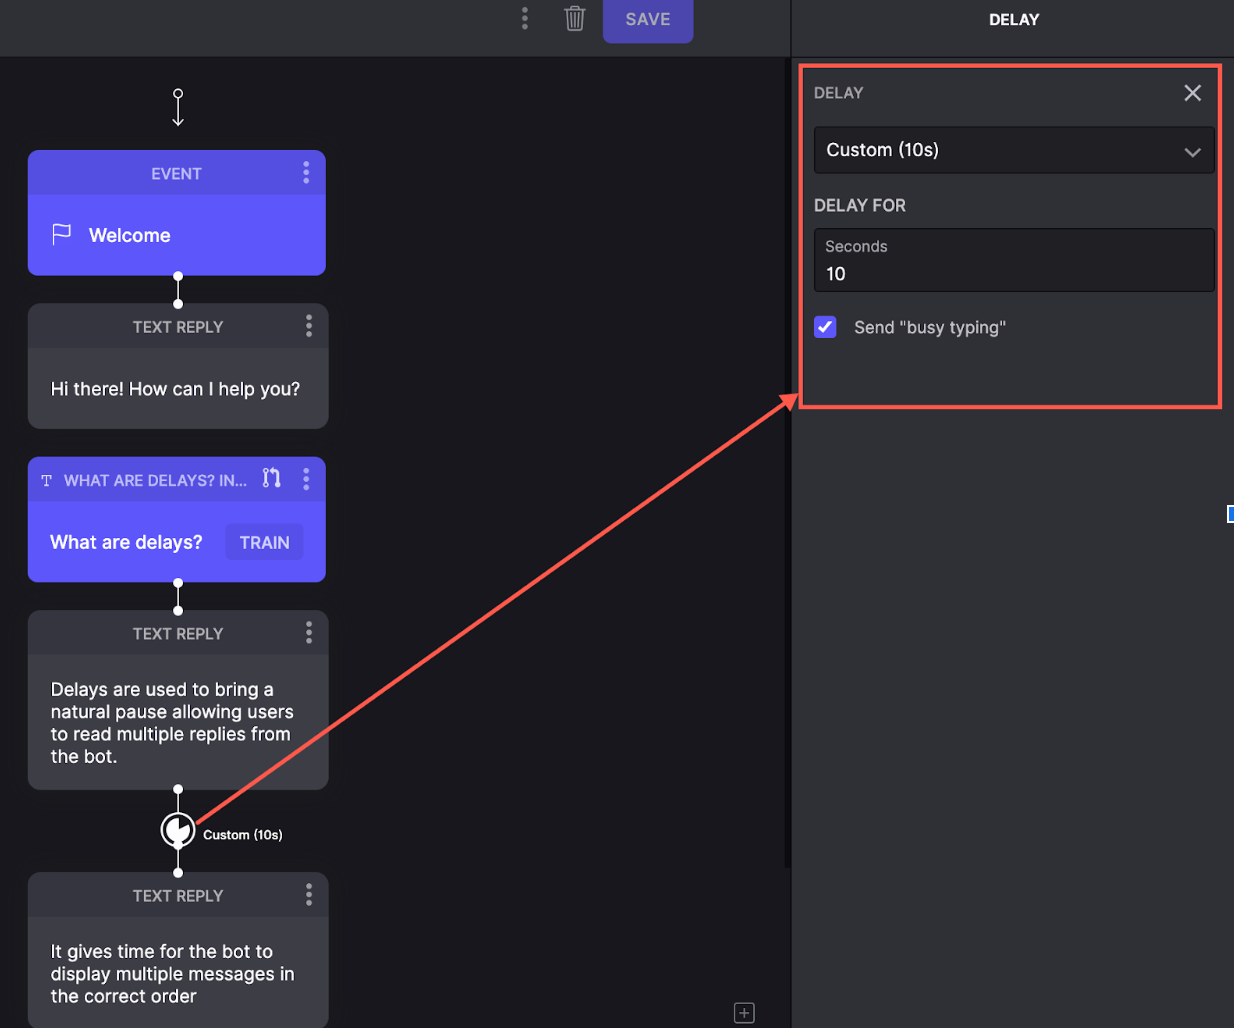
In the right pane, select the time interval for the delay.
-
(Optional) Select Send “busy typing” if you want to show that the bot is processing and preparing to send the next message. This gives users time to read the previous messages.
-
Select Save.
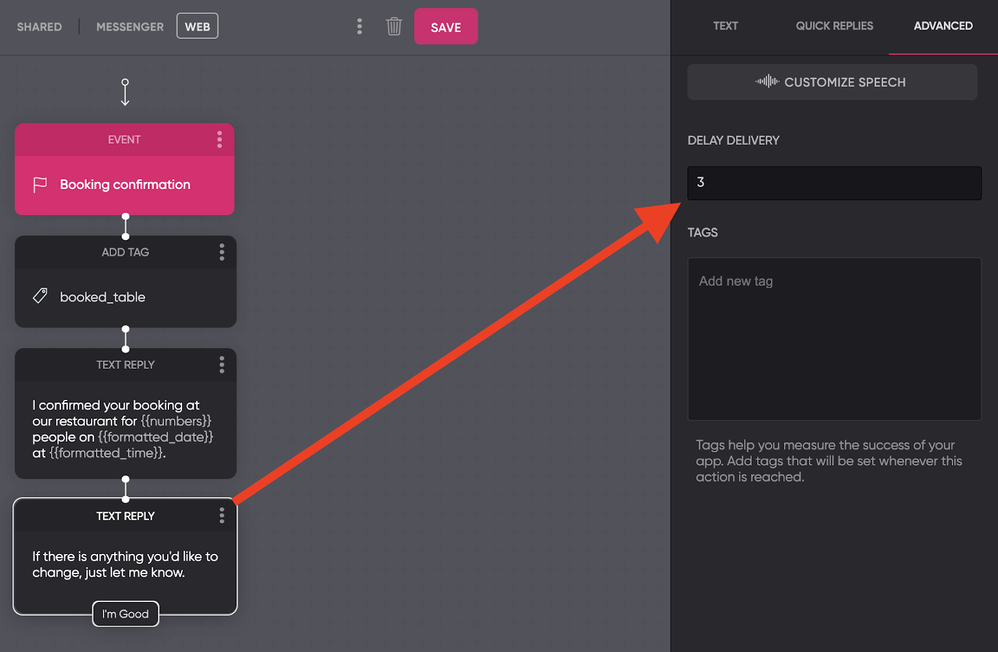
Deprecating Delay Delivery
The new Delay action works in a similar way to the Delay Delivery setting. You can add Delay Delivery by clicking on the Text Reply and going to the Advanced Settings, as shown below:
We will remove support for this option in the near future and we recommend using the new Delay action instead.
The new Delay actions are better than the old Delay Delivery setting because it is more clearly visible. When adding a Delay Delivery, you will have to manually go to the advanced settings of each Text Reply in order to see its delivery time. This is inefficient, and you are more likely to forget one or two this way.
Delay actions, however, are actually shown in the flow, which gives you a clear overview of all delays, and helps you not to forget to add some.
Delay actions versus Timer Triggers
The way Delay actions work seems similar to Timer Triggers. Timer triggers are still better suited in some use cases.
Delay actions are practically only used for adding delays between text messages, so that the chatbot doesn’t spam multiple messages at once and improve the user experience.
Timer Triggers, however, can be used for waiting for user input and send a reply if no user input is received. For example, if your flow is expecting a customer to provide contact information, or for sending a follow-up message after a few hours of inactivity.
See our blog How to use Timers for more examples of the capabilities of the Timer trigger
How to use the Delay action
So in short, use Delay actions for just adding simple delays of a few seconds between your chatbots text messages, and the Timer Triggers should be used for more complex situations or when you want to wait for a longer time period. But how do you actually use these new delays?
- Simply drag them into your flow from your replies section

- Configure the settings
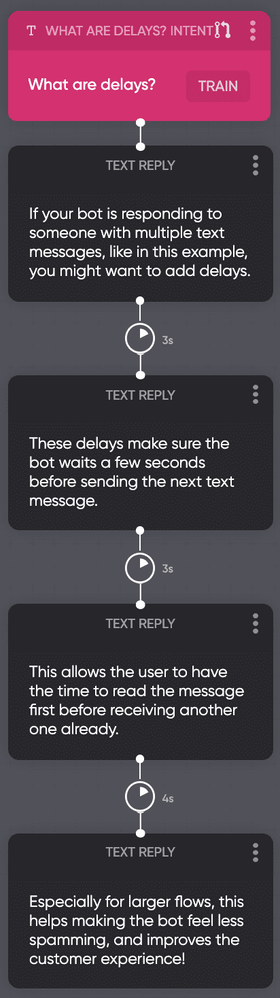
Next, you can click on it to configure its settings. We recommend the amount of seconds according to the length of the first message (the Text Reply above the delay), so the user has just enough time to read the first message before you send the next.
Note: Send busy typing” is only supported with a few channels, like for example, the web widget.
When using a delay that is too short, the next message will be sent before the user is ready, and when the delay is too long, the user has to wait for the message, which is also not optimal. When the user has to wait too long, they might become impatient and respond before they receive the new message. That is of course not what you want, so it is important to try to hit the sweet spot when using delays. Testing your bot helps checking if the length of your timers is good enough.
You can change these settings anytime by clicking on the delay icon within your flow.
More information
Feel free to join our Slack Community for a quick answer to all your questions!
Updated 3 months ago