
Persona UI
The Persona UI streamlines the process of creating and managing personas within the Organization Settings.
This document outlines the specifications and features required for implementing the Persona UI, including persona ID creation, type management, prompt templates, and knowledge sources.
Persona Management
Create a new persona for your organization.
- Go to ORGANIZATION > Personas
- Select ADD (plus symbol) next to PERSONAS, or select Add Personas.
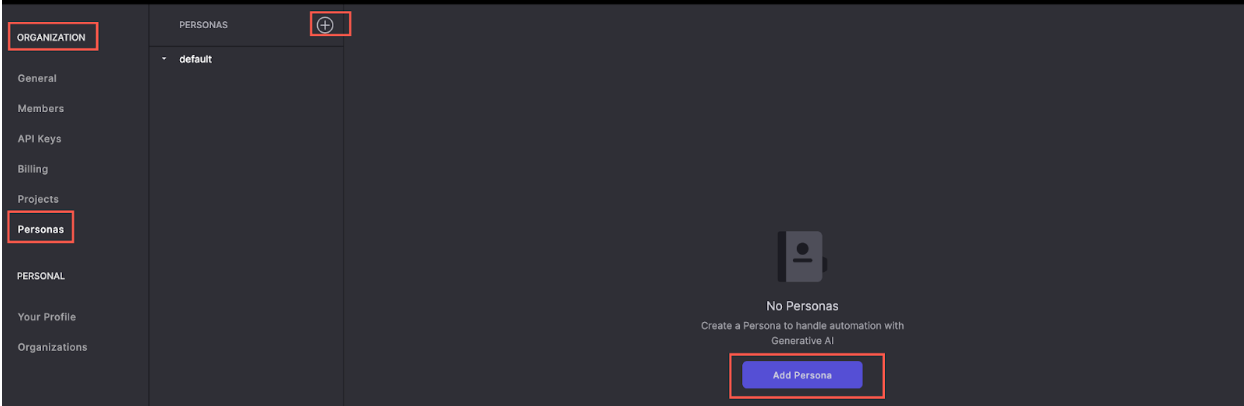
The modal to choose a persona type opens.
- Select either Bot or Agent Assist. In our example, we select Bot.
- Enter a Name for the persona in the Name field.
- Select SAVE.
Note: The Persona ID is read-only and cannot be edited.
- If you want to use an internal source to define the Persona, select Internal from the Config type drop-down menu.
- Select a prompt from the Prompt template drop-down menu. The most relevant system prompt template is set by default.
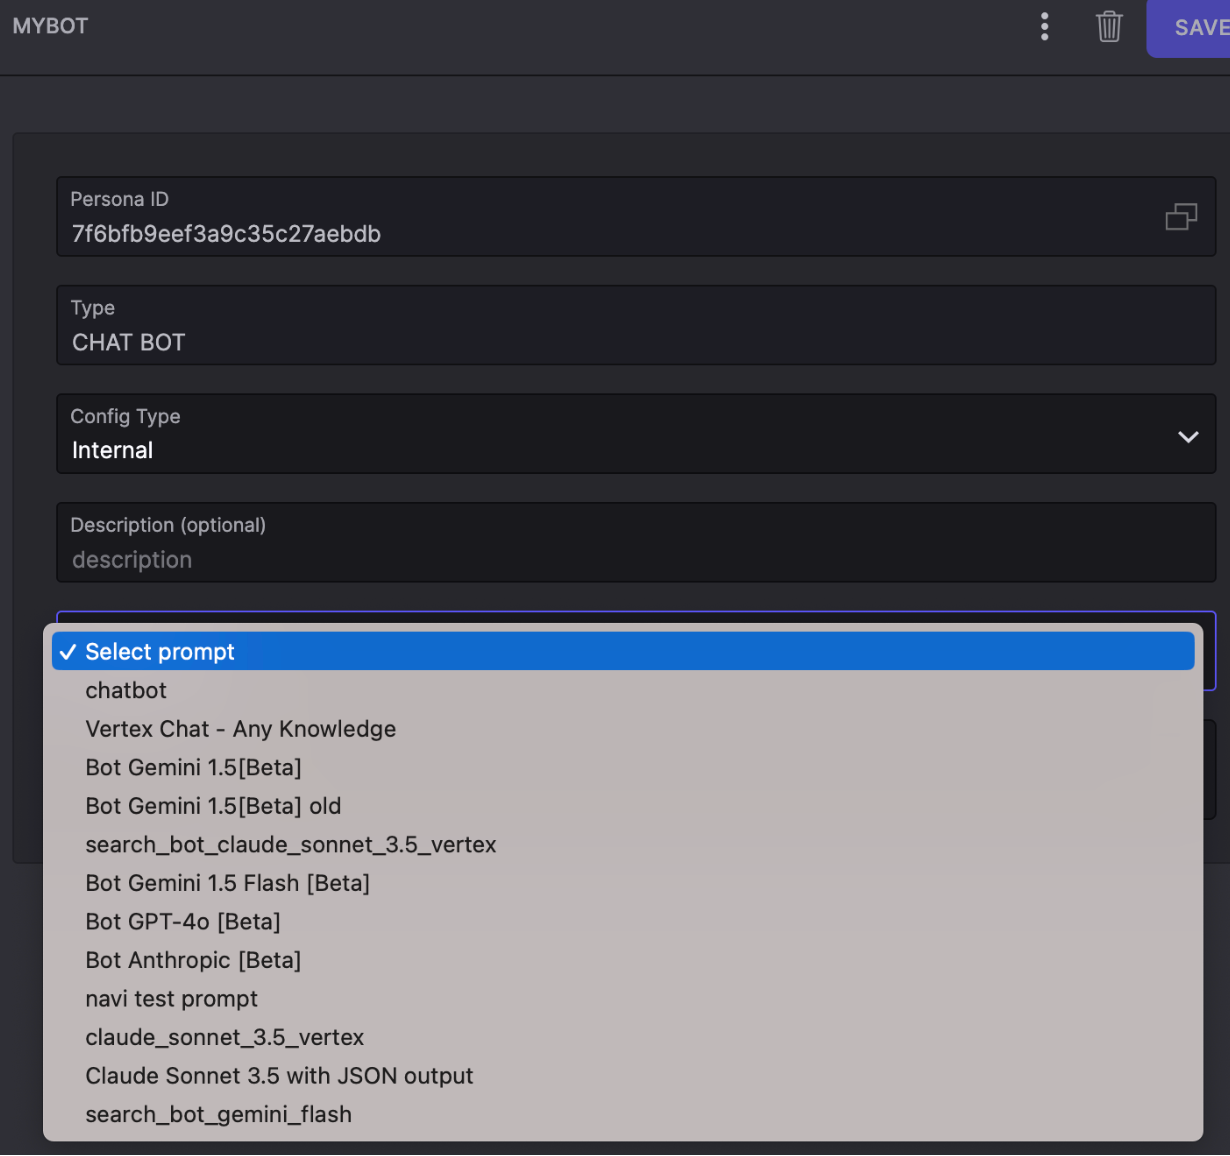
- In the Knowledge sources field, enter the list of knowledge sources for the bot to use. It’s highly recommended to not use more than 4 different knowledge sources, as using too many of them in the same persona will decrease the performance.
- Select SAVE.
- To use an external Persona source.
- Select External from the Config Type dropdown menu.
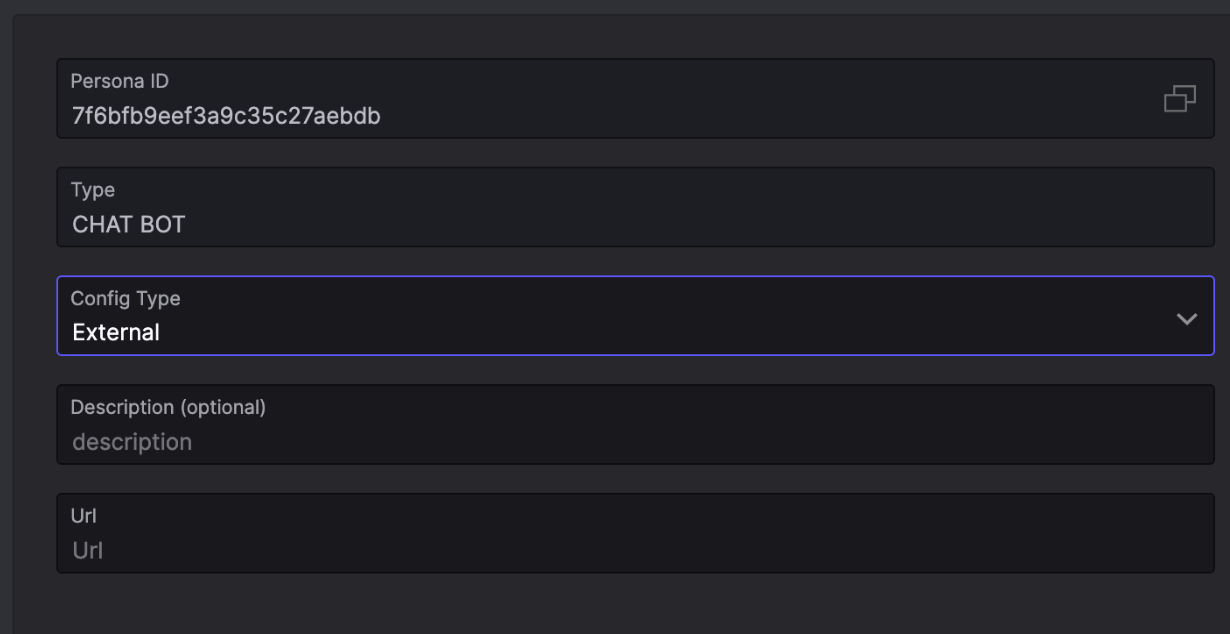
- In the Url field, enter the URL containing the Persona details.
- Select SAVE.
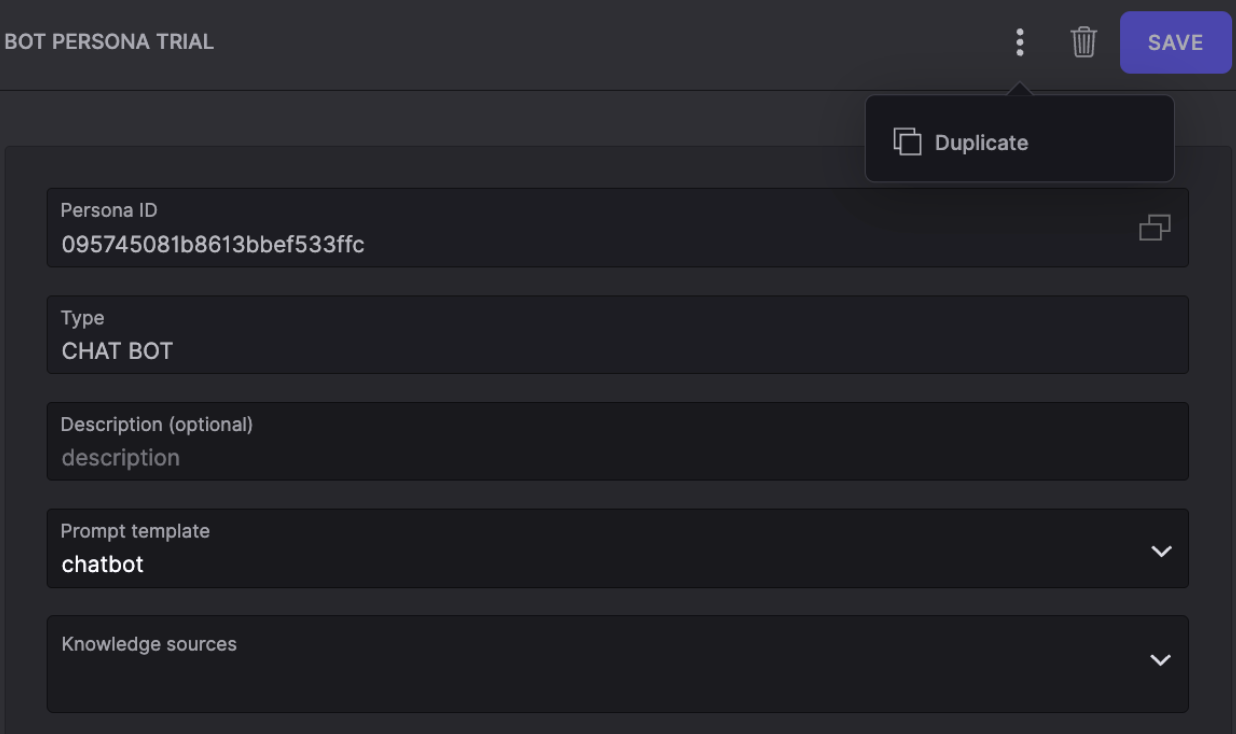
More Menu
Duplicate option: The Options menu (three vertical dots) has a Duplicate option, which generates a new ID for the copied persona.
Permissions
Org Settings Visibility
Owner Access: Only owners of the organization can view the Personas tab in the org settings.
Brain Settings Permissions
Consistent Permissions: Updating the selected persona in the brain settings requires the same permissions as the rest of the brain settings.
Updated 2 months ago