
Flow Designs: Measure feedback or performance
Measuring the performance of a chatbot can be challenging. When is a bot successful? Is your virtual assistance successful when there is no handover to a human? Or did your end-user dropped out because it performed poorly?
This guide explains how to create a simple example of feedback flow within Flow.
It's best to start a Feedback Flow with an event. After answering an FAQ, instruct the bot to continue with the Feedback Event by dragging and dropping the Event Reply into the FAQ flow.
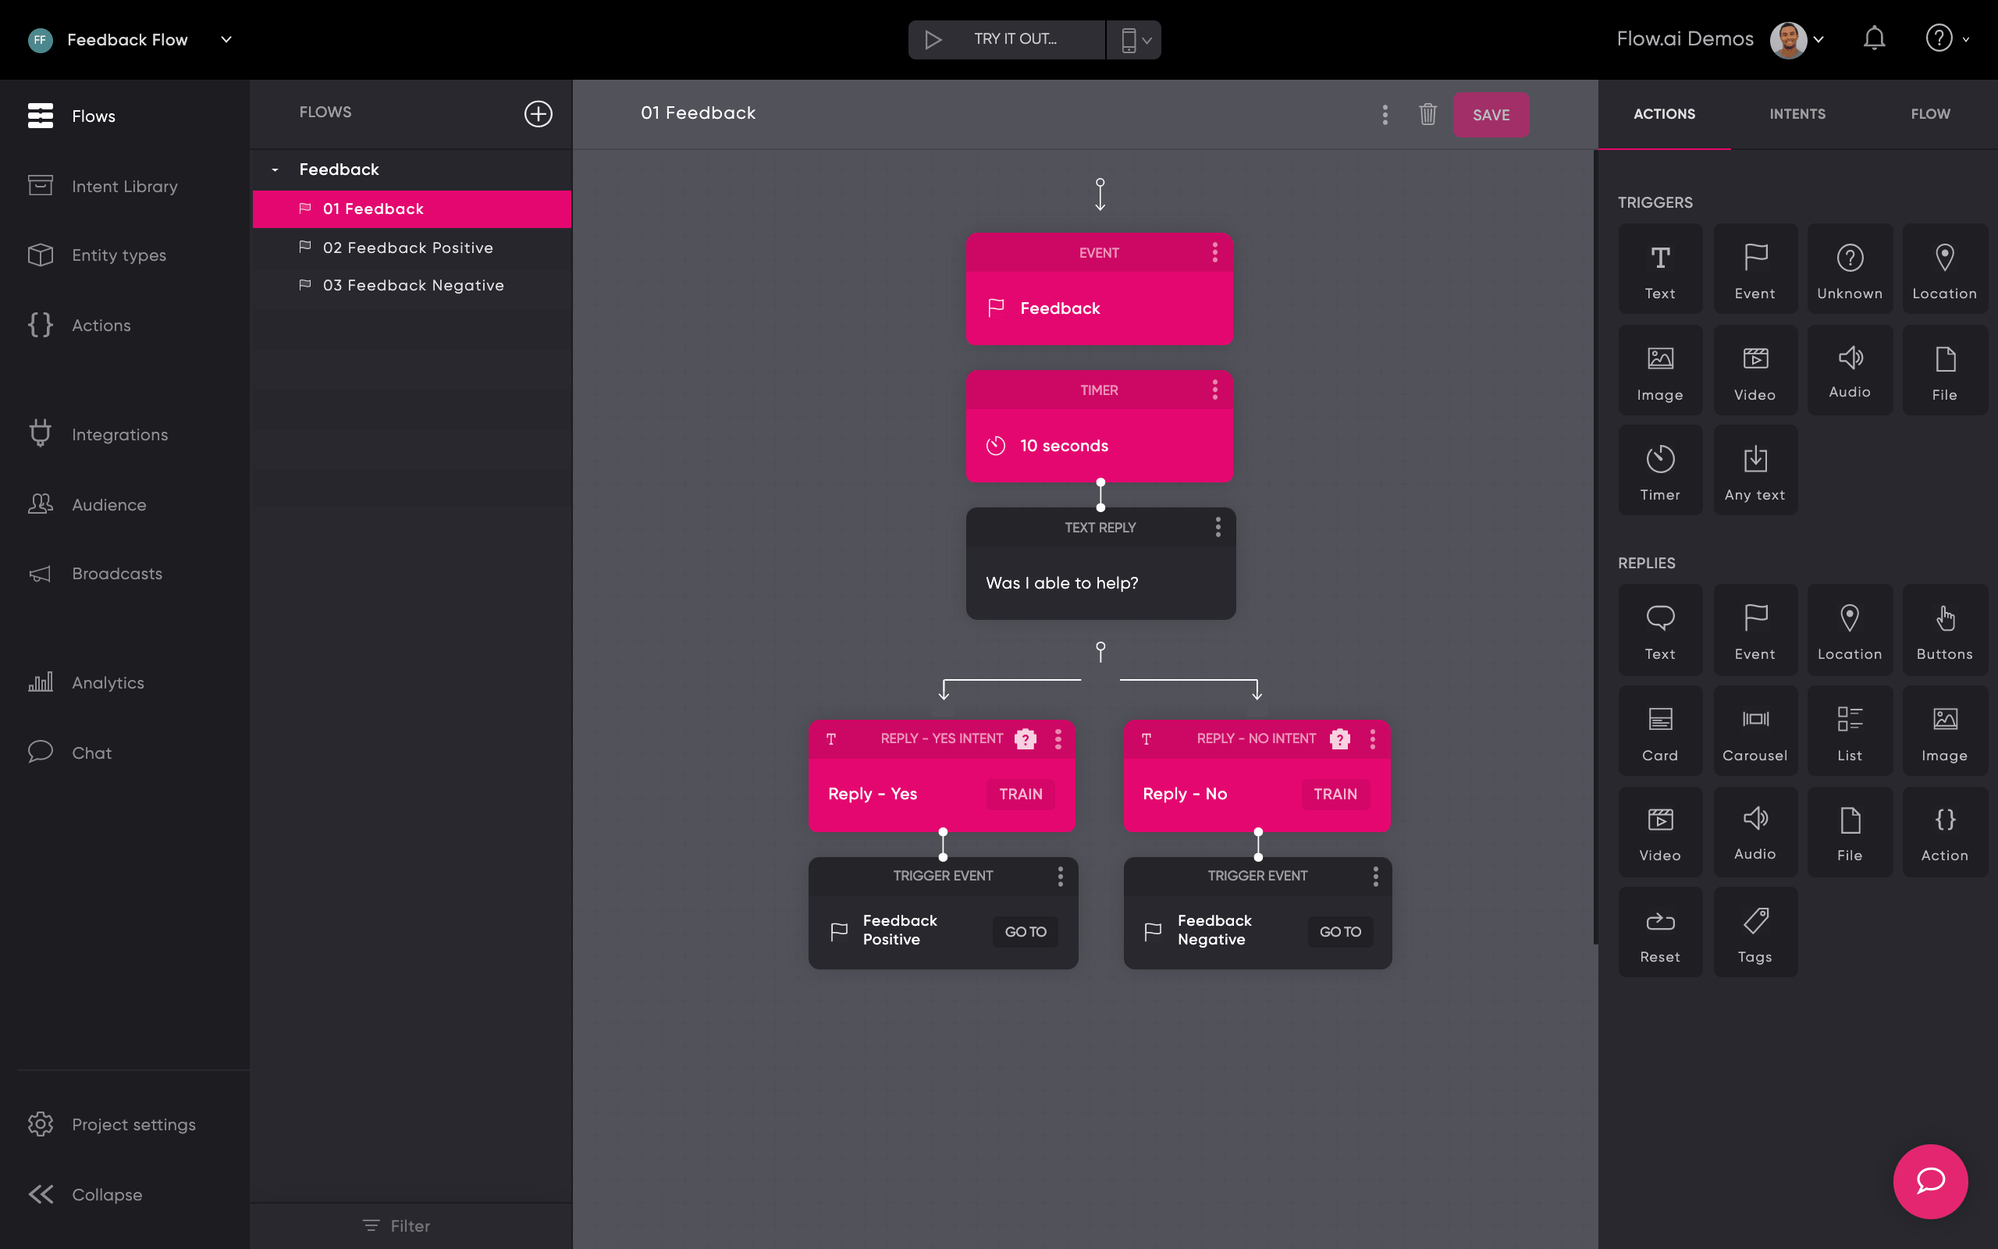
The flow will be triggered and the timer is used to delay a reply by the bot. We continue with a follow up "Was I able to help?". You can add Quick Replies to improve CX if supported by your channel. From here we've got two options:
-
New Flows
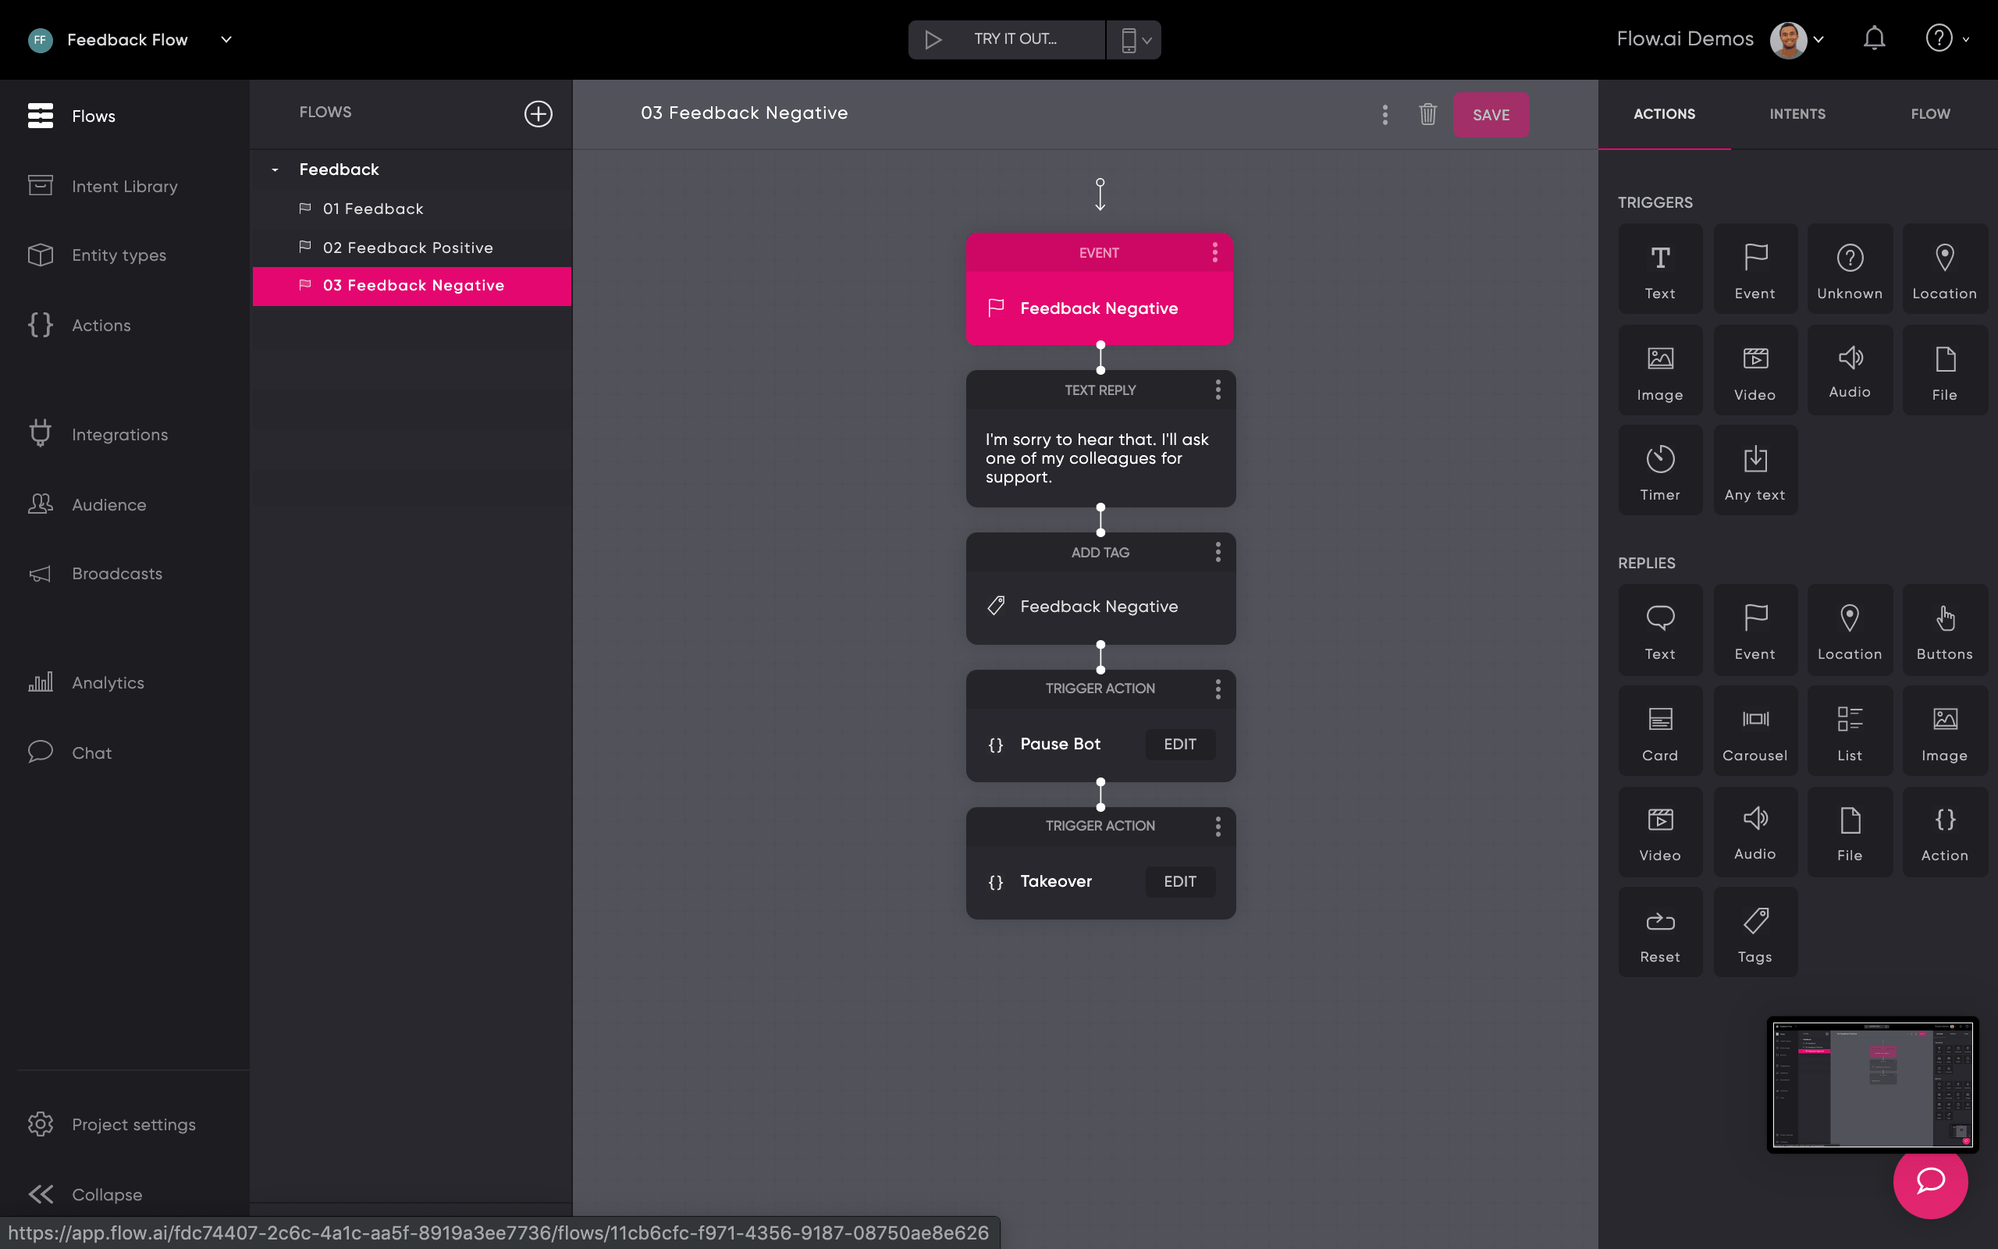
If the user answers "Was I able to help?" with the Quick Replies or simply by typing input we trigger a new event and corresponding Flow. If the answer is positive, the bot was able to help, we trigger Feedback Positive and if the answer is negative, we trigger Feedback Negative. -
Add Tags
Instead of creating more Flows you could also try to keep things more compact by adding tags. If the positive branch has been triggered the conversation can be tagged as Positive and the other way around.
Tag each branch by dragging and dropping a Tag onto your canvas. Then add a name for that tag so you can use it later on.
Measurements
The design is finished and the bot can start collecting data. The next step is to analyze the incoming data.
Data Export for Flows and Tags
Within the Analytics view, you can select a data range and export data. You will receive an export of your data. Within the data, you can see which flows have been triggered and how often it occurred. You can also use these reports to get insights into the tags.
Analytics Integration
Another way to measure performance is to add an analytics integration from the Integration section. You will be able to see your flows and tags in your existing analytics tools.
Updated 2 months ago