
Code-based Actions: Create a Webview in 3 steps
Use Flow to create Webviews and improve the customer journey. This article will show how to create Webvews in 3 steps.
A Webview is a separate view that can be opened within your bot. This allows the user to interact in a more intuitive way for several cases.
If you want to incorporate 1 or more of the following 5 items in your bot, use a Webview.
- Article
- Date picker
- Radio select
- Multiple select
- Terms
Webviews are created within cloud code. Use the following 3 steps to build your Webview.
- Create Webview item.
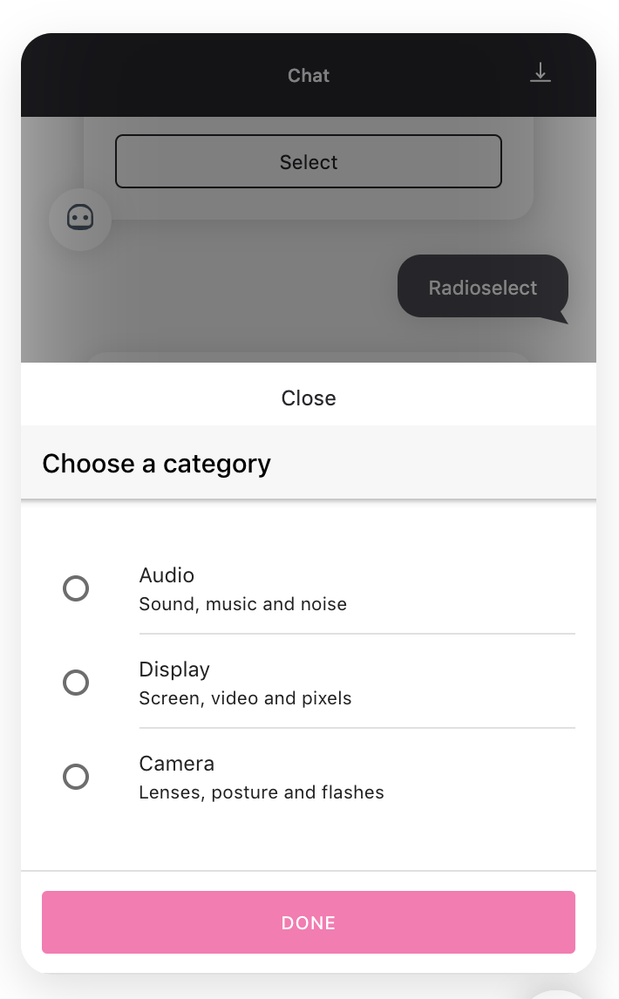
Creating your Webview starts with a new action where you create your Webview. The following cloud code creates a Radio select Webview that contains 3 options:- Audio
- Display
- Camera
When the user selects one of the items, a new parameter 'category' will be created with the corresponding value. When completed, the event 'select' will be triggered. Ensure that you have the same event in your design.
async payload => {

  const url = await webview.radioSelect.create({
    ref: 'category',
    title: 'Choose a category',
    items: [{
title: 'Audio',
  subtitle: 'Sound, music and noise',
  onSelect: {
    eventName: 'select',
    params: new Param('category', 'audio')
  }
}, {
  title: 'Display',
  subtitle: 'Screen, video and pixels',
  onSelect: {
    eventName: 'Select',
    params: new Param('category', 'display')
  }
}, {
  title: 'Camera',
  subtitle: 'Lenses, posture and flashes',
  onSelect: {
    eventName: 'Select',
    params: new Param('category', 'display')
  }
}]
})- Use the following code to create a button for the users to access the Webview.
...

const buttons = new Buttons('Select a category')
buttons.addButton(new Button({
  label: 'Choose category',
  type: 'webview',
  value: url
}))

...- Create a return message for the users when the click the button.
...

const message = new Message(`Select a category ${url}`)
message.addResponse(buttons)

return message

...
Find the complete code for this RadioSelect Webview below:
async payload => {

  const url = await webview.radioSelect.create({
    ref: 'category',
    title: 'Choose a category',
    button:{
      label:'Done',
    },
    items: [{
      title: 'Audio',
      subtitle: 'Sound, music and noise',
      onSelect: {
        eventName: 'RadioEvent',
        params: new Param('category', 'audio')
      }
    }, {
      title: 'Display',
      subtitle: 'Screen, video and pixels',
      onSelect: {
        eventName: 'RadioEvent',
        params: new Param('category', 'display')
      }
    }, {
      title: 'Camera',
      subtitle: 'Lenses, posture and flashes',
      onSelect: {
        eventName: 'RadioEvent',
        params: new Param('category', 'display')
      }
    }]
  })

  const buttons = new Buttons('Select categories')
  buttons.addButton(new Button({
    label: 'Choose categories',
    type: 'webview',
    value: url
  }))

  const message = new Message(`Choose categories ${url}`)
  message.addResponse(buttons)

  return message
}
Updated 3 months ago
Did this page help you?