Beginner's Guide to the Analytics Reports API
Try this tutorial for running your first Analytics export using the Analytics Reports API. This tutorial is for newbies -- even if you've never used an API before. We teach you how to run API requests using a tool called Postman and also a tool called cURL.
Has someone just told you that they need you to run an Analytics export using the Analytics Reports API and pointed you to the API documentation? Did you stare at that documentation thinking, “What am I supposed to do with this? What’s an API?”
Don’t worry. We’ve got you. This tutorial walks you through the steps to use the Analytics API documentation and get you started with some simple tools that will allow you to generate the export and access the export data. When you’re done, you’re going to feel like a rock star.
Tip
If you're a seasoned developer who is comfortable with REST APIs and cURL examples, see Analytics Reports API quickstart.
We’re going to generate a Raw Conversation export. First, we’ll generate the default export with all columns listed. Then, we’ll show you how to run a export filtering the data down to just the columns you want. You’ll be able to take the skills you learn here and apply them to run any future Care Analytics exports.
How to use this guide
If you’re new to working with APIs, you’ll need to learn a few things before we can get started with the tutorial. While it might feel like it’s taking a while to get to the good stuff, the overview and information sections are important.
- Prerequisites helps you choose and install the tool to run your exports
- Have this information handy lists information you’ll need to use the Analytics Reports API
- Basic Steps is an abridged version of the steps in the tutorial. Use it as a shortcut when you run reports in the future.
- Choose which export to run, Determine which columns to include in the report, and Understand the API request contain useful reference material that will help you understand how to use the API and understand the API documentation
This section is where the tutorial actually begins:
Prerequisites
Download Postman
Postman is a user-friendly app that enables you to make requests to REST APIs like the Analytics Reports API. We aren’t going to get into what a REST API is in this tutorial. Just understand that we’re going to make a request to the Analytics Reports API and Postman is going to help us do that. Get Postman here.
- During setup, you’ll need to create an account and supply an email address.
- Select the Debugging and Manual testing workspace option
- Skip the Postman Team Setup
Have this information handy
Contact your Khoros Care administrator and get the following information:
- The username and password for the dedicated Analytics Reports API user account(s) used for your Khoros Care instance.
- Your Analytics API URL. Generally:
- If your data is hosted in the US, the API URL is
analytics-api.app.lithium.com - If your data is hosted in EMEA, the API URL is
analytics-api-emea.app.lithium.com
- If your data is hosted in the US, the API URL is
- Your Analytics API Company Key.
Basic Steps
These are the basic steps to running an Analytics export with the API. Don’t worry if you don’t understand all of the terms in this section yet. We’ll do a detailed walkthrough in the next sections. Use this section as a shortcut after you’ve run a few exports and understand the process.
Step 1: Identify the Export you want to run
The Analytics Reports API enables you to generate the exports listed below. You can export to CSV and JSON, pulling data from all export columns or a subset of your choosing. JSON is the default format.
The Export Name is the export title seen in the user interface (UI) and in the Admin guides. The Export ID is the ID used by the Analytics Reports API. Each item in the Export Name column links to the Admin documentation that describes the export. Each item in the Export ID column links to the API reference for the endpoint to call to generate the export.
Step 2: Refine your export
The next step is determining if you want the export to include all columns or only a subset of columns.
These articles in the Khoros Care Analytics knowledge base list and describe the columns included in our Analytics Reports:
- Team performance analytics
- Export raw data from Social Response Analytics
- Export raw brand post data from Publishing analytics
If you want to display only a subset of columns in your export:
- Review the Admin documentation listed above and note those column names.
- Get the corresponding column name used by the API.
The API wants column names in a specific format when you run the export. We list the column names used by the API in reportMetrics values by export type. Generally, the names will look similar. For example, Time Zone is displayed in the Analytics UI, while TIME_ZONE is used by the API.
In this tutorial, we’ll generate the Raw Conversation export twice -- once including all columns, and then again including only the Conversation ID, Status, and Assignee ID columns.
- Conversation ID → CONVERSATION_ID
- Status → STATUS
- Assignee ID → ASSIGNED_AGENT_DISPLAY_ID
Data Filters
Each export supports a set of filters that define what data to return.
Example of filters include:
- During business hours
- Conversation priority
- Smart view ID
- Work queue ID
- Agent ID
- Include turned off agents
- Team IDs
- Campaign ID (for Raw Brand Post exports)
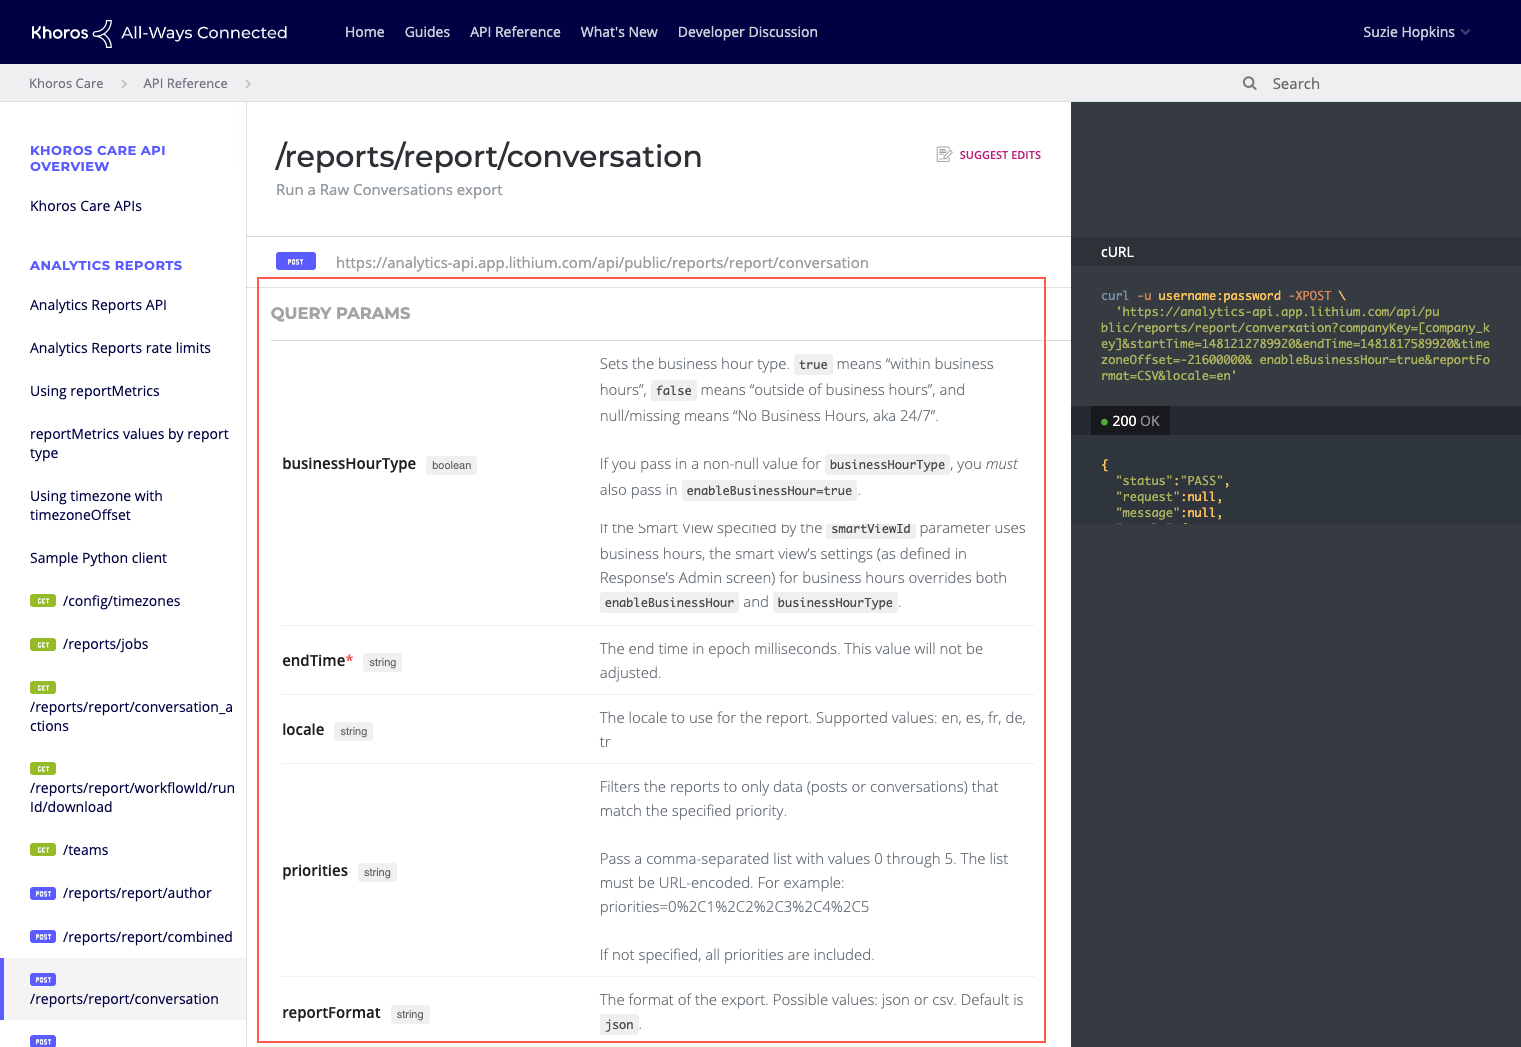
We list and describe the query parameters used with each export in the API reference documentation for each export. (Get the link to the documentation for each export in the table above.) When you read the documentation, note the required query parameters -- they are marked with a red asterisk (*).
Here is an example of the documentation for the Raw Conversation endpoint. We'll talk about how to define these filters in the next section.
Step 3: Make the requests
- Open Postman.
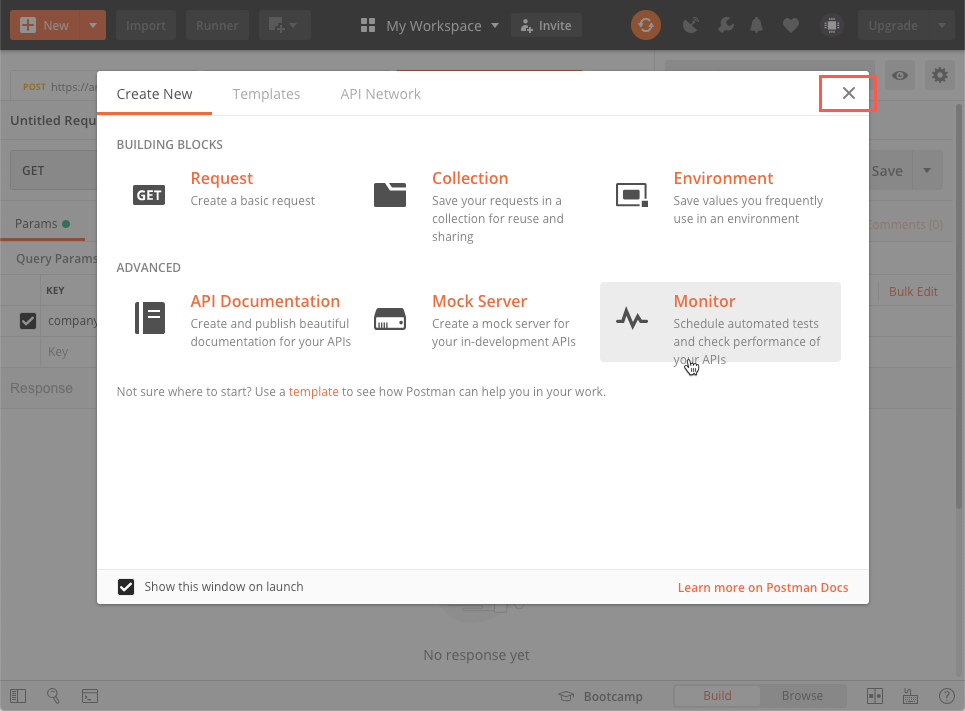
- If you see a popup window like this, close it.
- Click the plus icon (+).
![]()
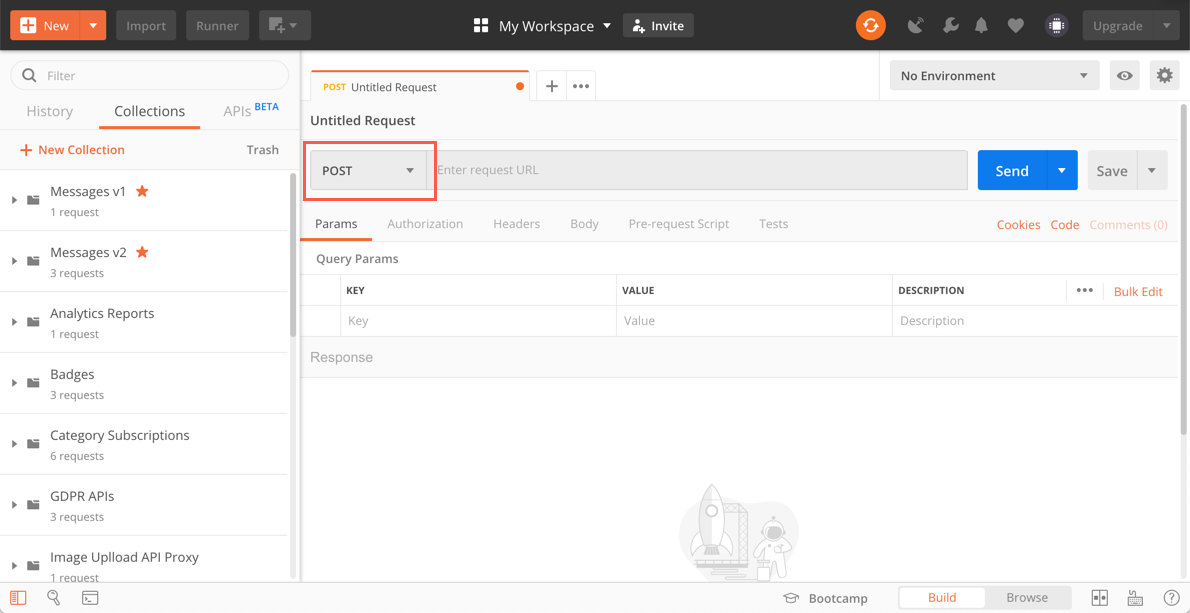
- Select POST from the dropdown menu.
Important
If you want to run a Conversation Actions or User export, select GET instead of POST.
- Copy this URL
https://analytics-api.app.lithium.com/api/public/reports/report/conversation?reportFormat=csv&locale=en_US&companyKey=put_your_company_key_here&startTime=1551441600000&endTime=1556712000000
- Paste it in the Enter request URL text box.
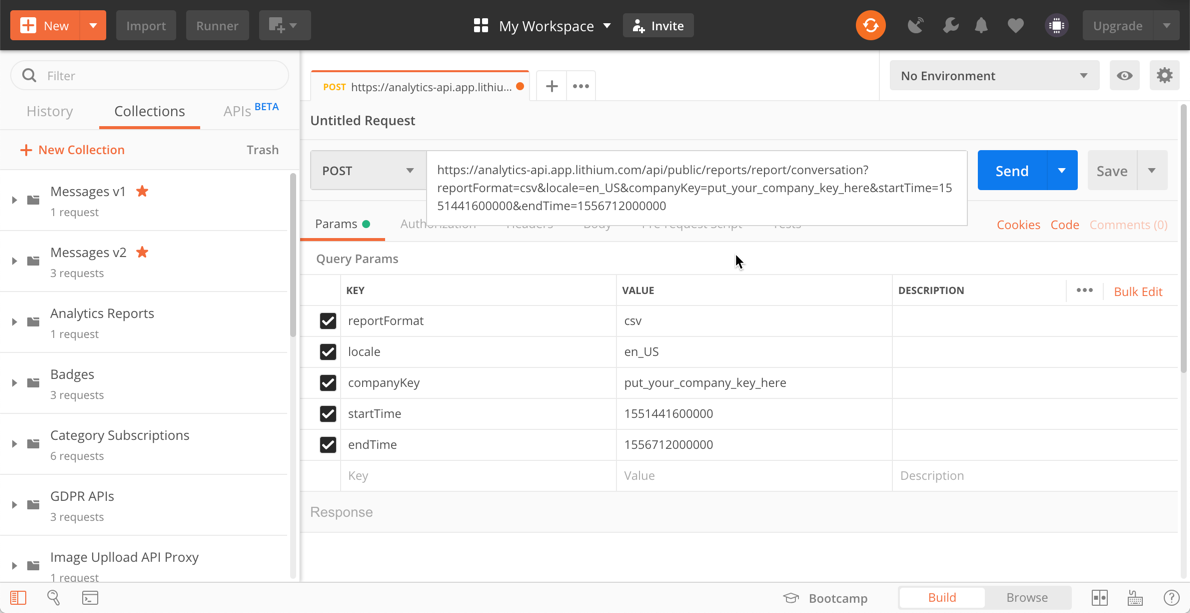
- Check the Analytics API URL. If your Response instance is hosted in EMEA, change the API URL to
analytics-api-emea.app.lithium.com. - Add your company key.
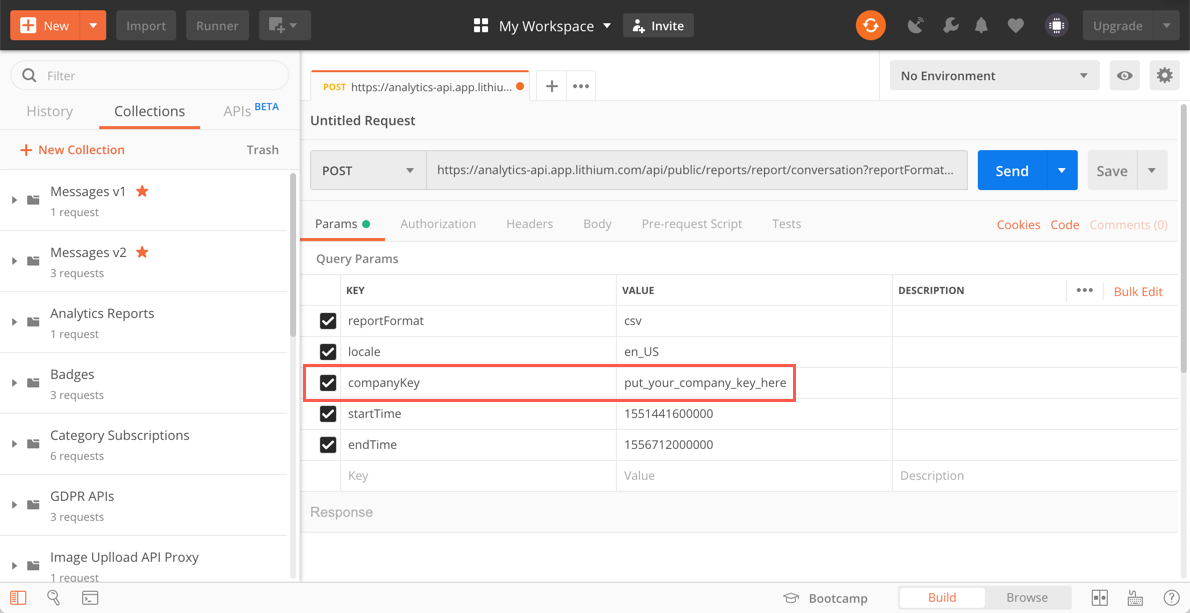
- Select the Authorization tab.
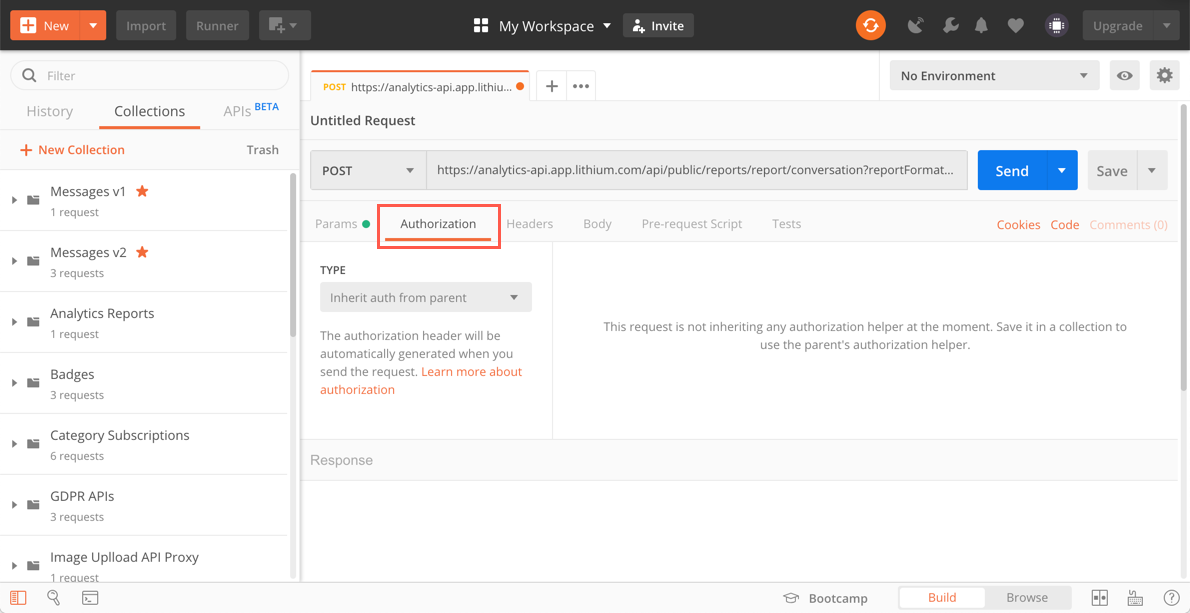
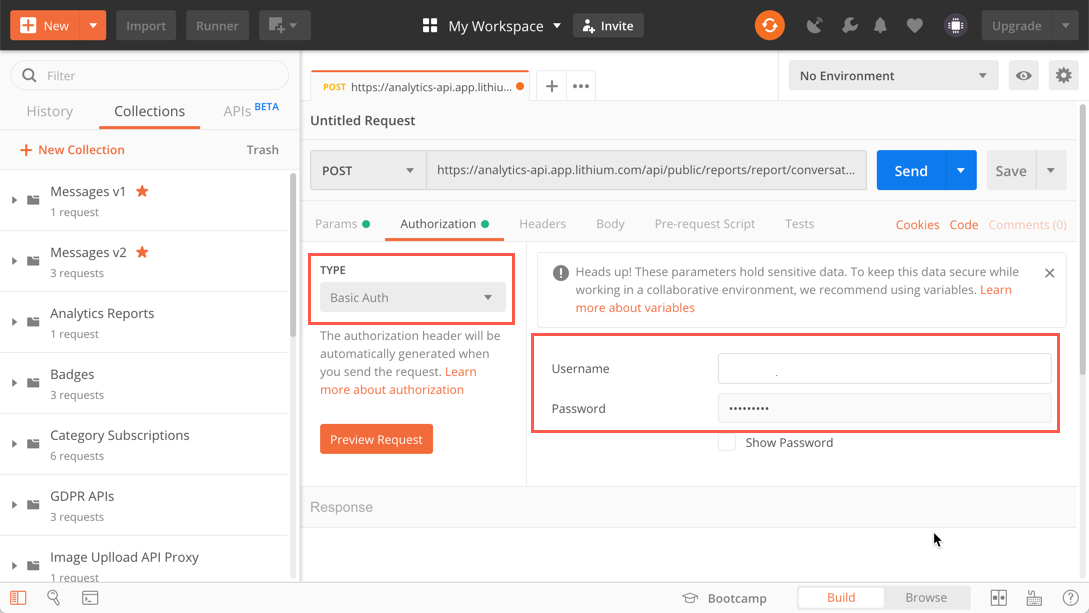
- Select Basic Auth from the Type dropdown and then enter the username and password of the API Analytics user in the Username and Password fields.
- Go back to the Params tab.
- Click Send.
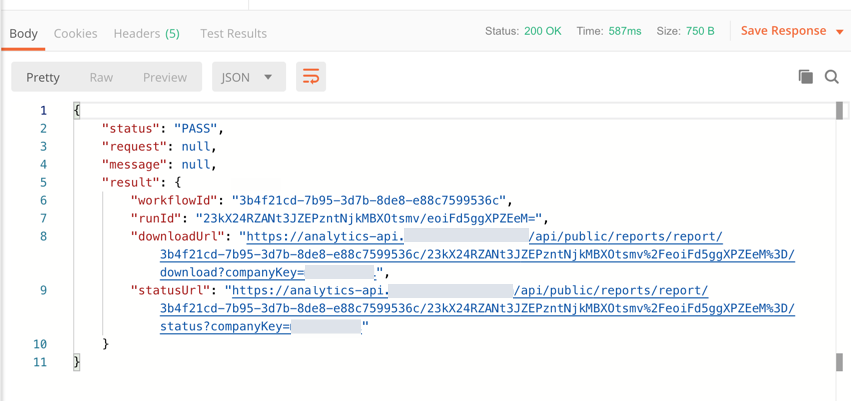
You should see a response to your request that looks something like this appear at the bottom of the app. If you see "status": "PASS", the request was successful.
Run a export with a subset of columns
Let’s try running that same export but with only a subset of columns.
We’re going to add a new query parameter for each column we want to include in the export.
We use the reportMetrics query parameter to define each column we want.
We’ll use these as the values for each reportMetrics parameter we add:
- CONVERSATION_ID
- STATUS
- ASSIGNED_AGENT_DISPLAY_ID
You can either open a new tab in Postman and make a new POST request with this URL:
https://analytics-api.app.lithium.com/api/public/reports/report/conversation?reportFormat=csv&locale=en_US&companyKey=put_your_company_key_here&startTime=1551441600000&endTime=1556712000000&reportMetrics=CONVERSATION_ID&reportMetrics=STATUS&reportMetrics=ASSIGNED_AGENT_DISPLAY_ID
Important
Remember to use the correct API URL, update your company key, and add Basic Auth credentials in the Authorization tab.
Or, you can return to the tab where you made your first POST request and add the new query parameters manually.
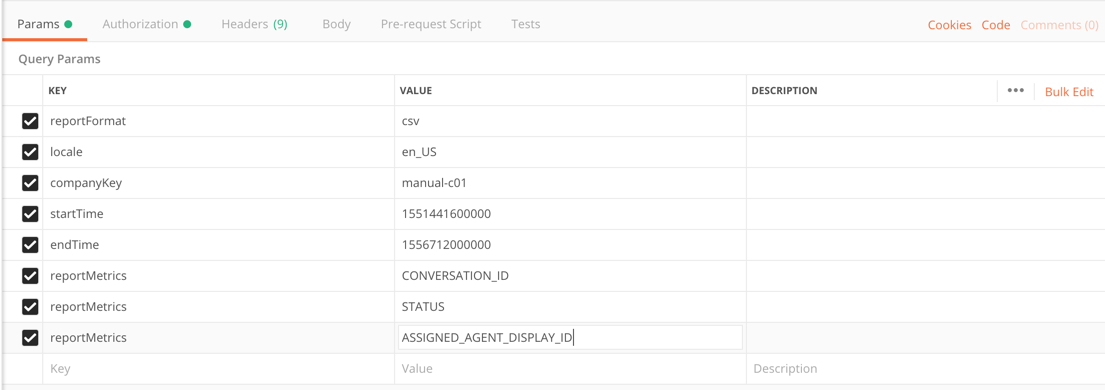
Click Send.
Step 4: Check the status of the request
We’ll check the status to see if the export has finished generating.
- In the response, click the
statusUrllink. - The URL is added into a new request in a new tab in Postman.
This time we’re going to use GET as the request action because we want to get the status.
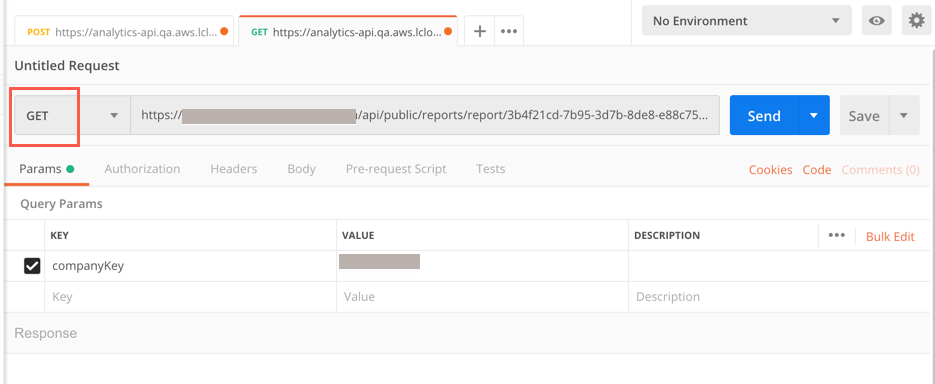
- Go to the Authorization tab.
- From the Type dropdown, select Basic Auth.
- Enter the Username and Password for the API Analytics User.
- Click Send.
The response will look something like this. If we see"runnerState": "CLOSED", the export is finished running and is ready to be downloaded. If the runnerState is"RUNNING", then wait for a bit and then run repeat these steps until"runnerState": "CLOSED". When therunnerStateis CLOSED and thedetailfield below it is COMPLETED, the export is ready to download.
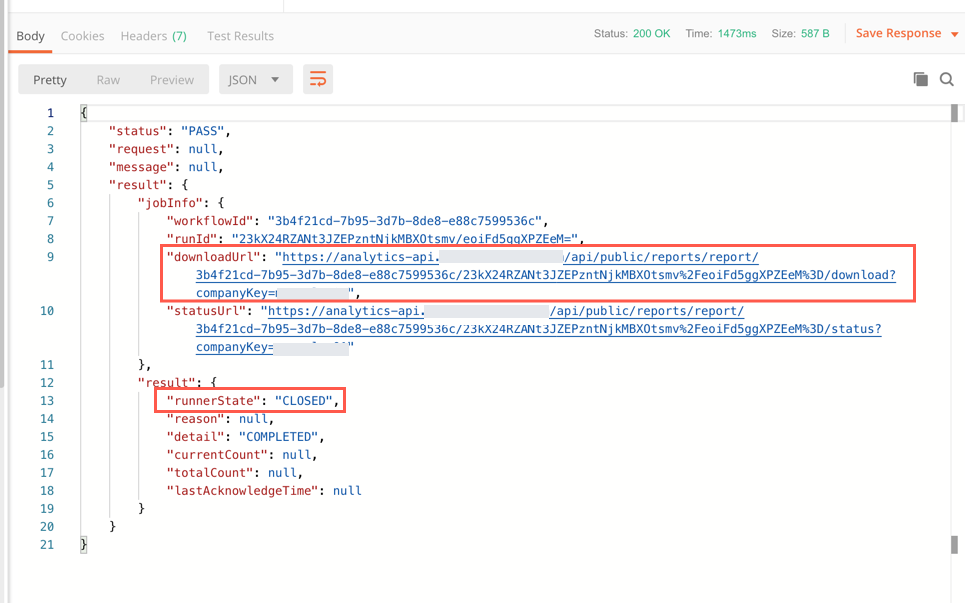
Step 5: Download the report
- Go back to the response, click the
downloadUrllink.
Important
If you do not see a URL in the
downloadUrlfield, then the export is not ready. Wait a bit, make the request to thestatusUrlagain. When the export is ready, thedownloadUrlfields will be populated.
Critical
The download URL is only valid for 24 hours. After that time, the report will need to be re-exported to be accessible.
The URL is added into a new request in a new tab in Postman.
We’re going to use GET as the request action again because we want to get the export.
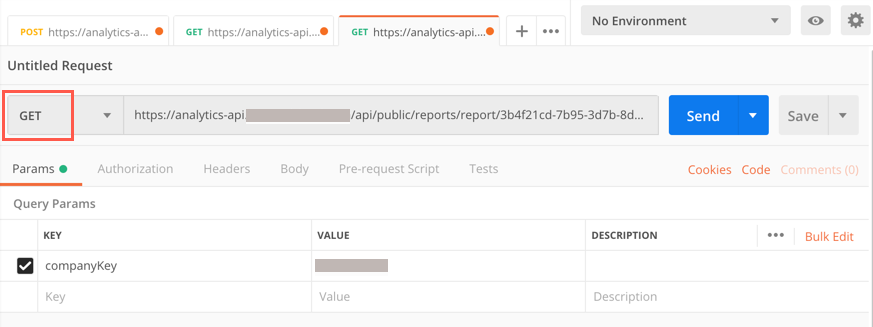
- Go to the Authorization tab.
- From the Type dropdown, select Basic Auth.
- Enter the Username and Password for the API Analytics User.
- Click Send.
The response will look something like this.
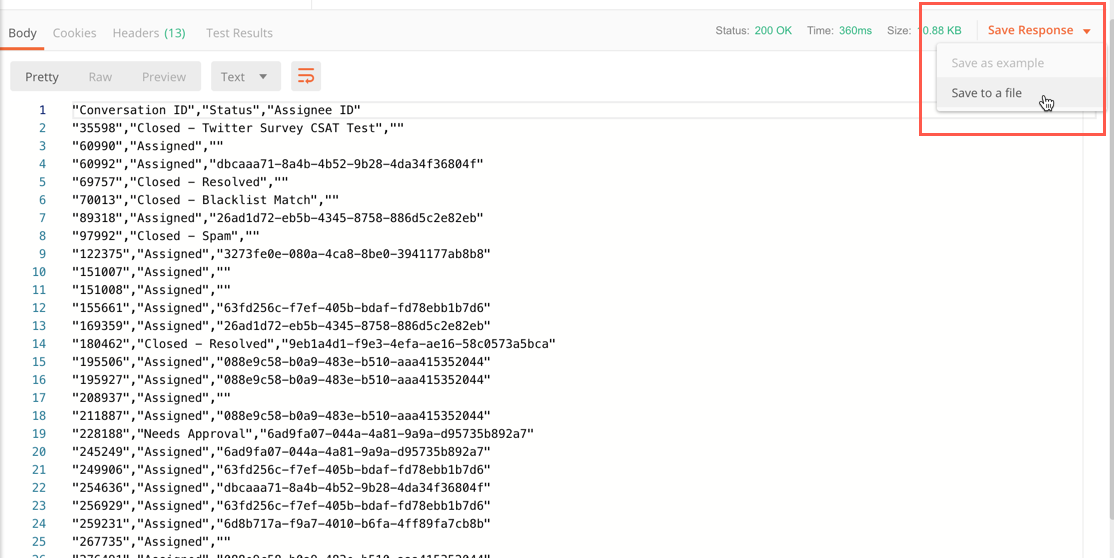
You've just generated and downloaded a Analytics Report export using the API. Nice job!
Updated about 1 year ago