Understanding the Analytics API Request
In this section, we’re going to describe some concepts and terms that you’re going to see throughout this guide.
To generate an export using the API, you’re going to make a request. The request tells the API exactly what you want it to do. We make the request to an endpoint. Each export has a specific endpoint. The endpoint looks something like this:
POST /api/public/reports/report/{report_type}
{report_type} will be one of the API export names listed in the table above. For the Raw Conversation export, we’re going to run in this tutorial, we will use the POST /api/public/reports/report/conversation endpoint.
The POST part of the endpoint is the action. You can think of POST as creating something new (like a new export). You will use POST as the action for most exports you generate.
Tip
For beginners, the GET action is best to generate a Conversation Actions or User export. (We’ll talk about this later - for now don’t worry about it.)
When we make the API request, we write it so that it looks like a URL that you’d type into a browser. Our request to run the Raw Conversations export will look like this:
https://[ANALYTICS API URL]/api/public/reports/report/conversation?reportFormat=csv&locale=en_US&companyKey=<put_your_company_key_here>&startTime=1551441600000&endTime=1556712000000
startTime and endTime
The values for
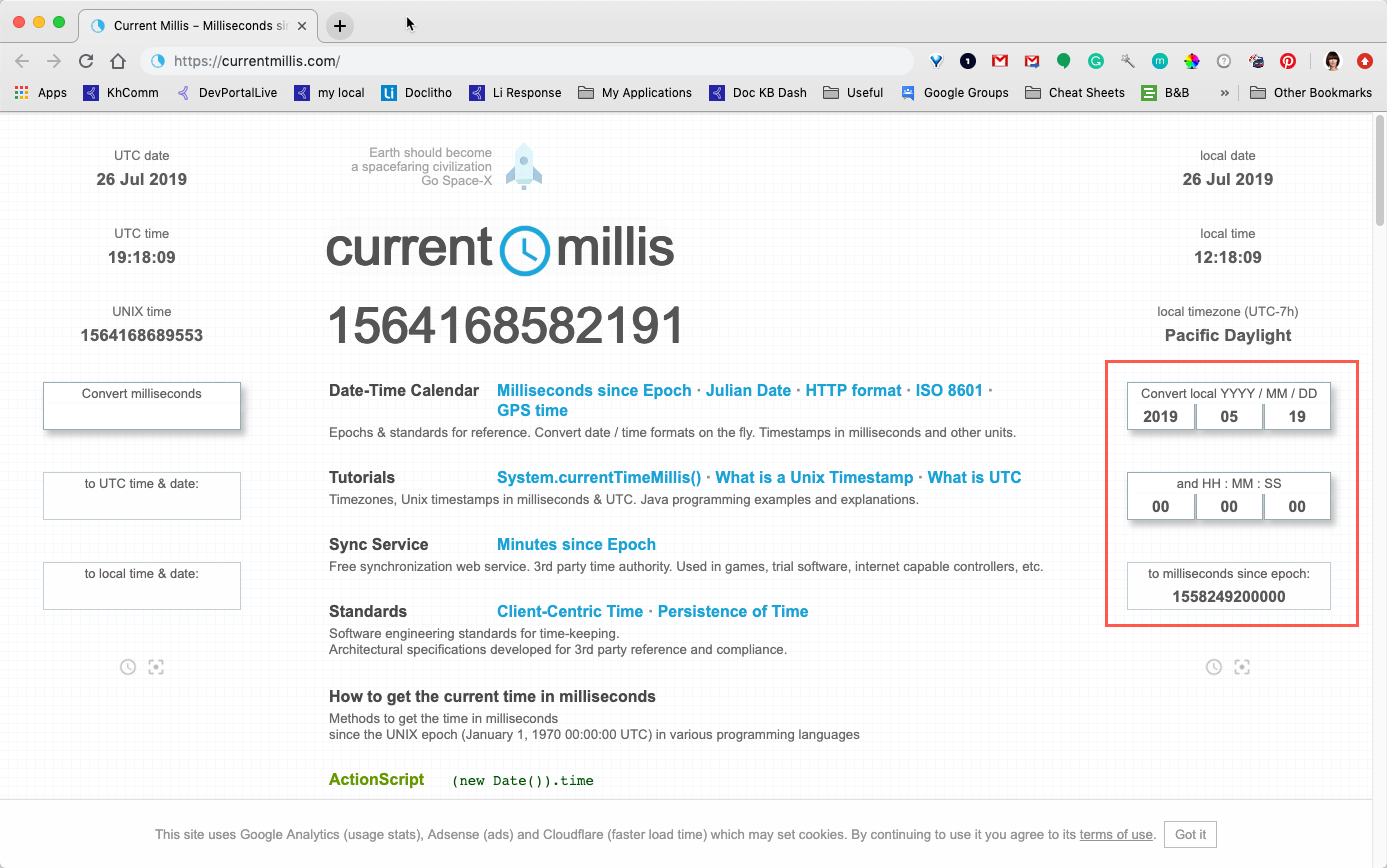
startTimeandendTimeare in milliseconds (Epoch). Online converters such as http://www.epochconverter.com/ provide a 'human date to timestamp' conversion option.
This request creates a Raw Conversation export format of open conversations from February 1, 2019 to May 1, 2019 in CSV format in US English. (Notice that I’ve got a placeholder for where to put your company key.)
Note
This request will return all columns in the export. We’ll show how to return only specific columns later.
Let’s look at the first half:
https://[ANALYTICS API URL]/api/public/reports/report/{report_type}
When you generate an export:
- You’ll replace [ANALYTICS API URL] with the Analytics API URL you received from your Response administrator. Either
analytics-api.app.lithium.comoranalytics-api-emea.app.lithium.com. - You’ll replace {report_type} with the API export name from the table above.
Let’s look at the second half:
?reportFormat=csv&locale=en_US&companyKey={put_your_company_key_here}&startTime=1551441600000&endTime=1556712000000
In the second part of our request, we add query parameters.
Query parameters provide details for how to build the export. All exports require certain query parameters and some export have optional query parameters that you can add to further define how filter and format the data. (This is where you'll use those filters we talked about in the Determine data filters section.)
Tip
Remember to review the API documentation for the list of query parameters supported and required for each export. (Get the link to the documentation for each export in the table above.)
In the request, query parameters go after the {report_type}. We separate the query parameters from the first part of our request with a question mark (?). You list all query parameters and their values one after another, separated by the ampersand character (&) like this:
?reportFormat=csv&locale=en_US&companyKey=put_your_company_key_here&startTime=1551441600000&endTime=1556712000000
Let’s look at what these query parameters mean.
- reportFormat - this instructs the API to return the export in CSV format. By default, the export is returned in JSON format, which is better for developers but not as useful for normal people like us. CSV, as you probably know, can be imported into Excel and other tools to view and analyze export data. If you want your export in CSV format, you must use
reportFormat=csvin your query parameter list. - locale - the language/local to use for your export. This parameter is optional.
- companyKey - this is the key we talked about in Before You Begin. The
companyKeyparameter is always required. - startTime - the start time for the data returned in the export. The
startTimeparameter is always required. - endTime - the end time for the data returned in the export. The
endTimeparameter is always required.
ThestartTimeandendTimevalues must be in epoch milliseconds format. That’s simply a certain date and time format that is more efficient for the API to process. You get your export start and end times in epoch milliseconds using an epoch milliseconds converter. You can find many of these on the internet. Here’s and example of the one I’m using for this tutorial.
Type in a user-friendly date and the converter will convert it to the epoch milliseconds equivalent.

Go ahead and try it out.
In an epoch milliseconds converter, convert August 14, 2019 1:00:00 AM using an epoch millis converter.
You should get 1565769600000.
Updated about 1 year ago