Widget Display Conditions
Learn how to set display conditions for Modern Chat widgets
A Widget's Display Conditions determine when the Modern Chat Widget will appear on the web page to offer chat assistance to your visitor. Khoros Care will check these conditions and will not display the widget unless all of the active conditions are true.
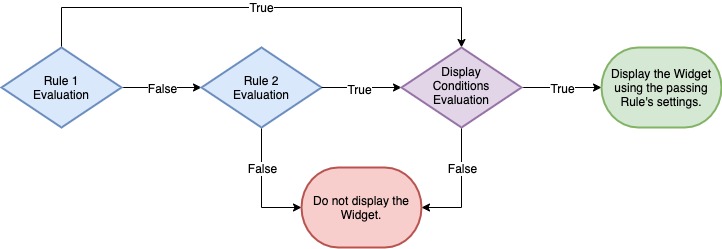
In the diagram above, we take a look at the evaluation process that determines whether or not a Widget appears on a given page. Display Conditions are the gateway standing between a rule that has been evaluated true and the widget being displayed.
Here is a breakdown of included Display Conditions:
- Number of Available Agents: Display the Widget only if a certain number of agents are available.
- Time to Agent Response (TAR): Display if TAR is below a certain threshold.
- Business Hours: Display during a specified timeframe.
- Throttling: Display only to a certain percentage of unique visitors.
You can find a detailed breakdown of the available Display Conditions options in Khoros Atlas.
Custom Conditions
For developers, a Custom Conditions option exists, which empowers developers to define parameters that exist on the web page rather than business/agent conditions set for the widget as a whole.
Some examples of custom condition parameters include:
- The number of items in a shopping cart.
- Actions were taken, including clicking a specific part of a webpage.
- Membership status.
- Contents of a search input text box
Custom Conditions create options at the widget level that can then be applied to rules. We demonstrate how Custom Conditions are set in the first example of this section. You can find more information about creating Custom Conditions as part of the Widget configuration in Khoros Atlas.
Defining a custom condition consists of two steps:
- Identify the CSS selector.
- Identify the type of criteria the selector will be weighed against. (text, number, options, event)
Once active, Modern Chat continues to check for those custom condition selectors every five seconds. So, if the end-user performs one of the actions triggering the Rule, the Modern Chat widget will identify those changes within five seconds of them occurring and appear as per its assigned Rule.
There is one exception to the five-second evaluation period. The click listener, which determines if an end-user clicked on an item on the page, fires immediately.
Example 1: Page Variables
Let’s consider the example of using a page variable such as the number of items in a shopping cart to drive the widget. Here's how:
- Click Add Custom Condition to initiate the creation of a new Custom Condition.
- Click New Custom Condition and enter a name for the new Custom Condition. We used
Items In Shopping Cart. - In the Query Selector box, enter the CSS selector. We used
#nav-cart-count. - Click the # button under Value Type.
- Click Save.
The value types available here are used for rule comparison. They include:
| Value Type | Description | Comparison Operators |
|---|---|---|
| String | String Operators | is is not contains starts with does not contain in |
| Number | Number Operators | lower than lower or equal greater or equal greater than |
| Option | From a List of Allowed Types | is is not |
| Event | An Event Triggered by the User | click |
The Modern Chat rules engine will grab the first value from the CSS selector if there are multiple values returned. It will be able to grab content from an HTML element or a "value" from an input or select type.
A user can test their CSS selector by opening up the javascript console and typing the following:
document.querySelector("SELECTOR_GOES_HERE");
In the example above, the
SELECTOR_GOES_HEREis a placeholder that should be replaced with the appropriate query selector for your needs.
Now that the new Custom Condition has been saved, Items in Shopping cart will appear as a selectable condition when setting up Modern Chat widget Rules.
Example 2: Contents of a Text Box
In this example, we'll tackle a scenario where you want the Modern Chat widget to appear whenever a user has entered a keyword into the search field on the page. In this case, the end-user would be searching for a way to contact the company.
To accomplish this goal, we will need to do the following:
- Create a Custom Condition for the text field.
- Create a rule that displays the Widget when any text exists in the field.
Let's start by creating the Custom Condition for the CSS selector we want to use for our rule. In our example, the selector we are targeting is input[type="text"]. Here's how:
Navigate to Admin > Modern Chat.
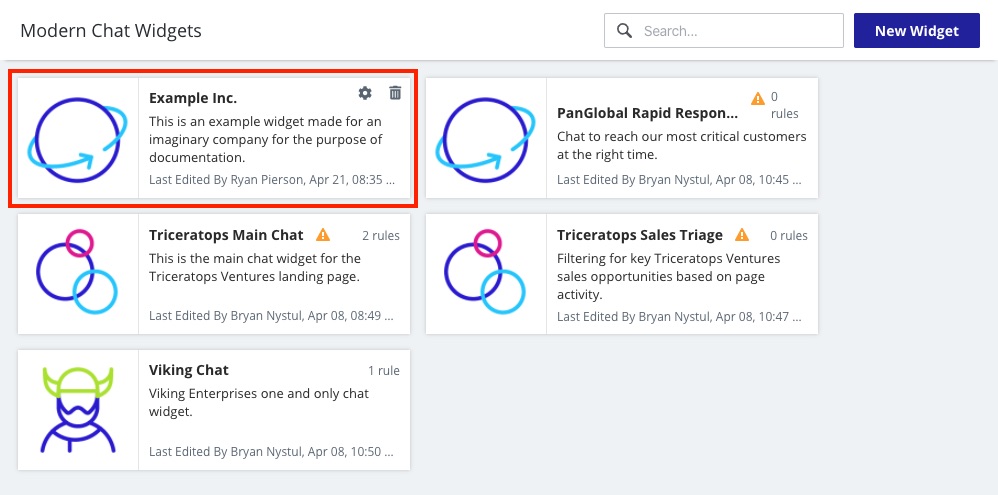
- Click the widget you would like to use and select the settings icon next to its title at the top of the page.
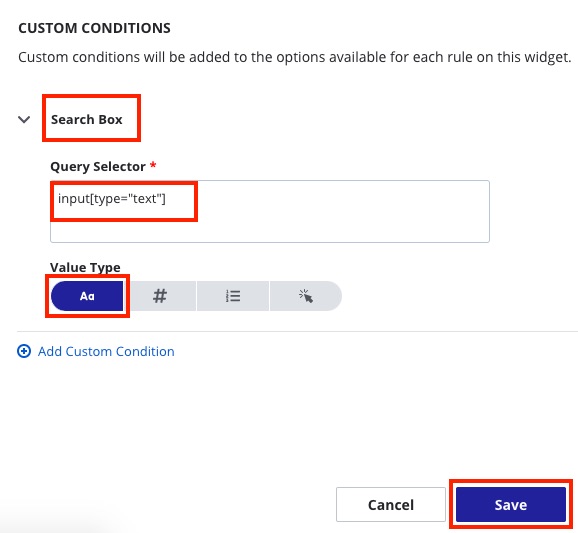
- Find the Custom Conditions section and select Add Custom Condition.
- Give your new Custom Condition a name. We used the title "Search Box".
- Enter the query selector you want to target in the Query Selector field.
- Select the Text value type.
- Click Save.
Now that we have the Custom Condition defined, we can move on to creating a rule that takes advantage of it. Here's how:
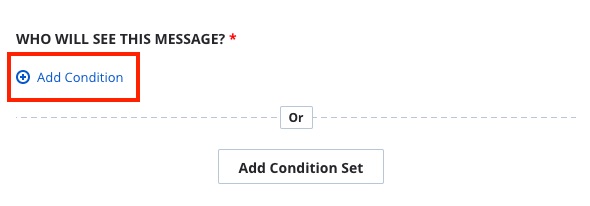
- In the Who Will See this Message area of the form, select Add Condition.
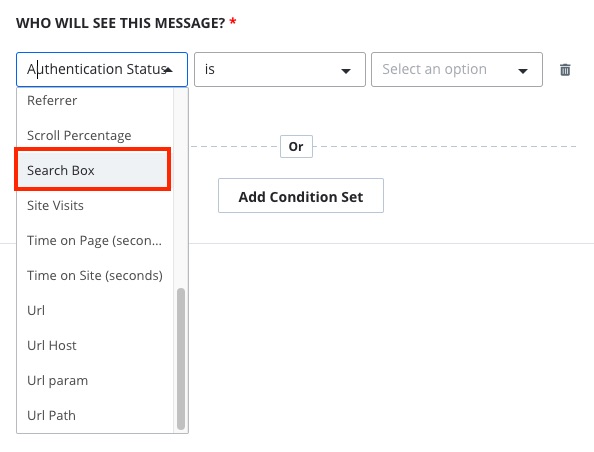
- In the first dropdown, select the new condition we created earlier.
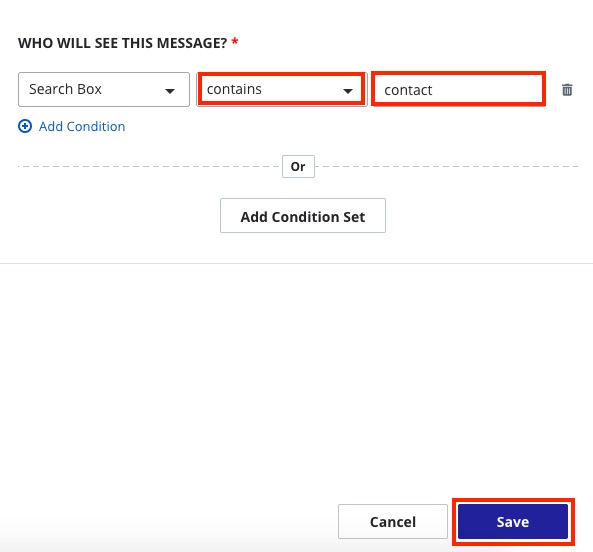
- In the second dropdown, select Contains as we want to target any end-user queries that contain a specific word or phrase.
- In the third field, enter a value that will trigger the Widget to appear. In our case, we're entering "
contact". - Click the Save button.

- On the Widget's rules page, you can activate the new (or existing) rule by switching its toggle to the ON position.
- Finally, select the Publish button to lock in your changes.
Updated almost 2 years ago