Android Notifications
Set up notification solutions for your Android app
Overview
Push notifications are a powerful way to engage with your users, keeping them informed about important updates and events within your Android app. This guide will walk you through the process of integrating and setting up push notifications for your Android application.
How it works is: Brand Messenger sends its payload to Android servers which then send the push notification to your user's device.
Android updates
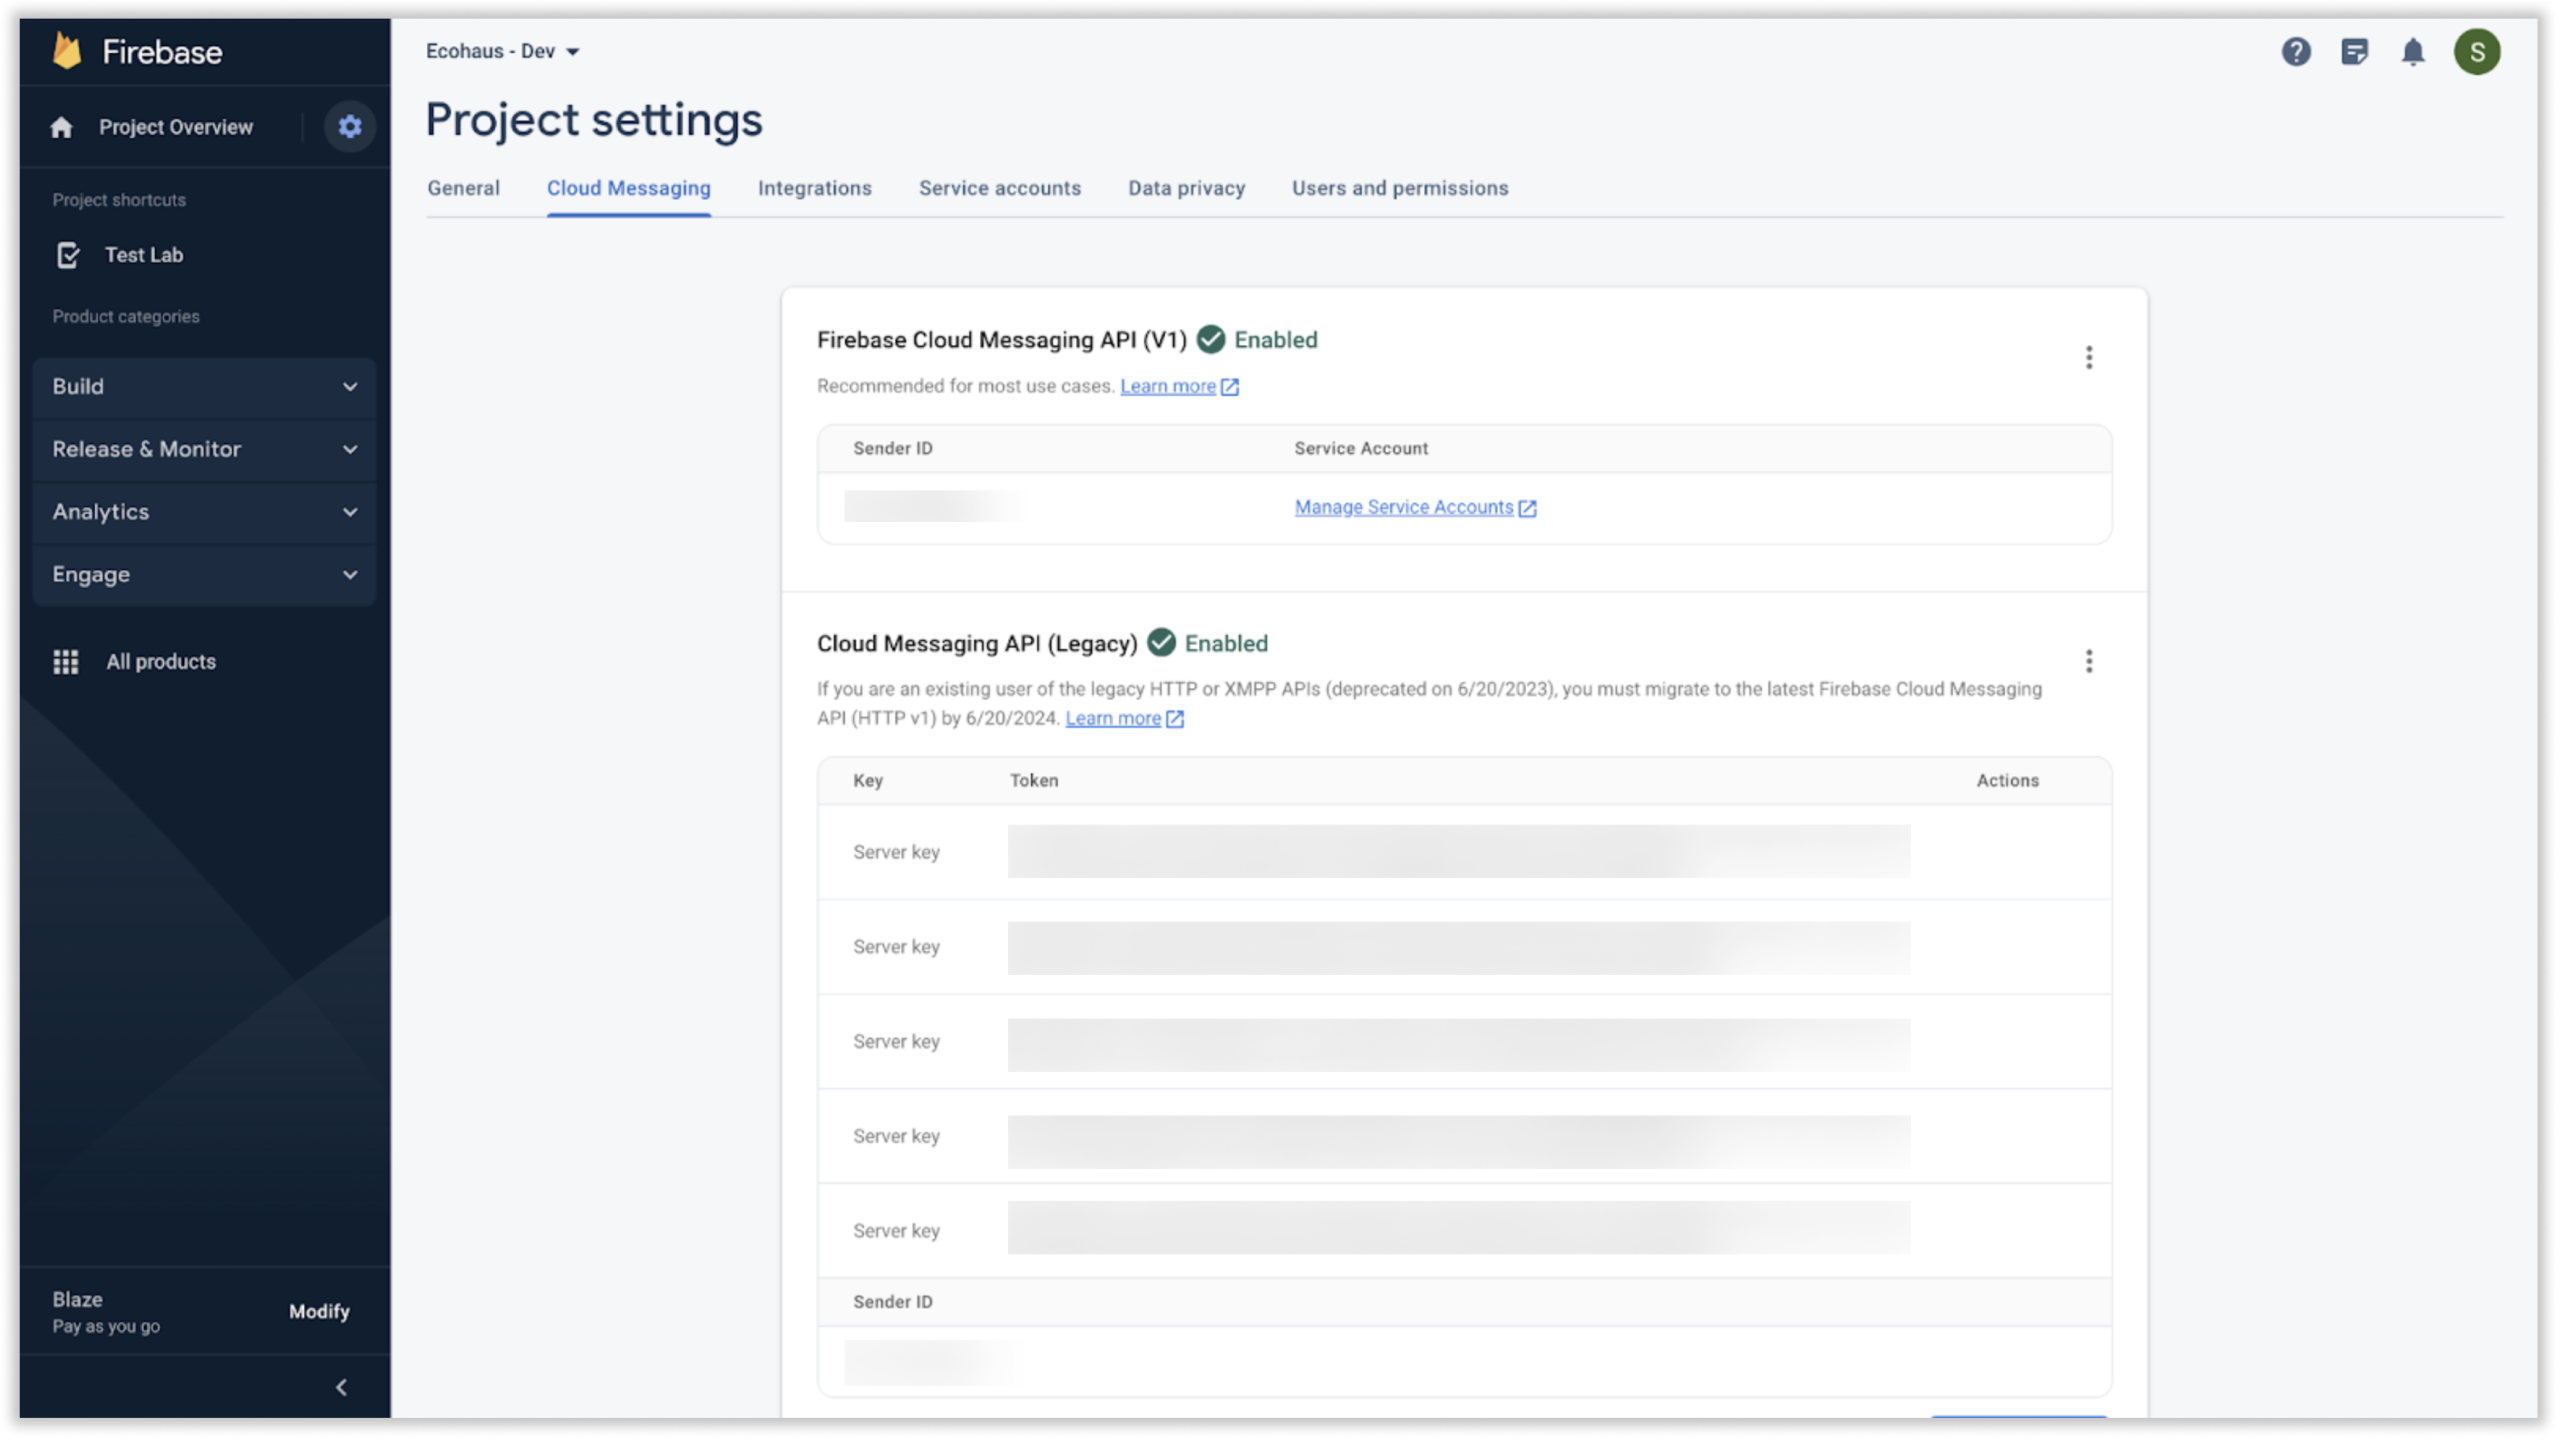
Android notification auth keys can be of 2 types: FCM legacy server key and V1. However Google is deprecating legacy server keys by Jun 2024 hence its highly recommended to move to v1
Here's a guide on how to migrate your server keys to V1
Setting up Notifications in your Android project
Step 1: Creating a Firebase Project
- Navigate to the Firebase console.
- Create a new Firebase project for your app.
- Follow the on-screen instructions to complete the project setup.
Step 2: Setting up your FCM v1 keys (Recommended)
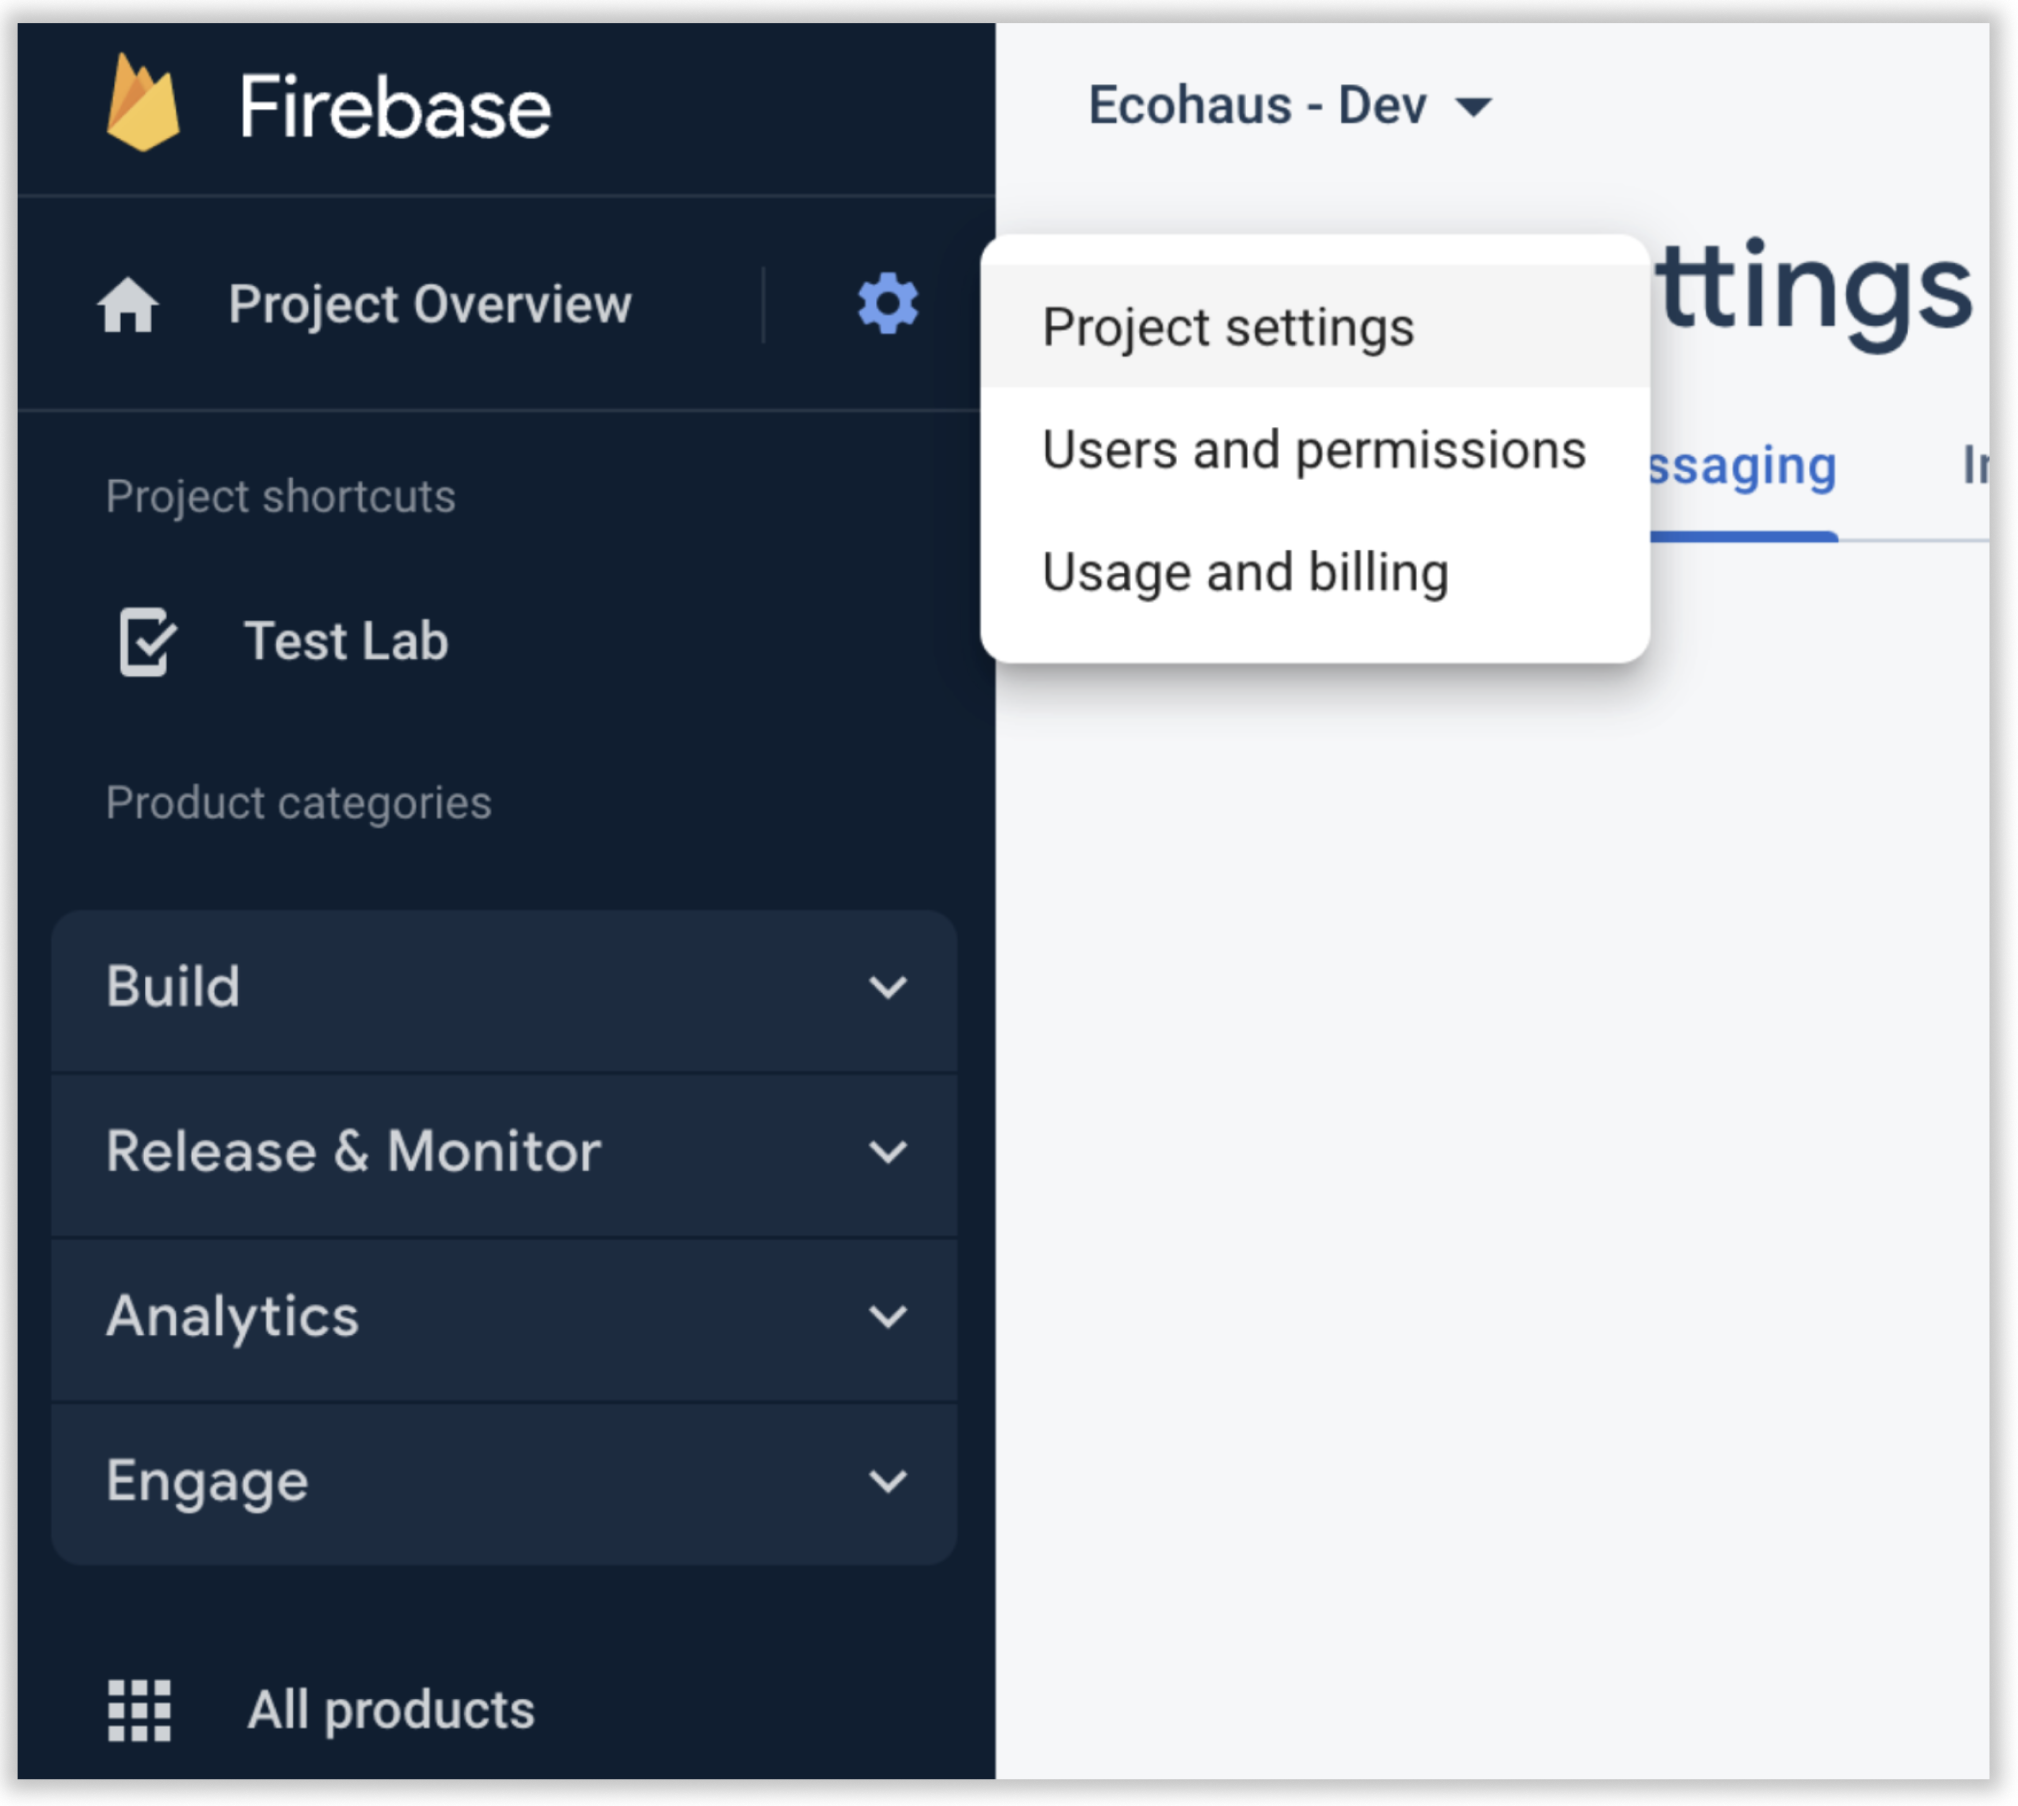
- From your Firebase console, select your project, go to Project Settings
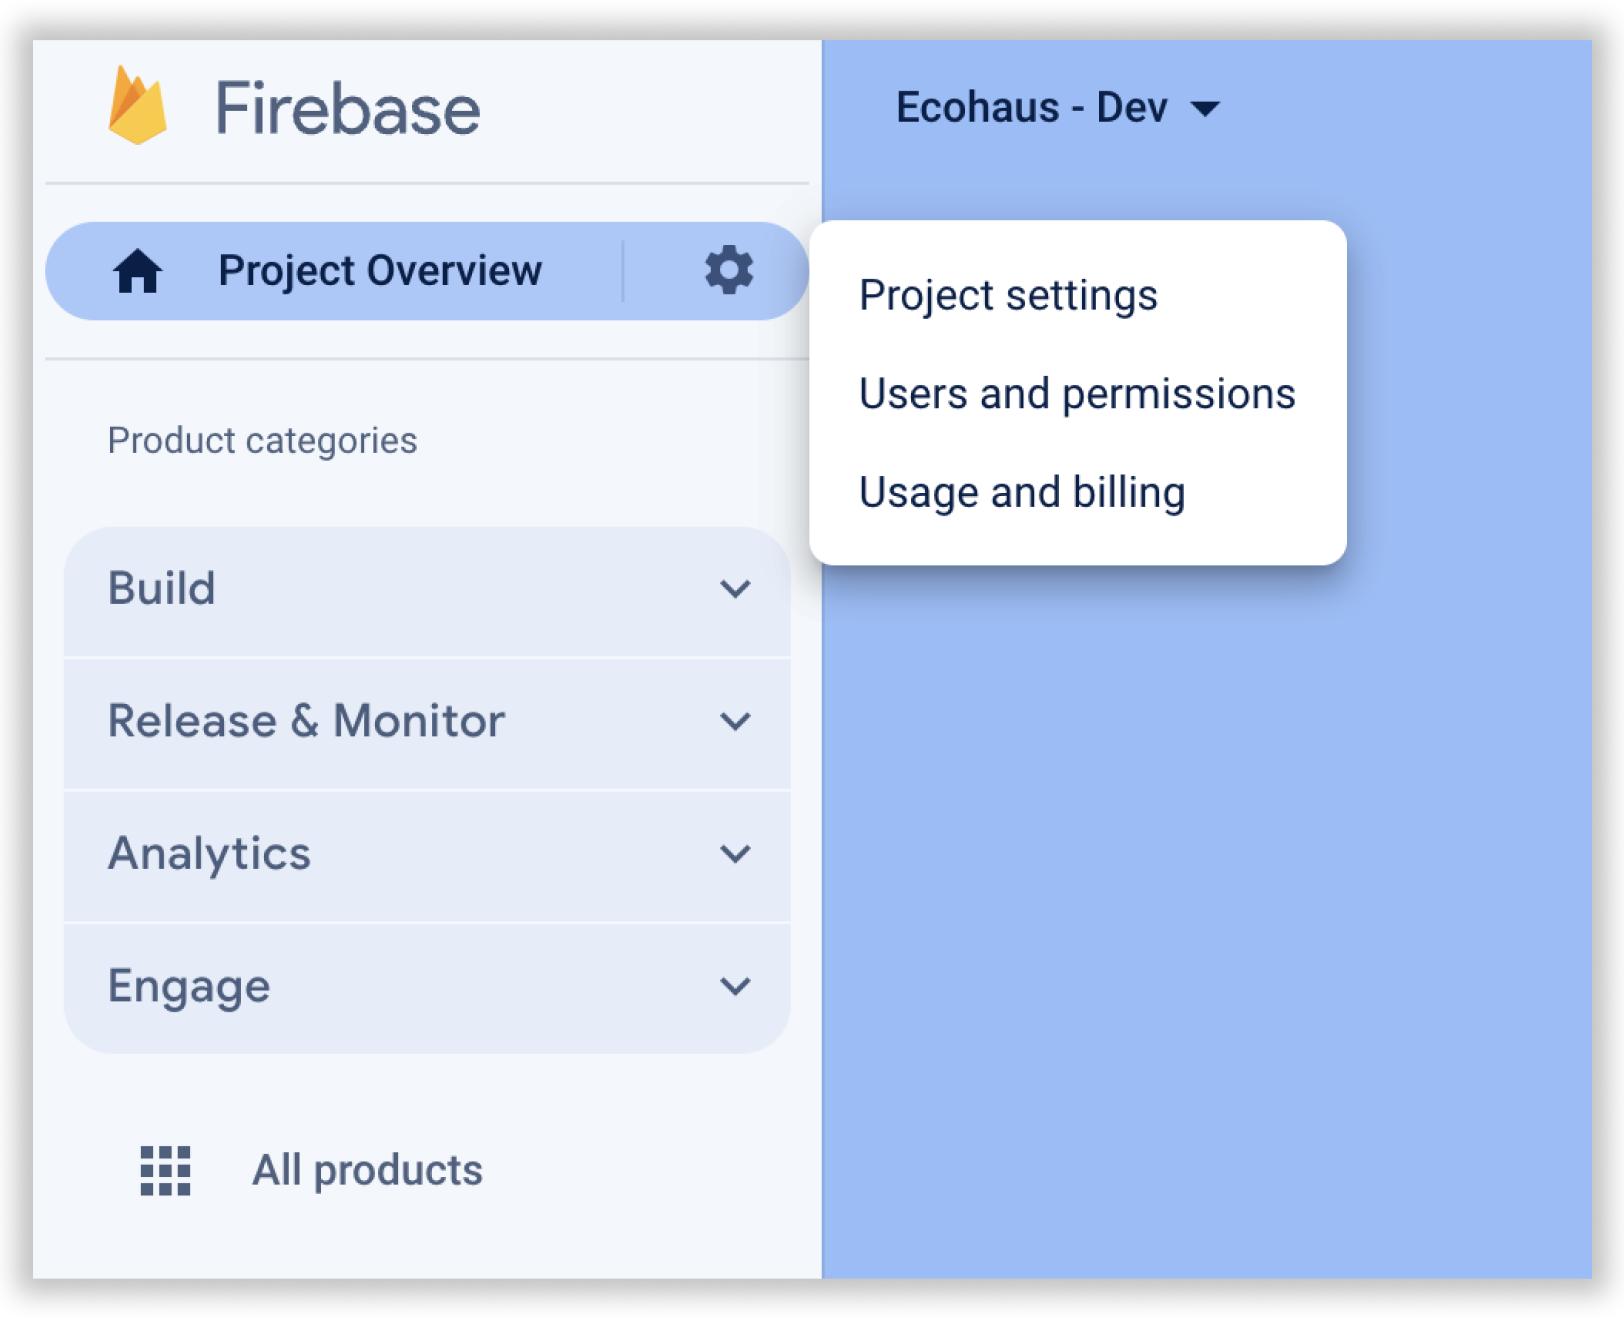
- Then switch to the Service Accounts tab.
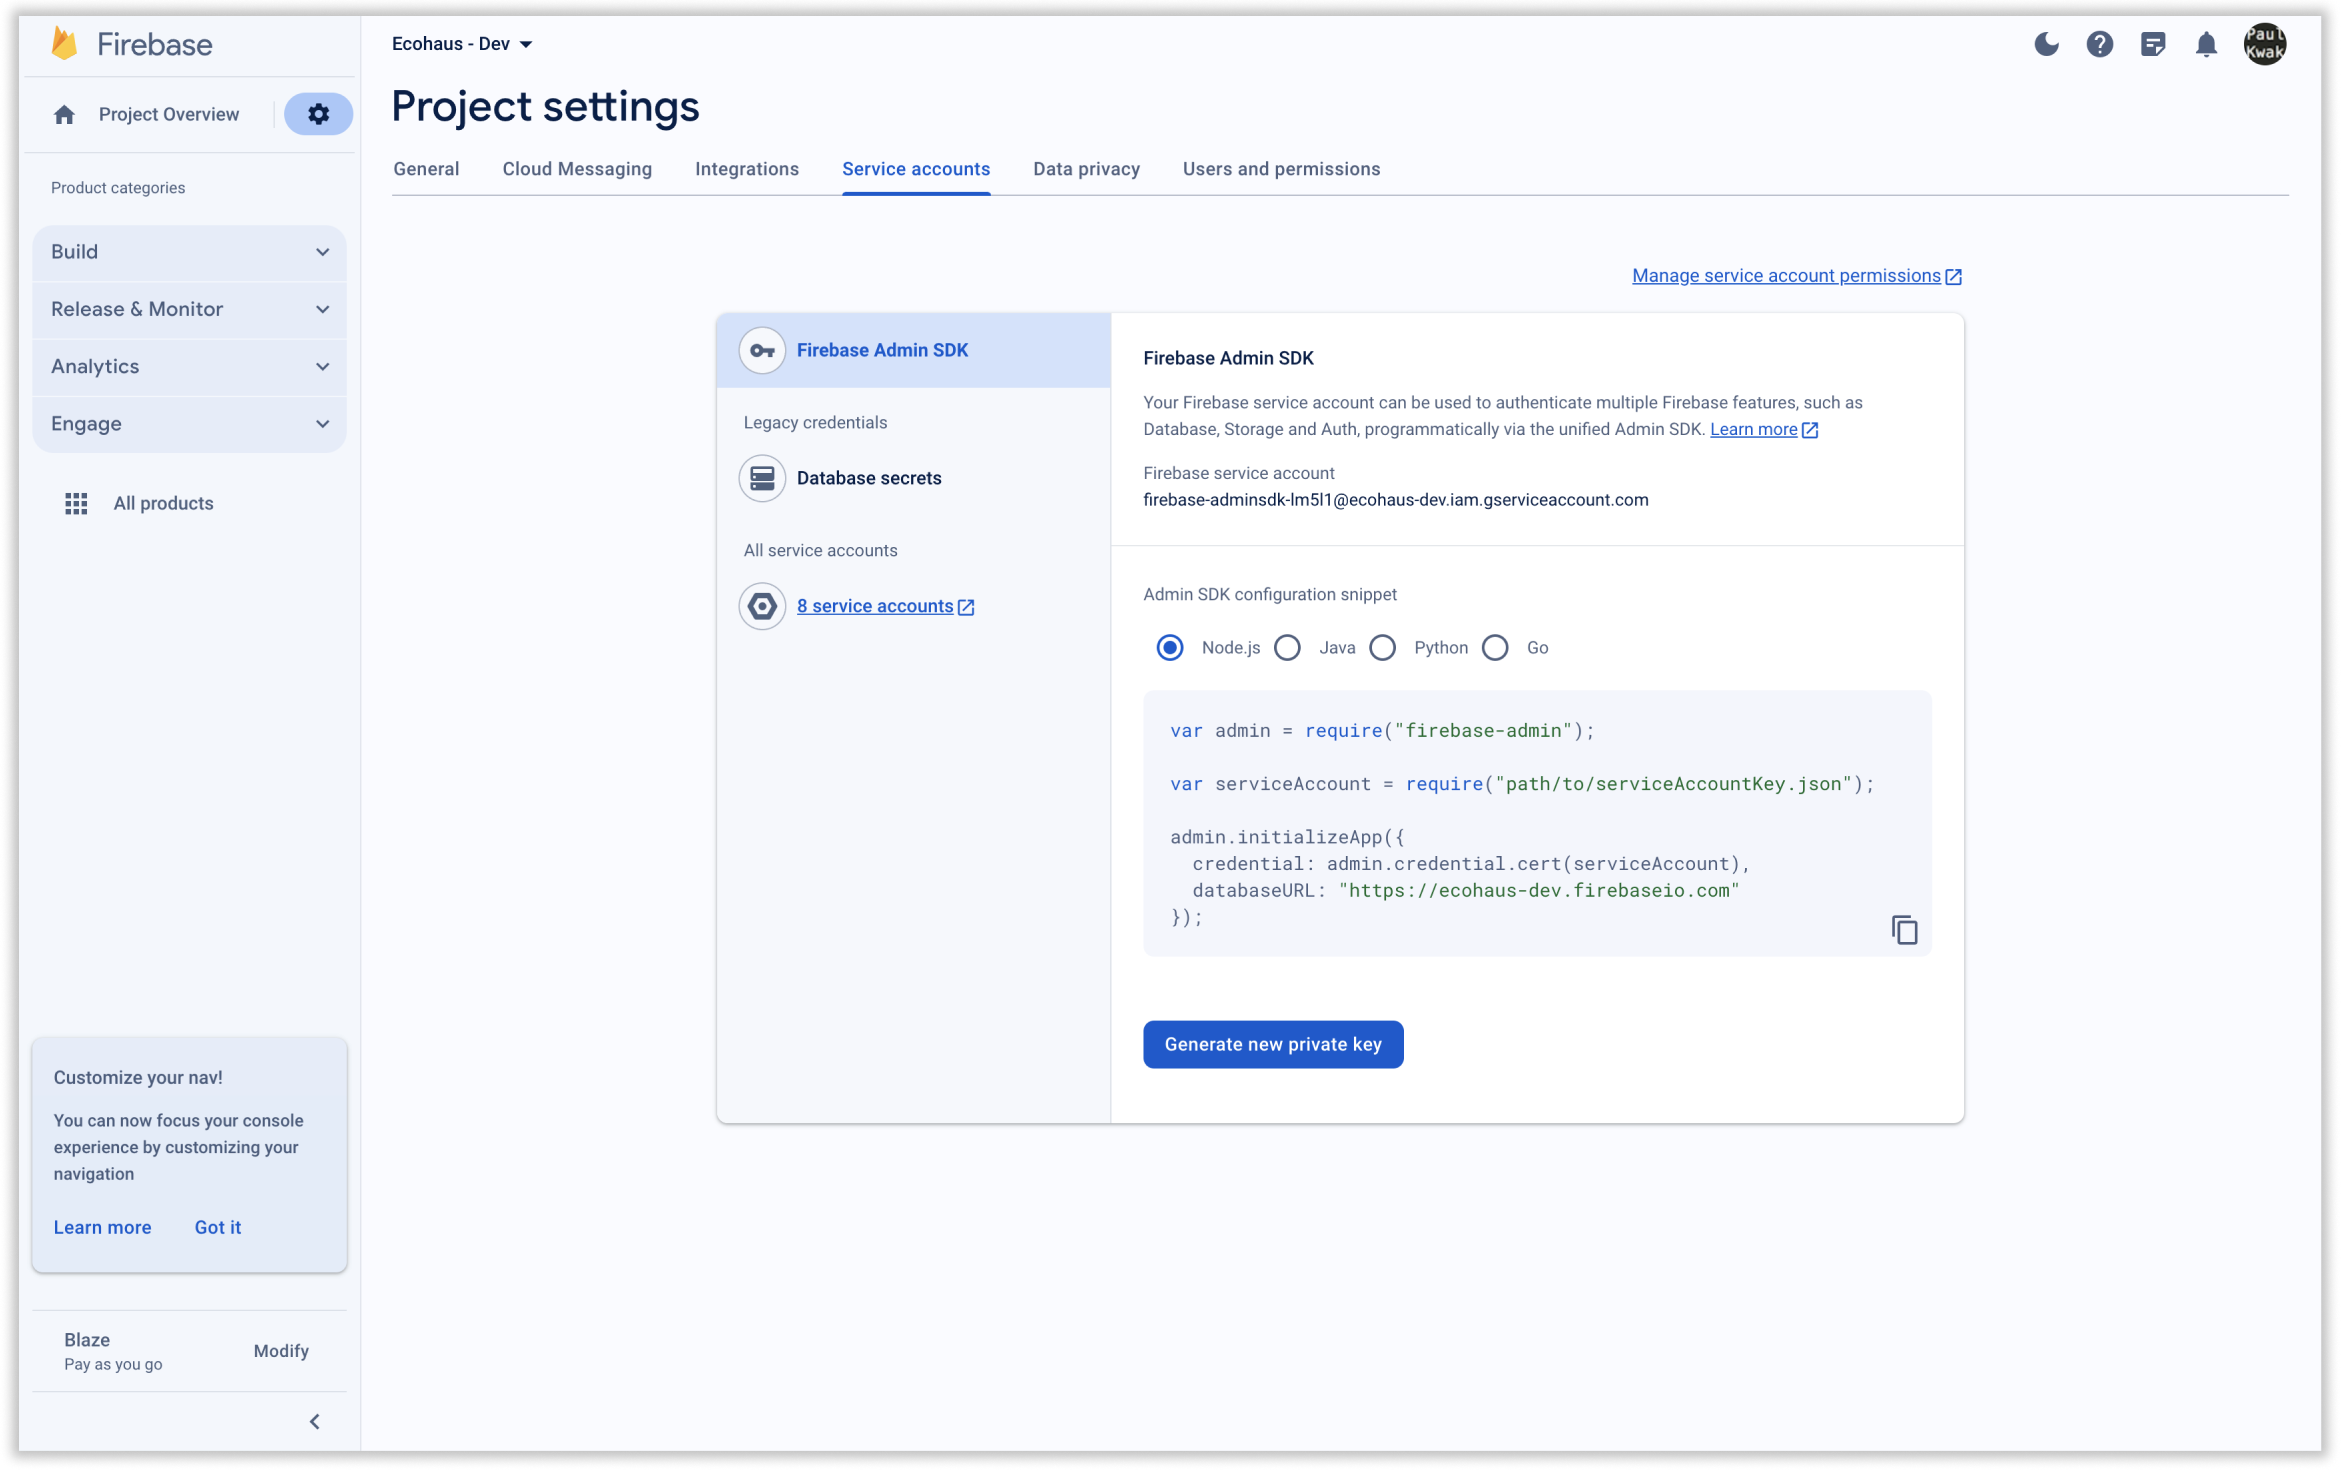
The default selected account has full admin access which is too much permission for just FCM.
❌ Do not select "Generate new private key"
Instead, we will create a new service account for this, select the 'X service accounts' which will open 'IAM & Admin' in a new tab.
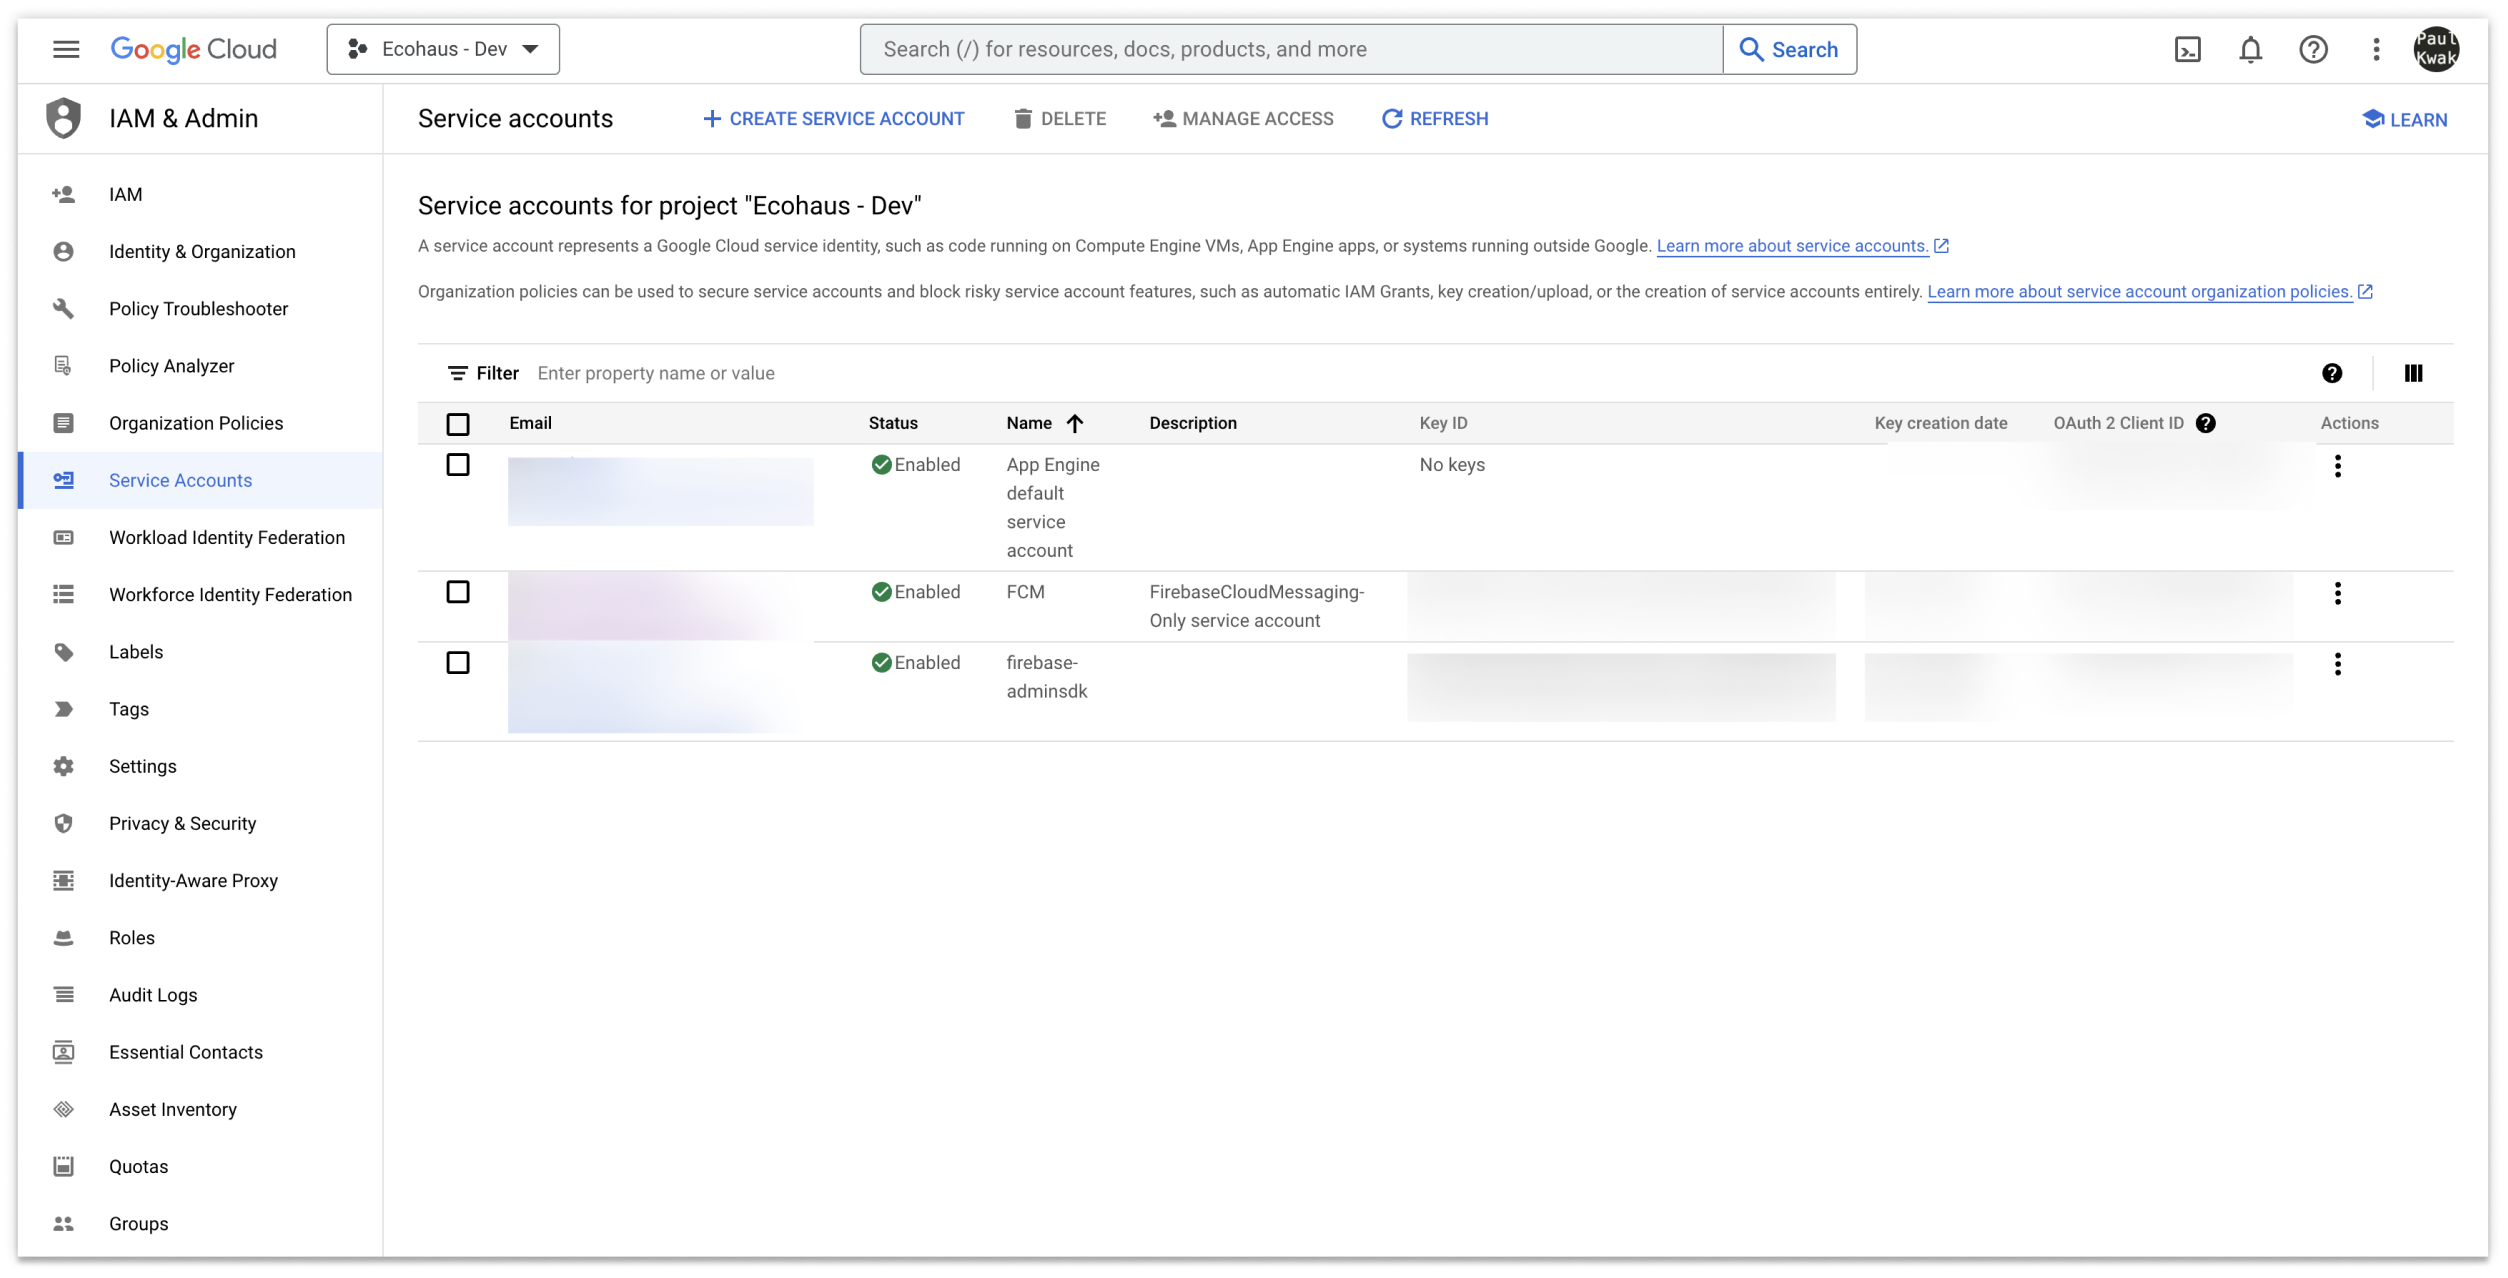
- In the IAM & Admin screen, select 'Service Accounts' on the left side menu, then 'CREATE SERVICE ACCOUNT' at the top.
- Fill in a name and description to the new service account and continue. Then in 'Select a role' box, start typing in 'messaging' and search for "Firebase Cloud Messaging API Admin'. Select it.
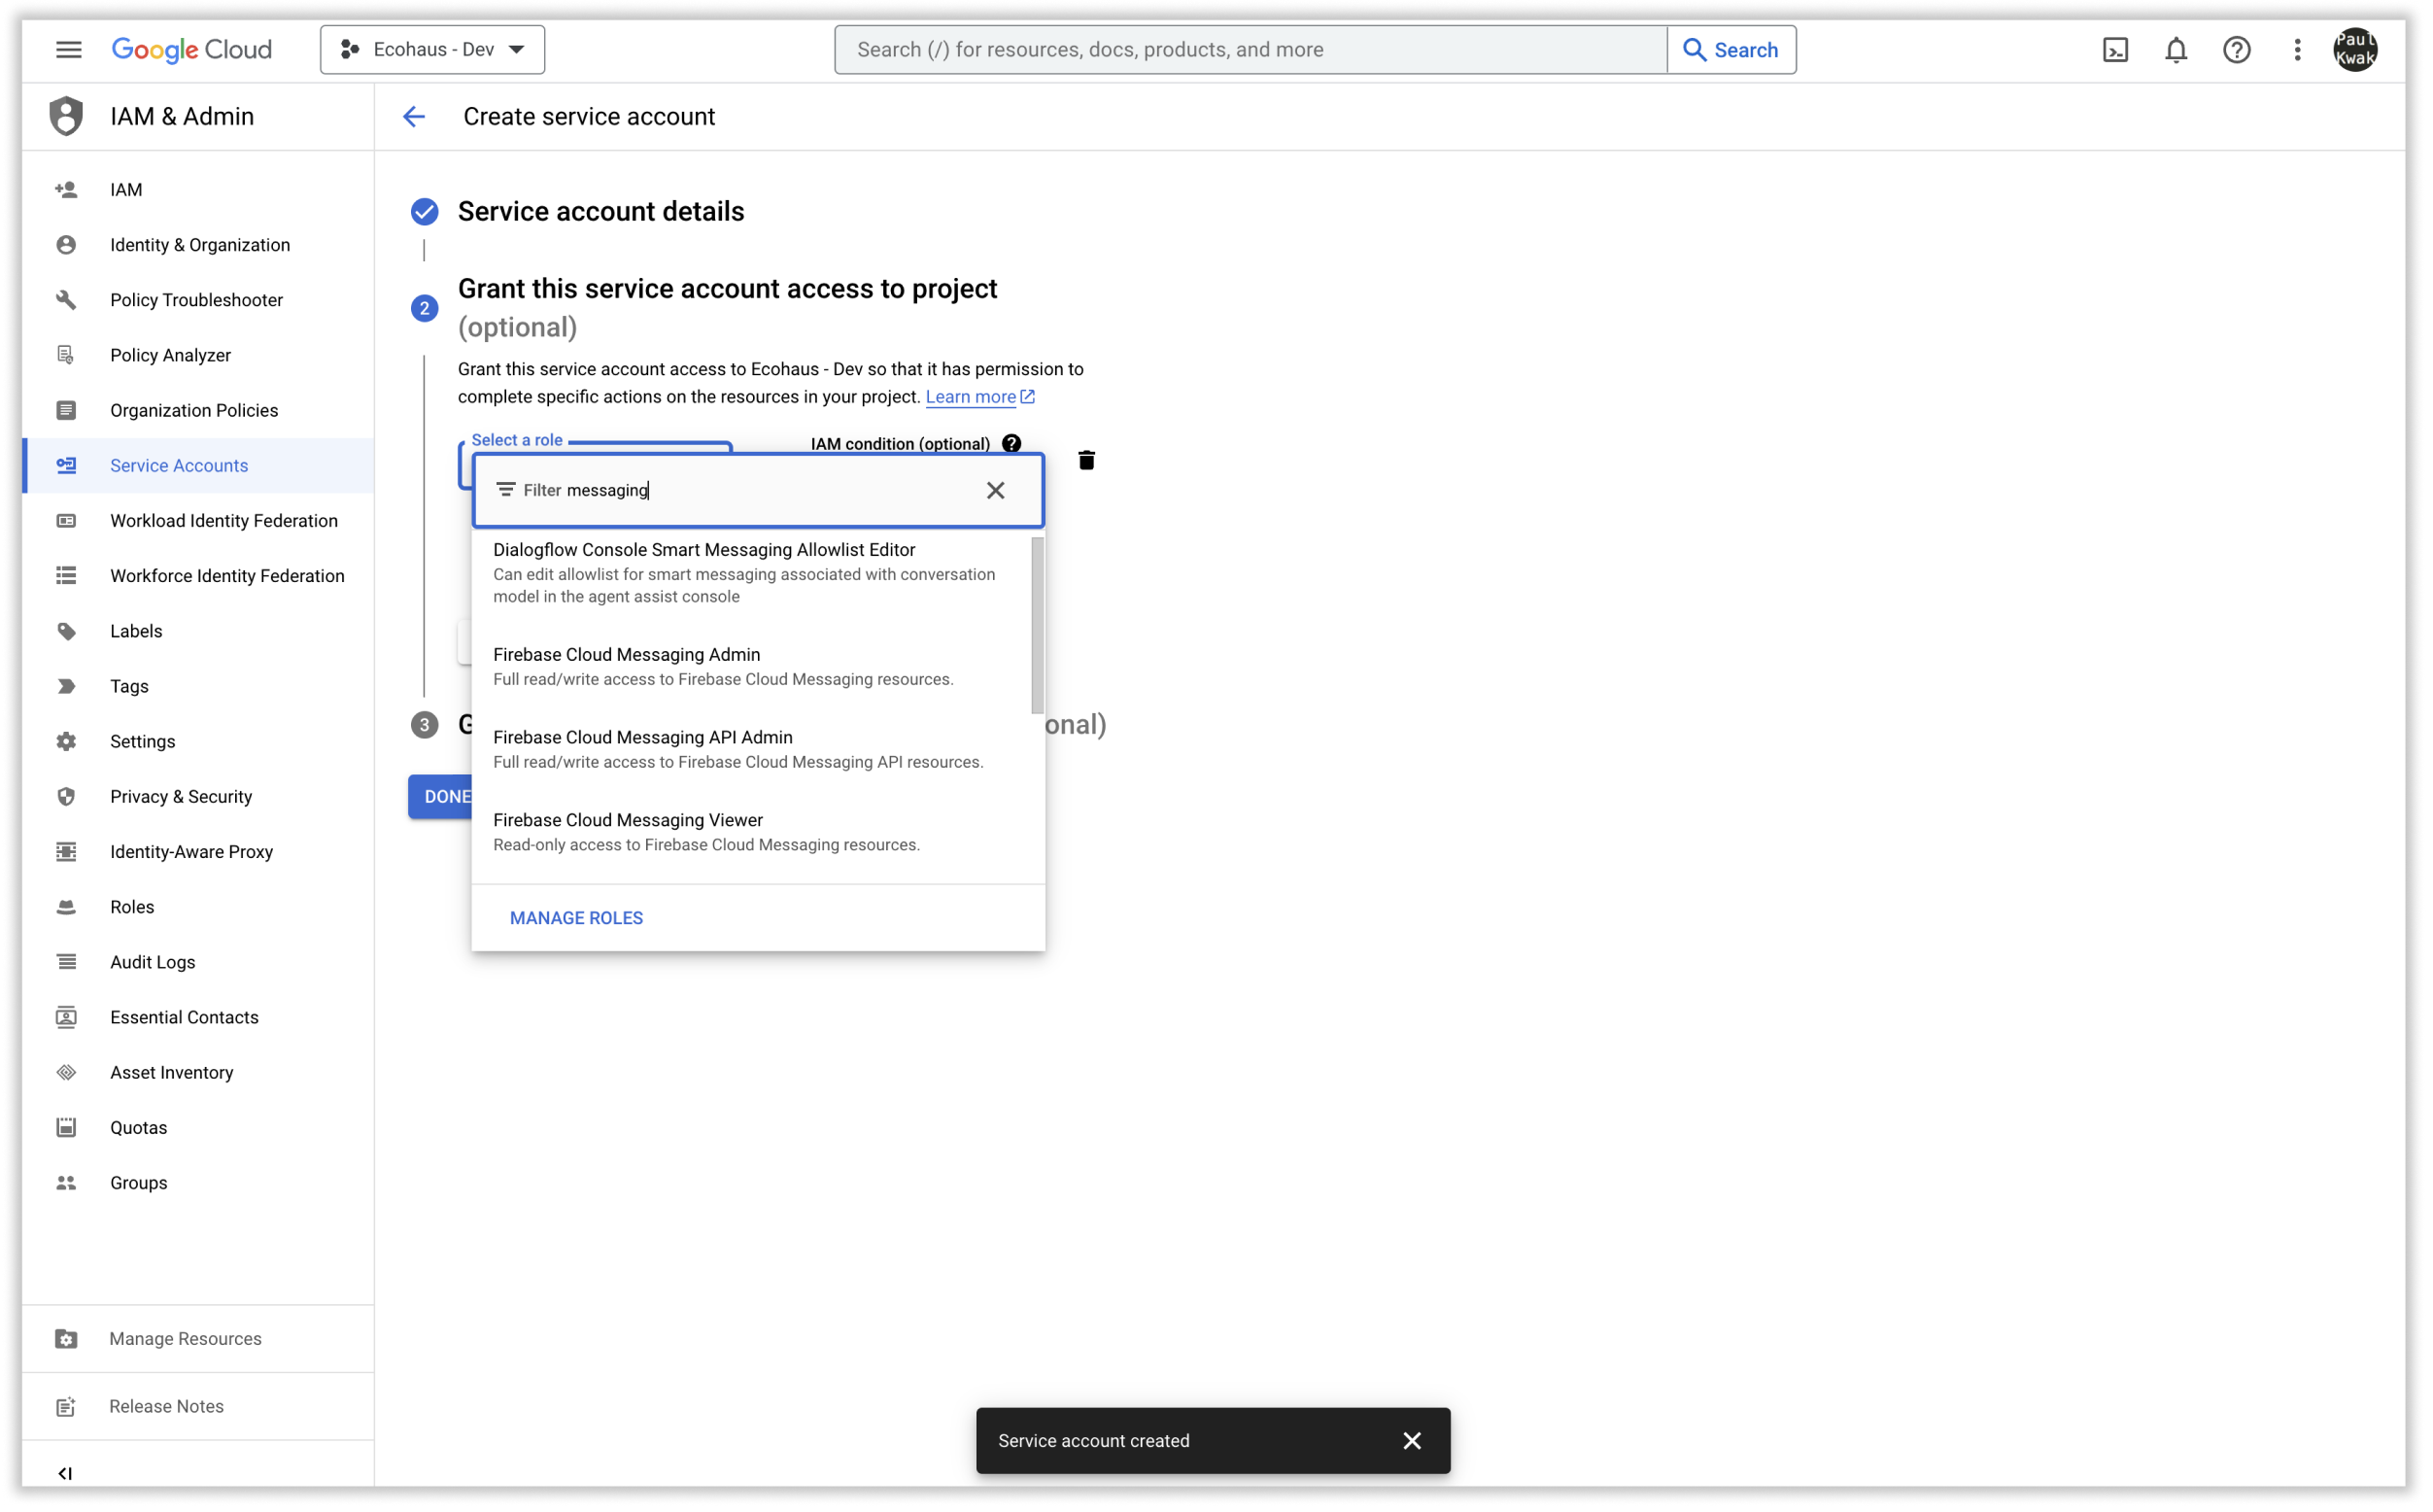
- With 'Firebase Cloud Messaging API Admin' as the only added role, select 'continue'.
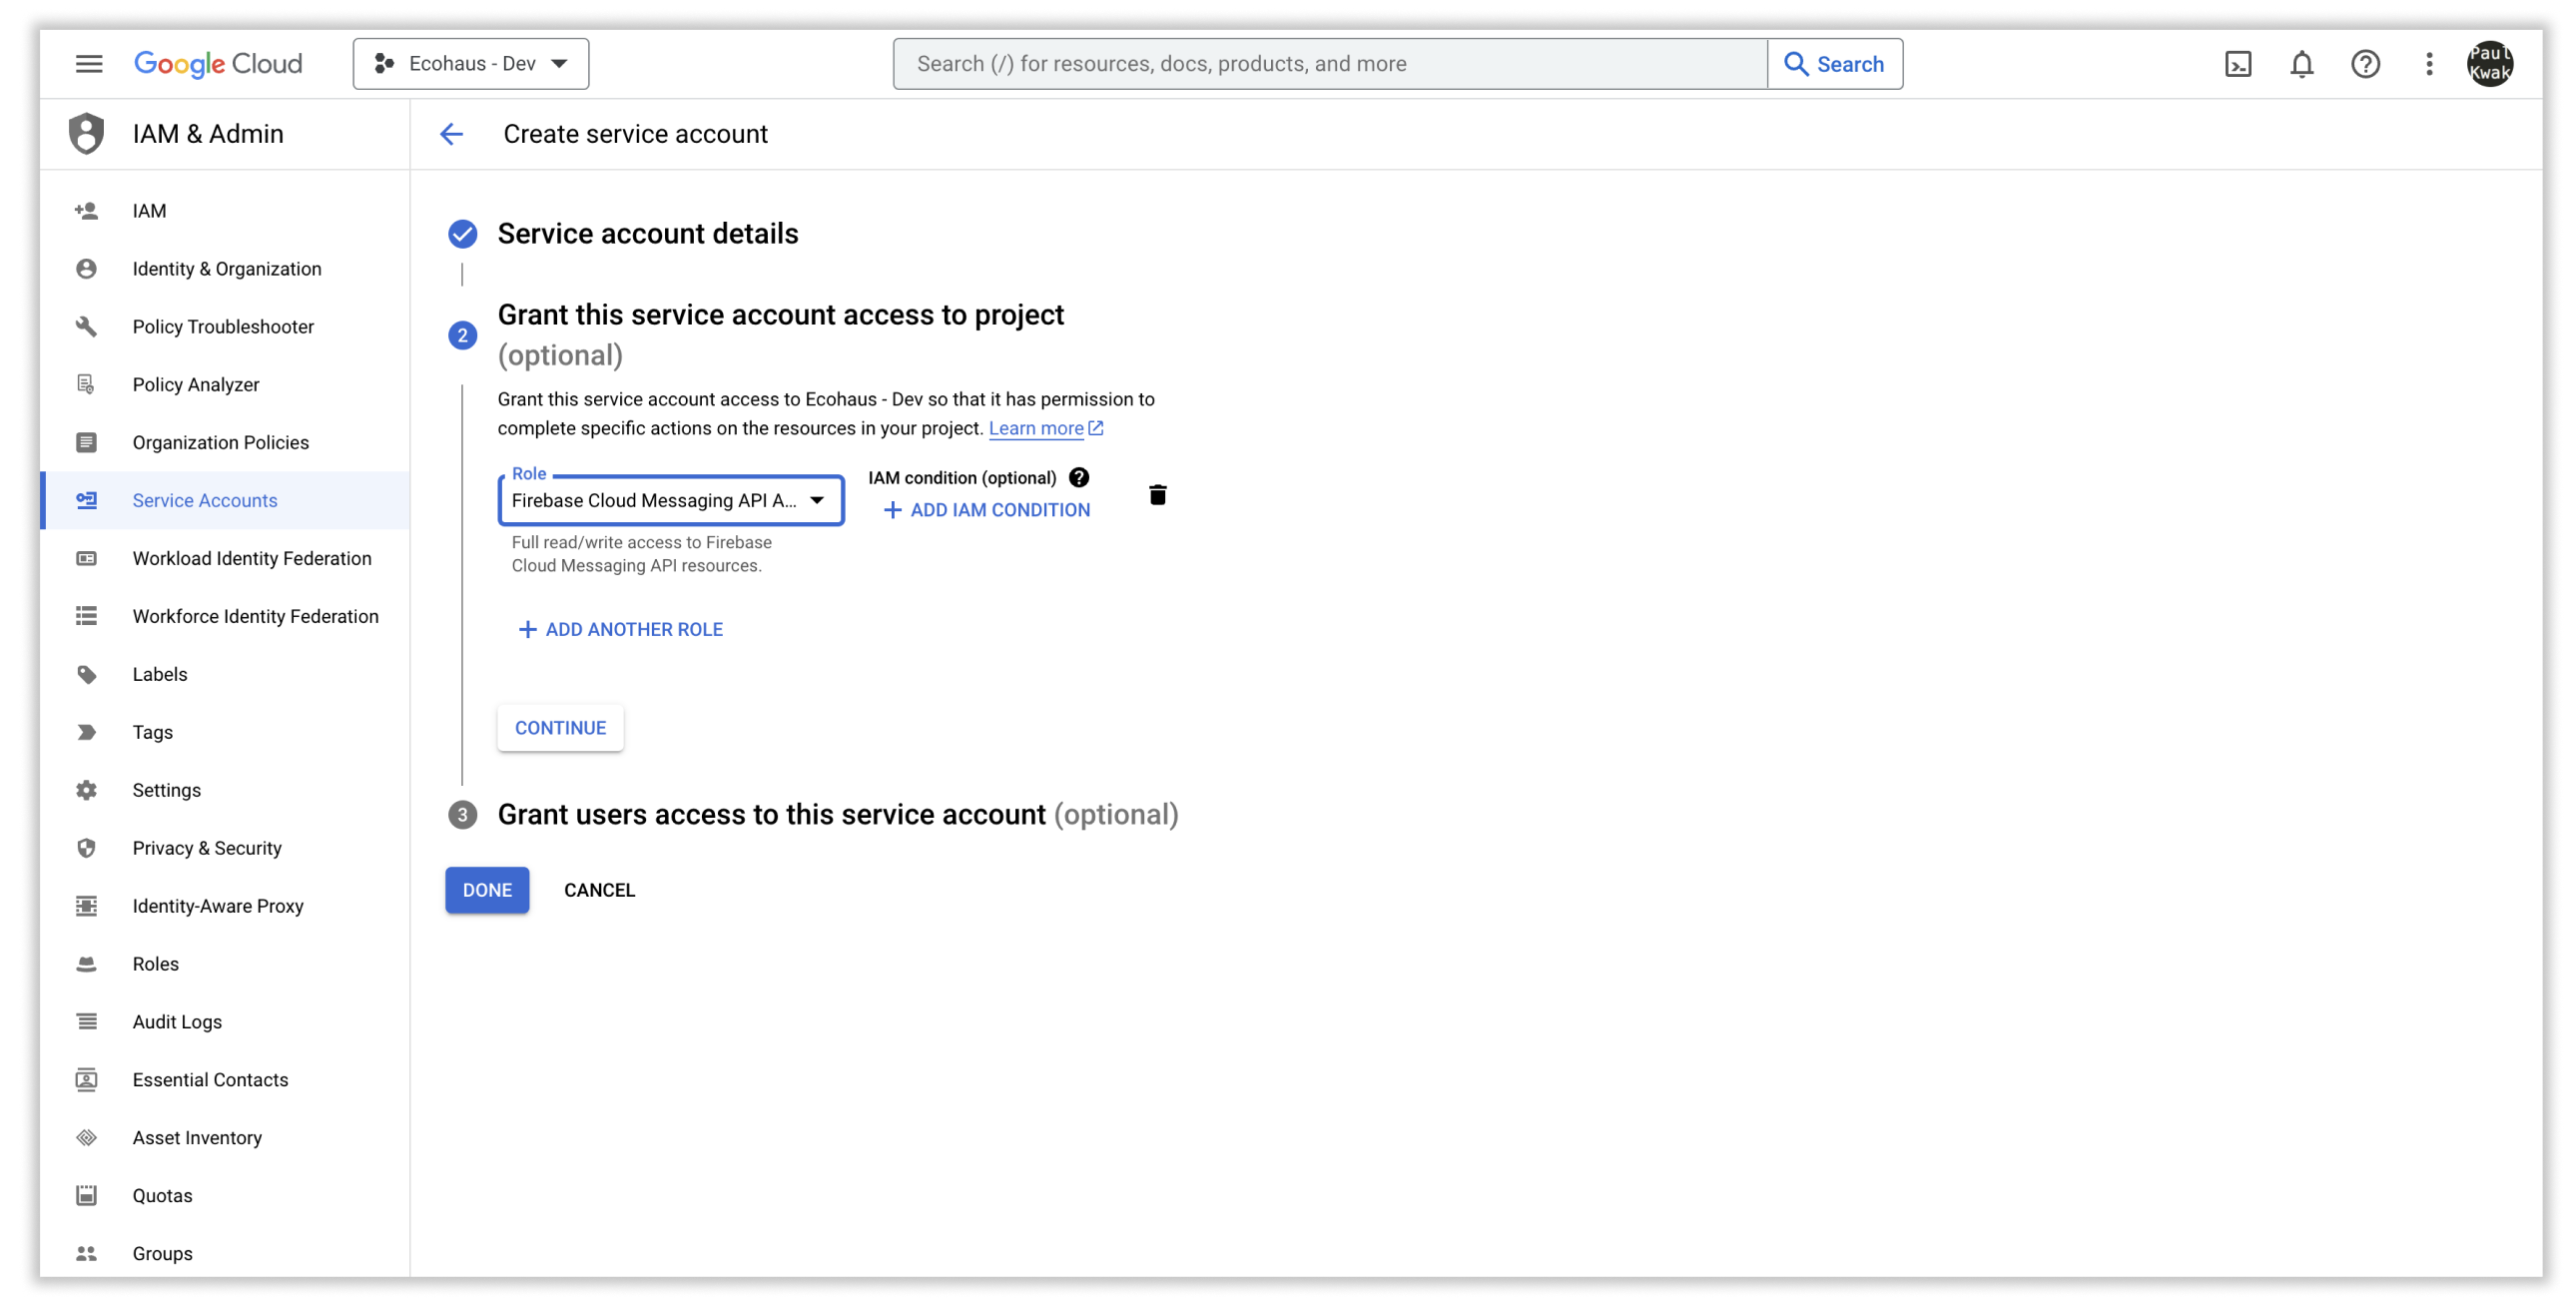
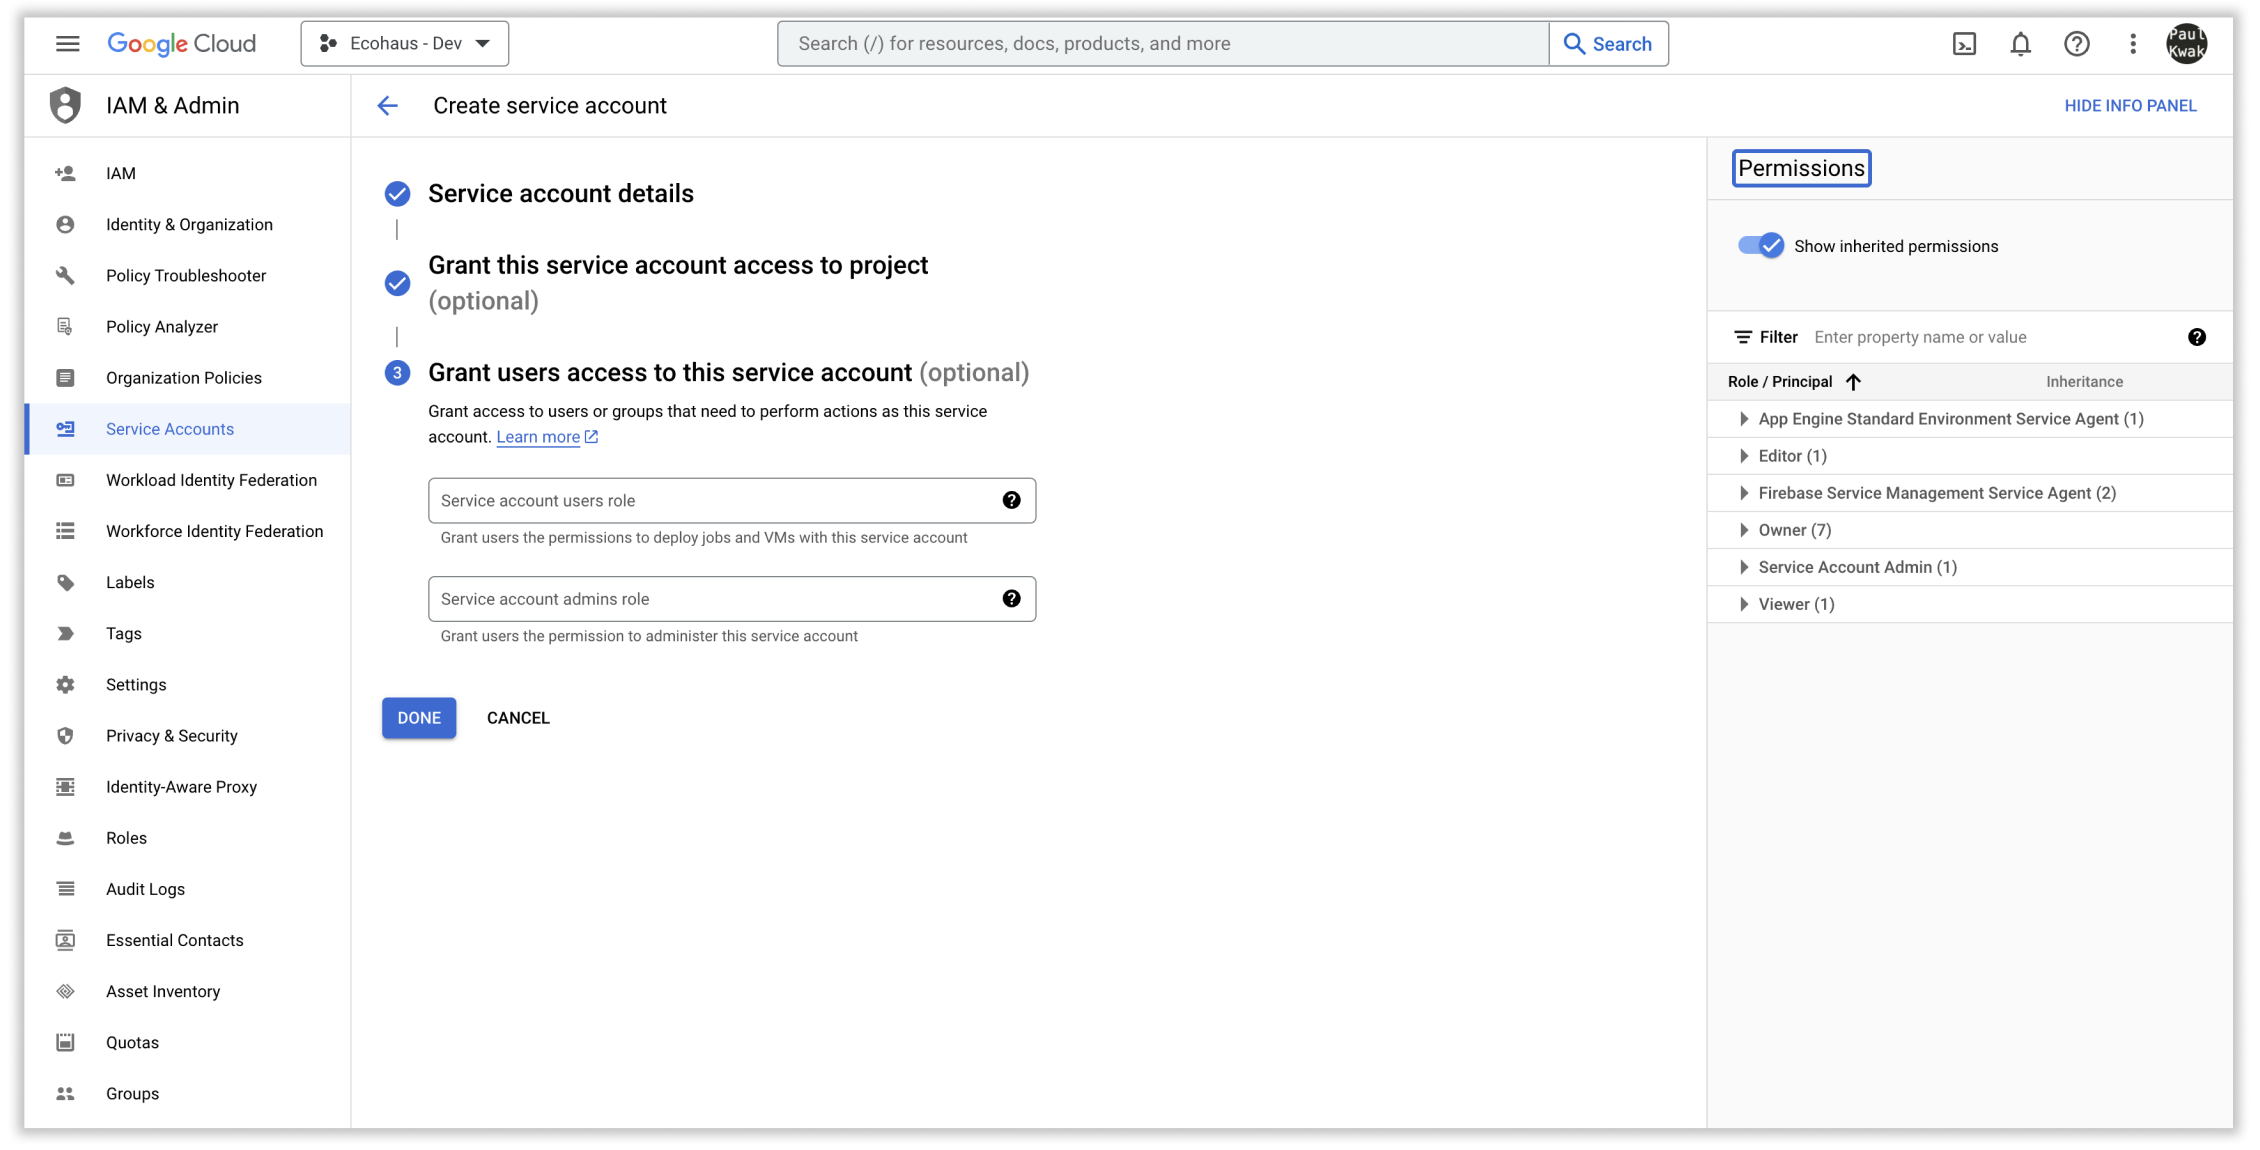
- As the last section is optional, you can now select 'Done'
- To confirm that the new Service Account is created, select the actions overflow-menu, and select 'Manage Keys'.
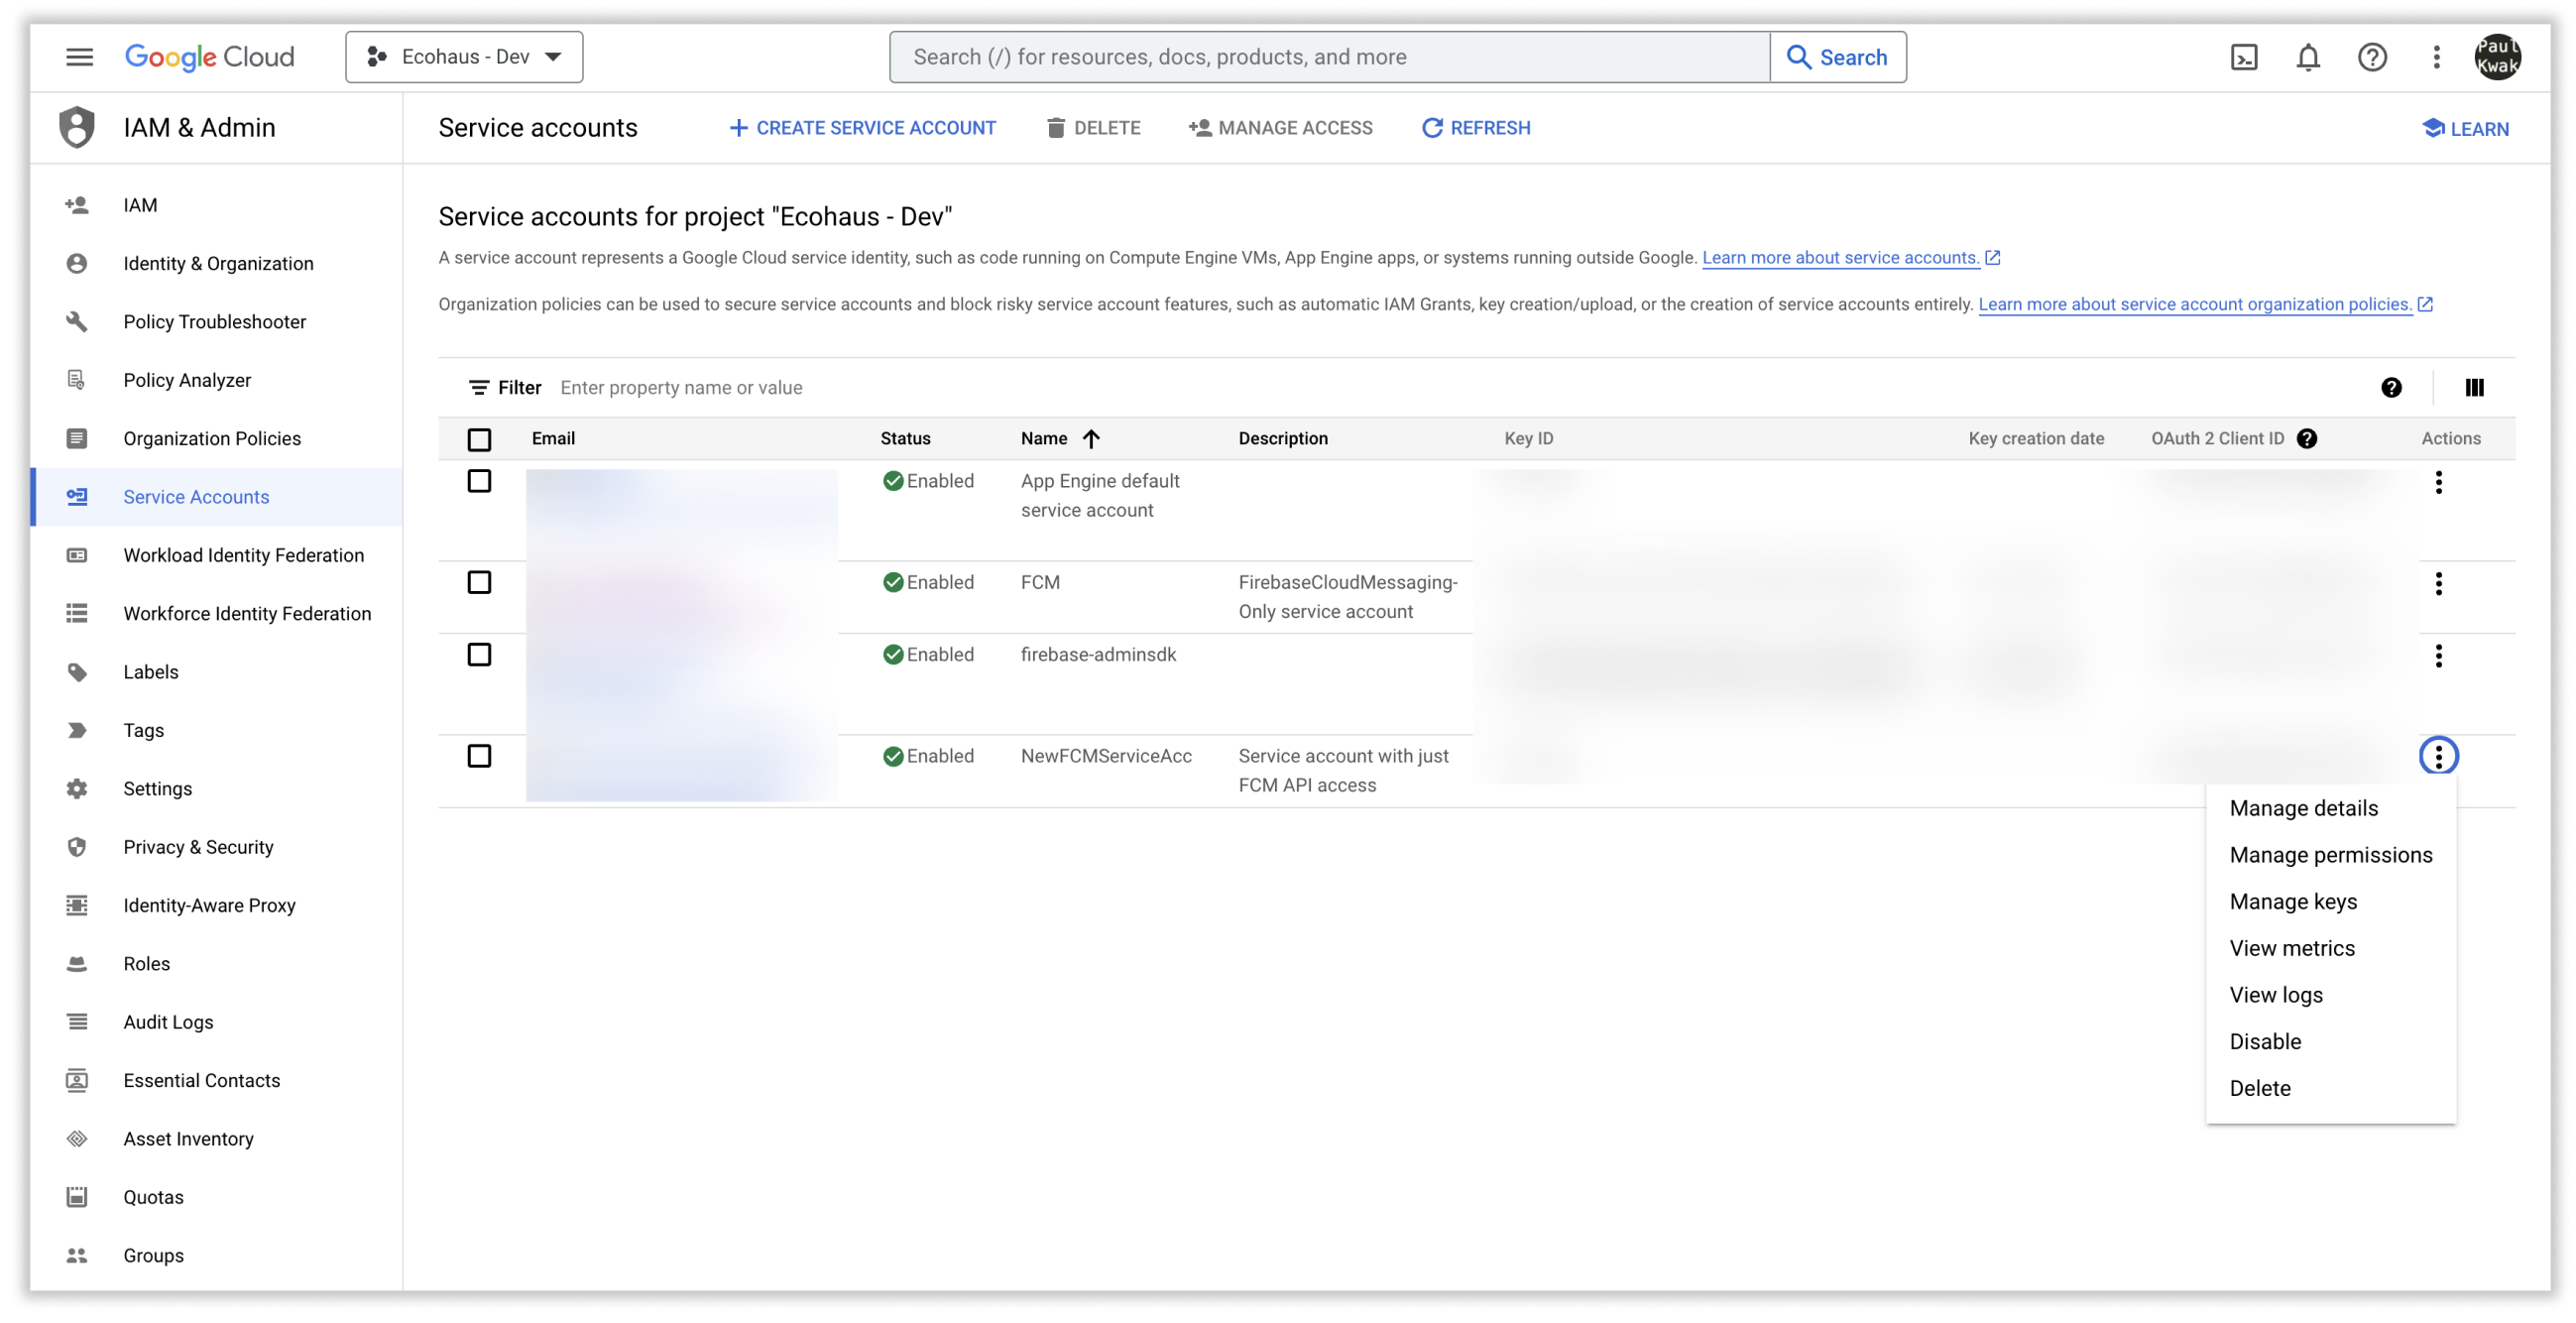
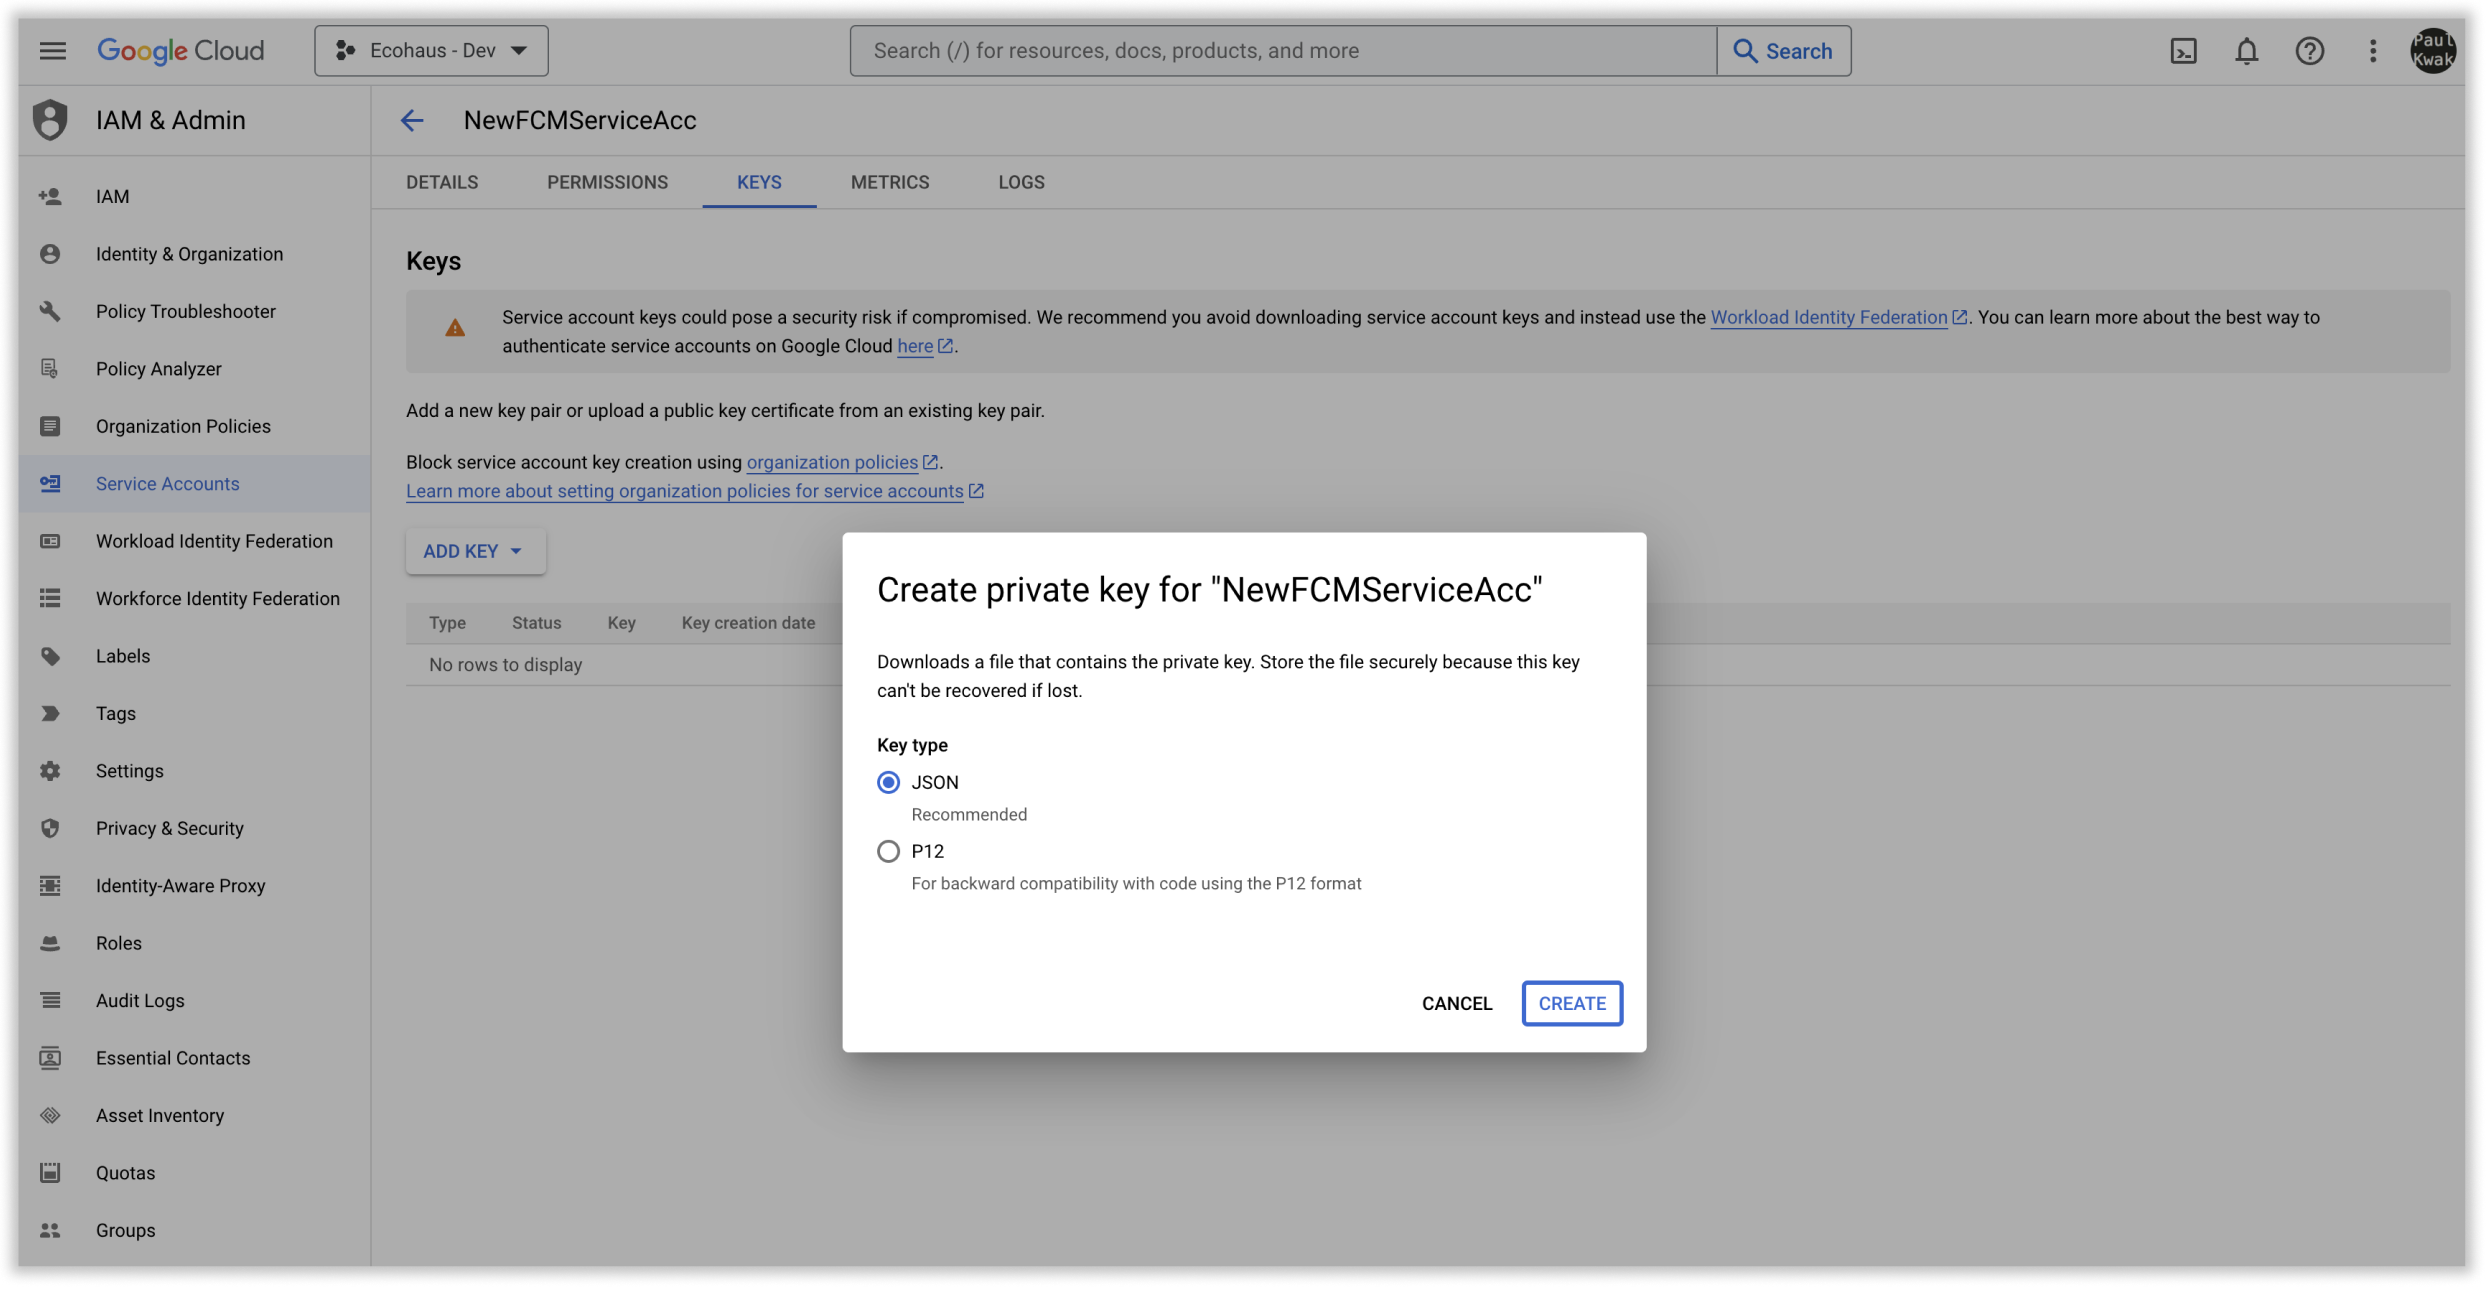
- There should be no keys for the new service account yet. Select 'ADD KEY' -> 'Create new key'.
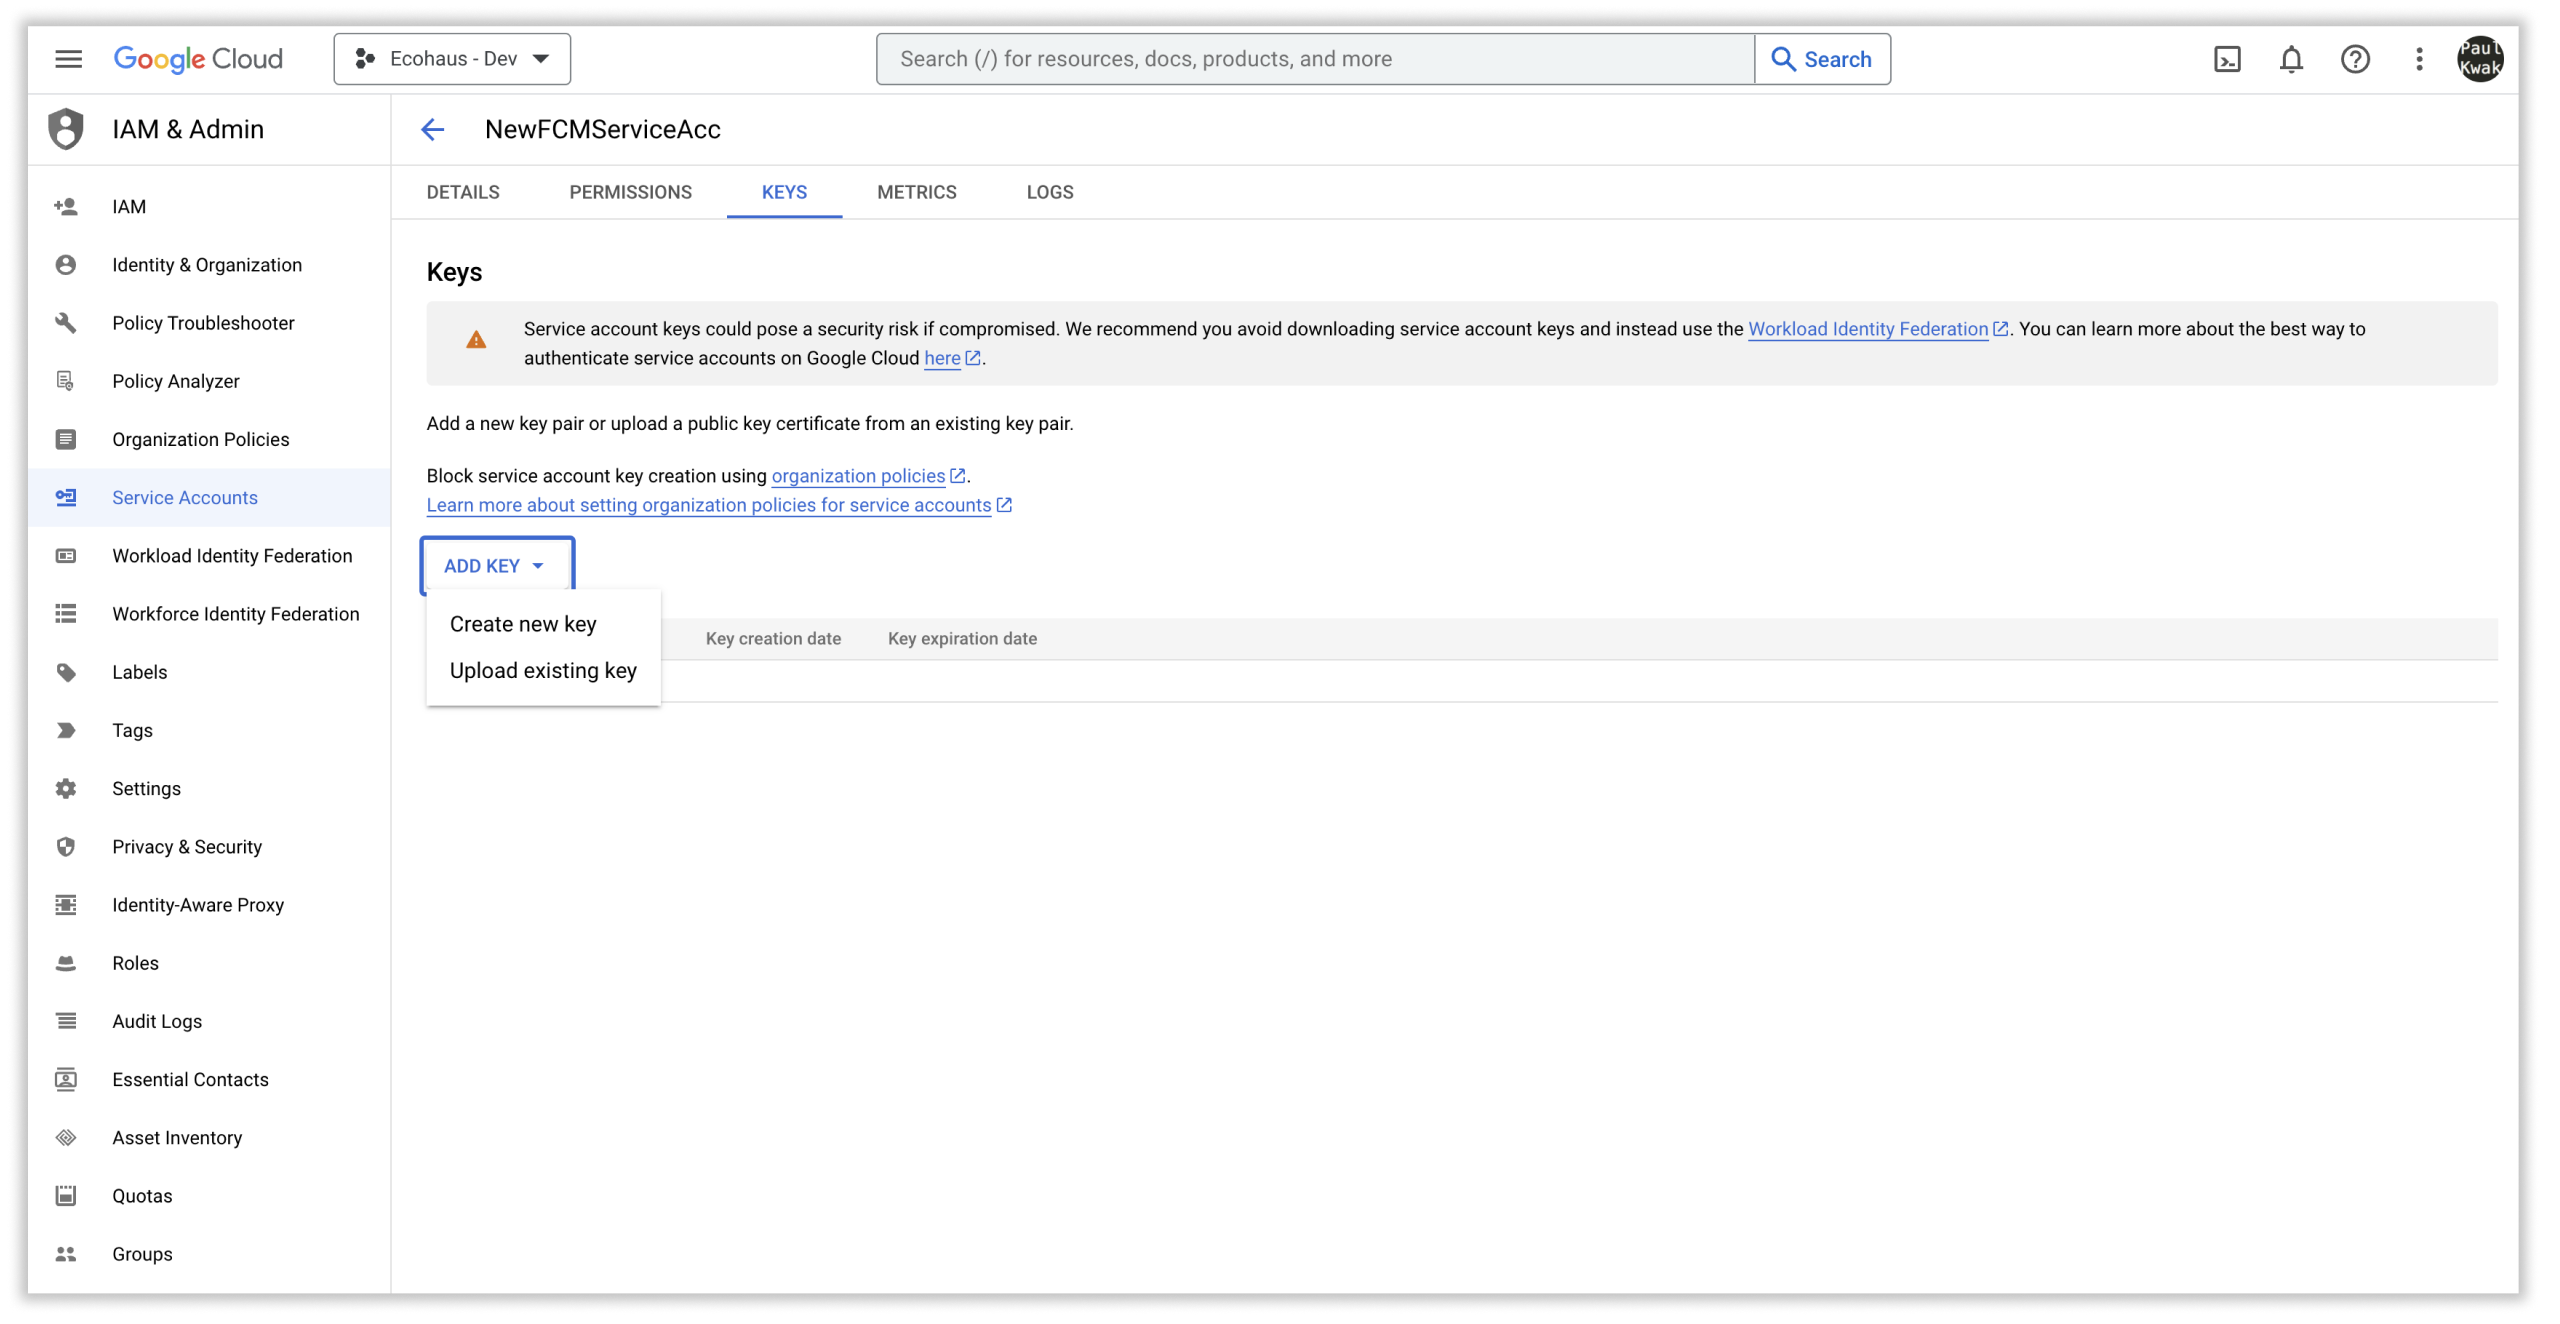
-
With 'JSON' selected, go ahead and 'CREATE'
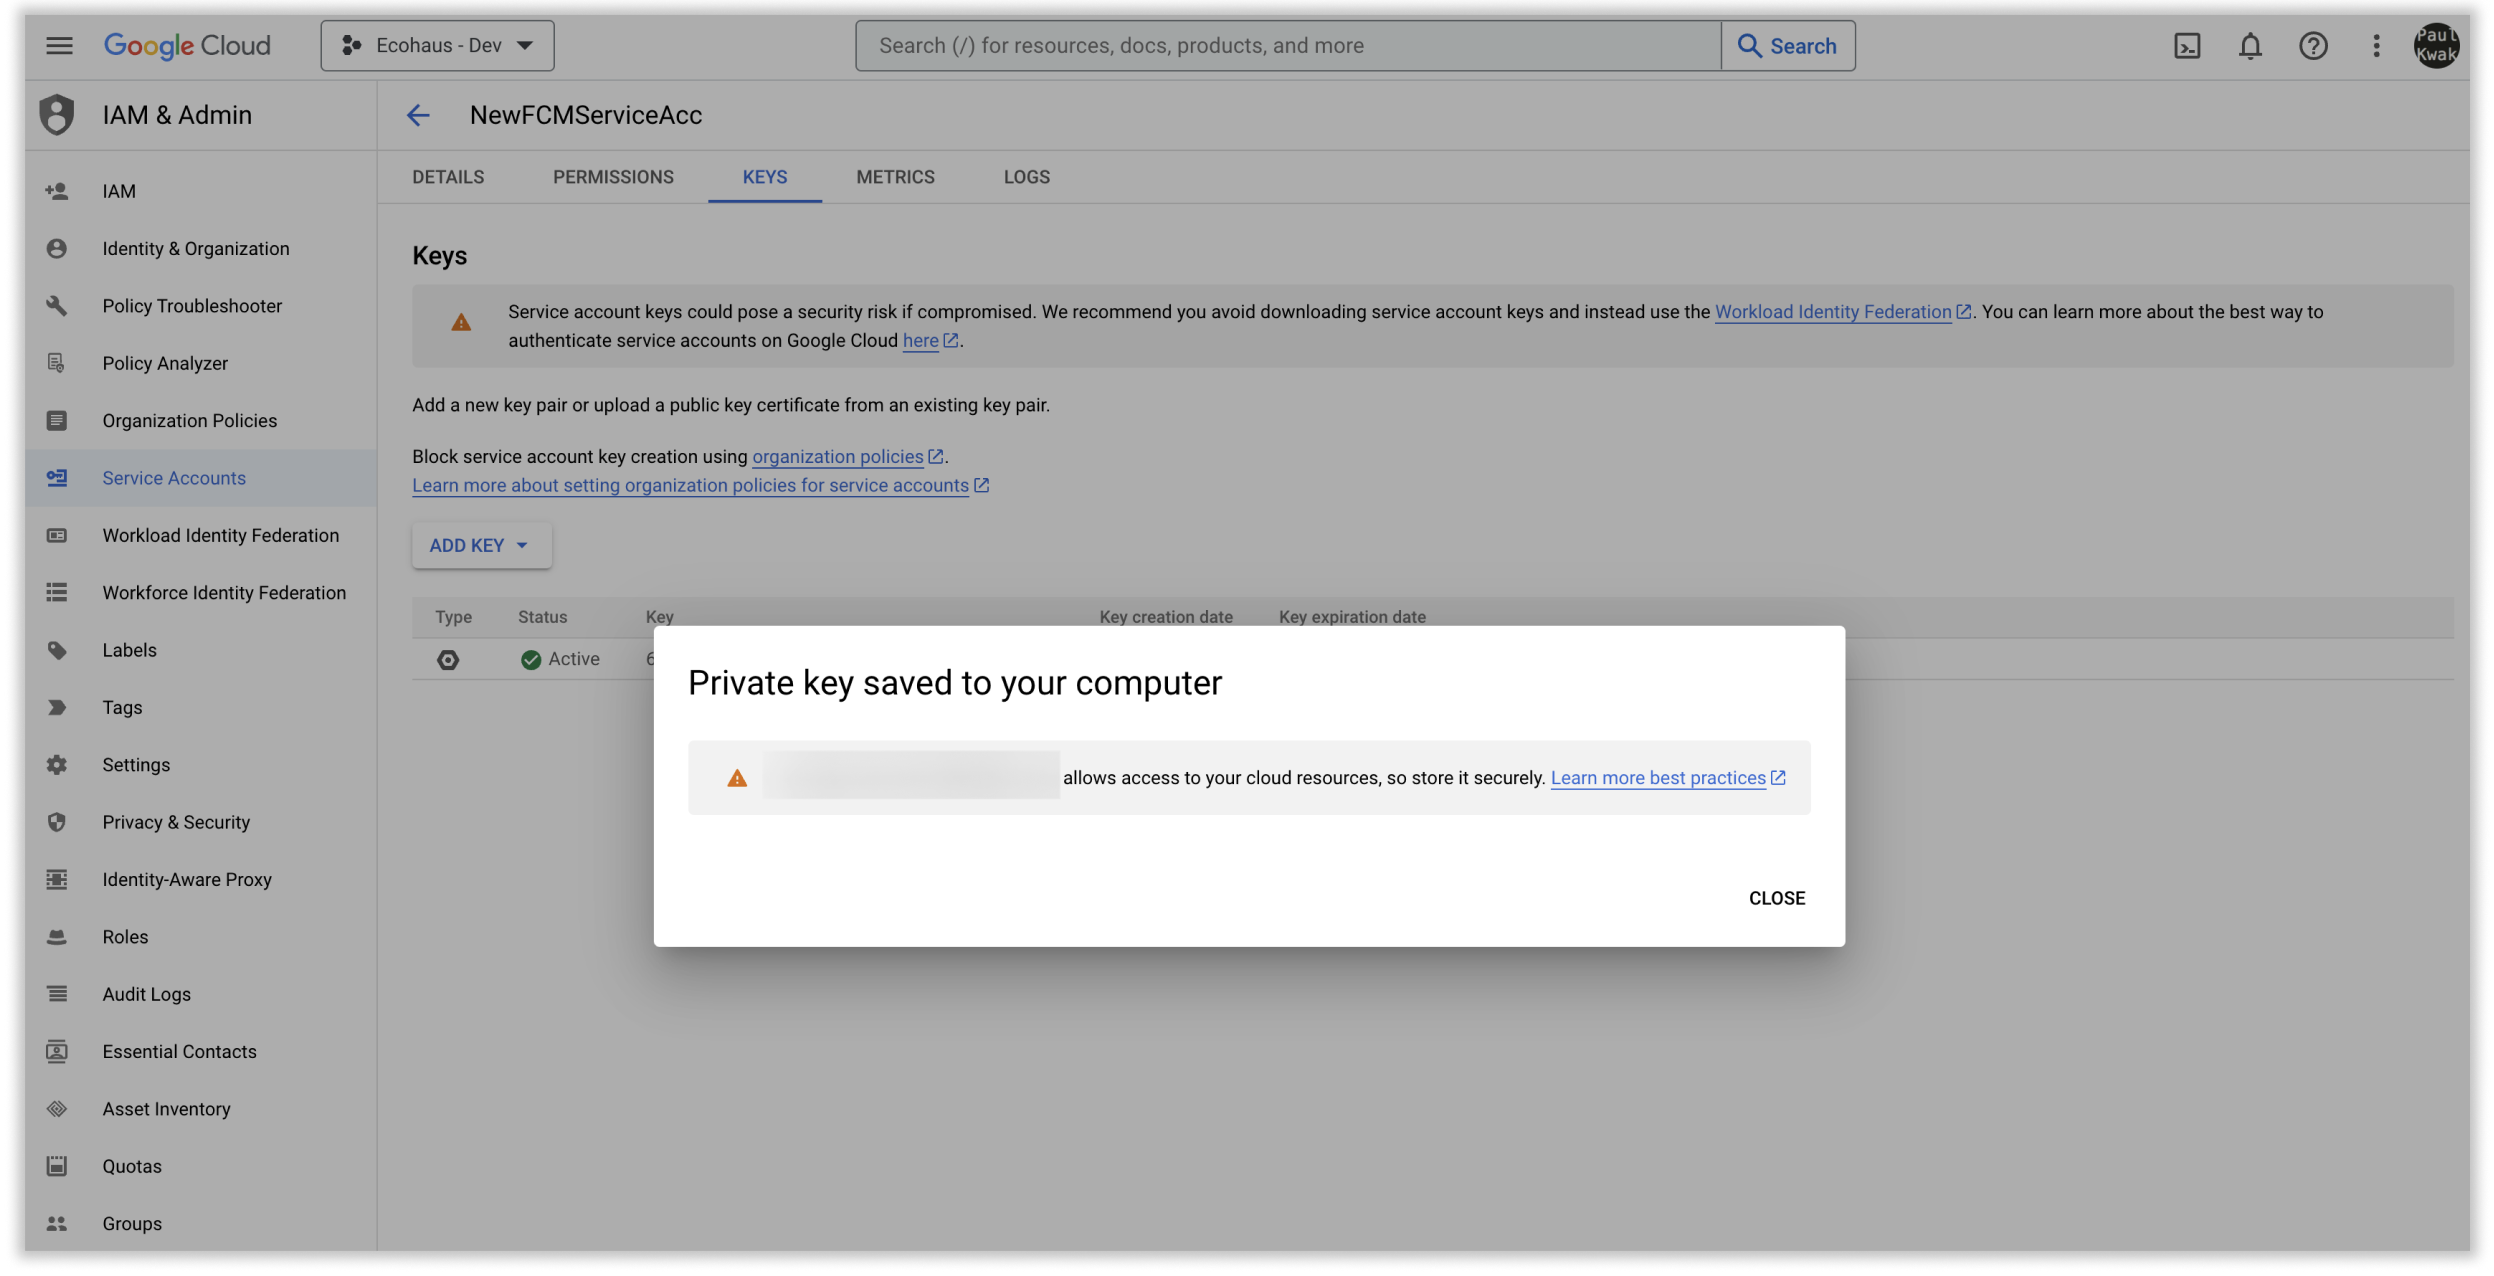
-
A new JSON file will be automatically downloaded. Keep this secure. Close and go back to 'Service Accounts'.
- Refresh page and confirm the new service account has a Key ID
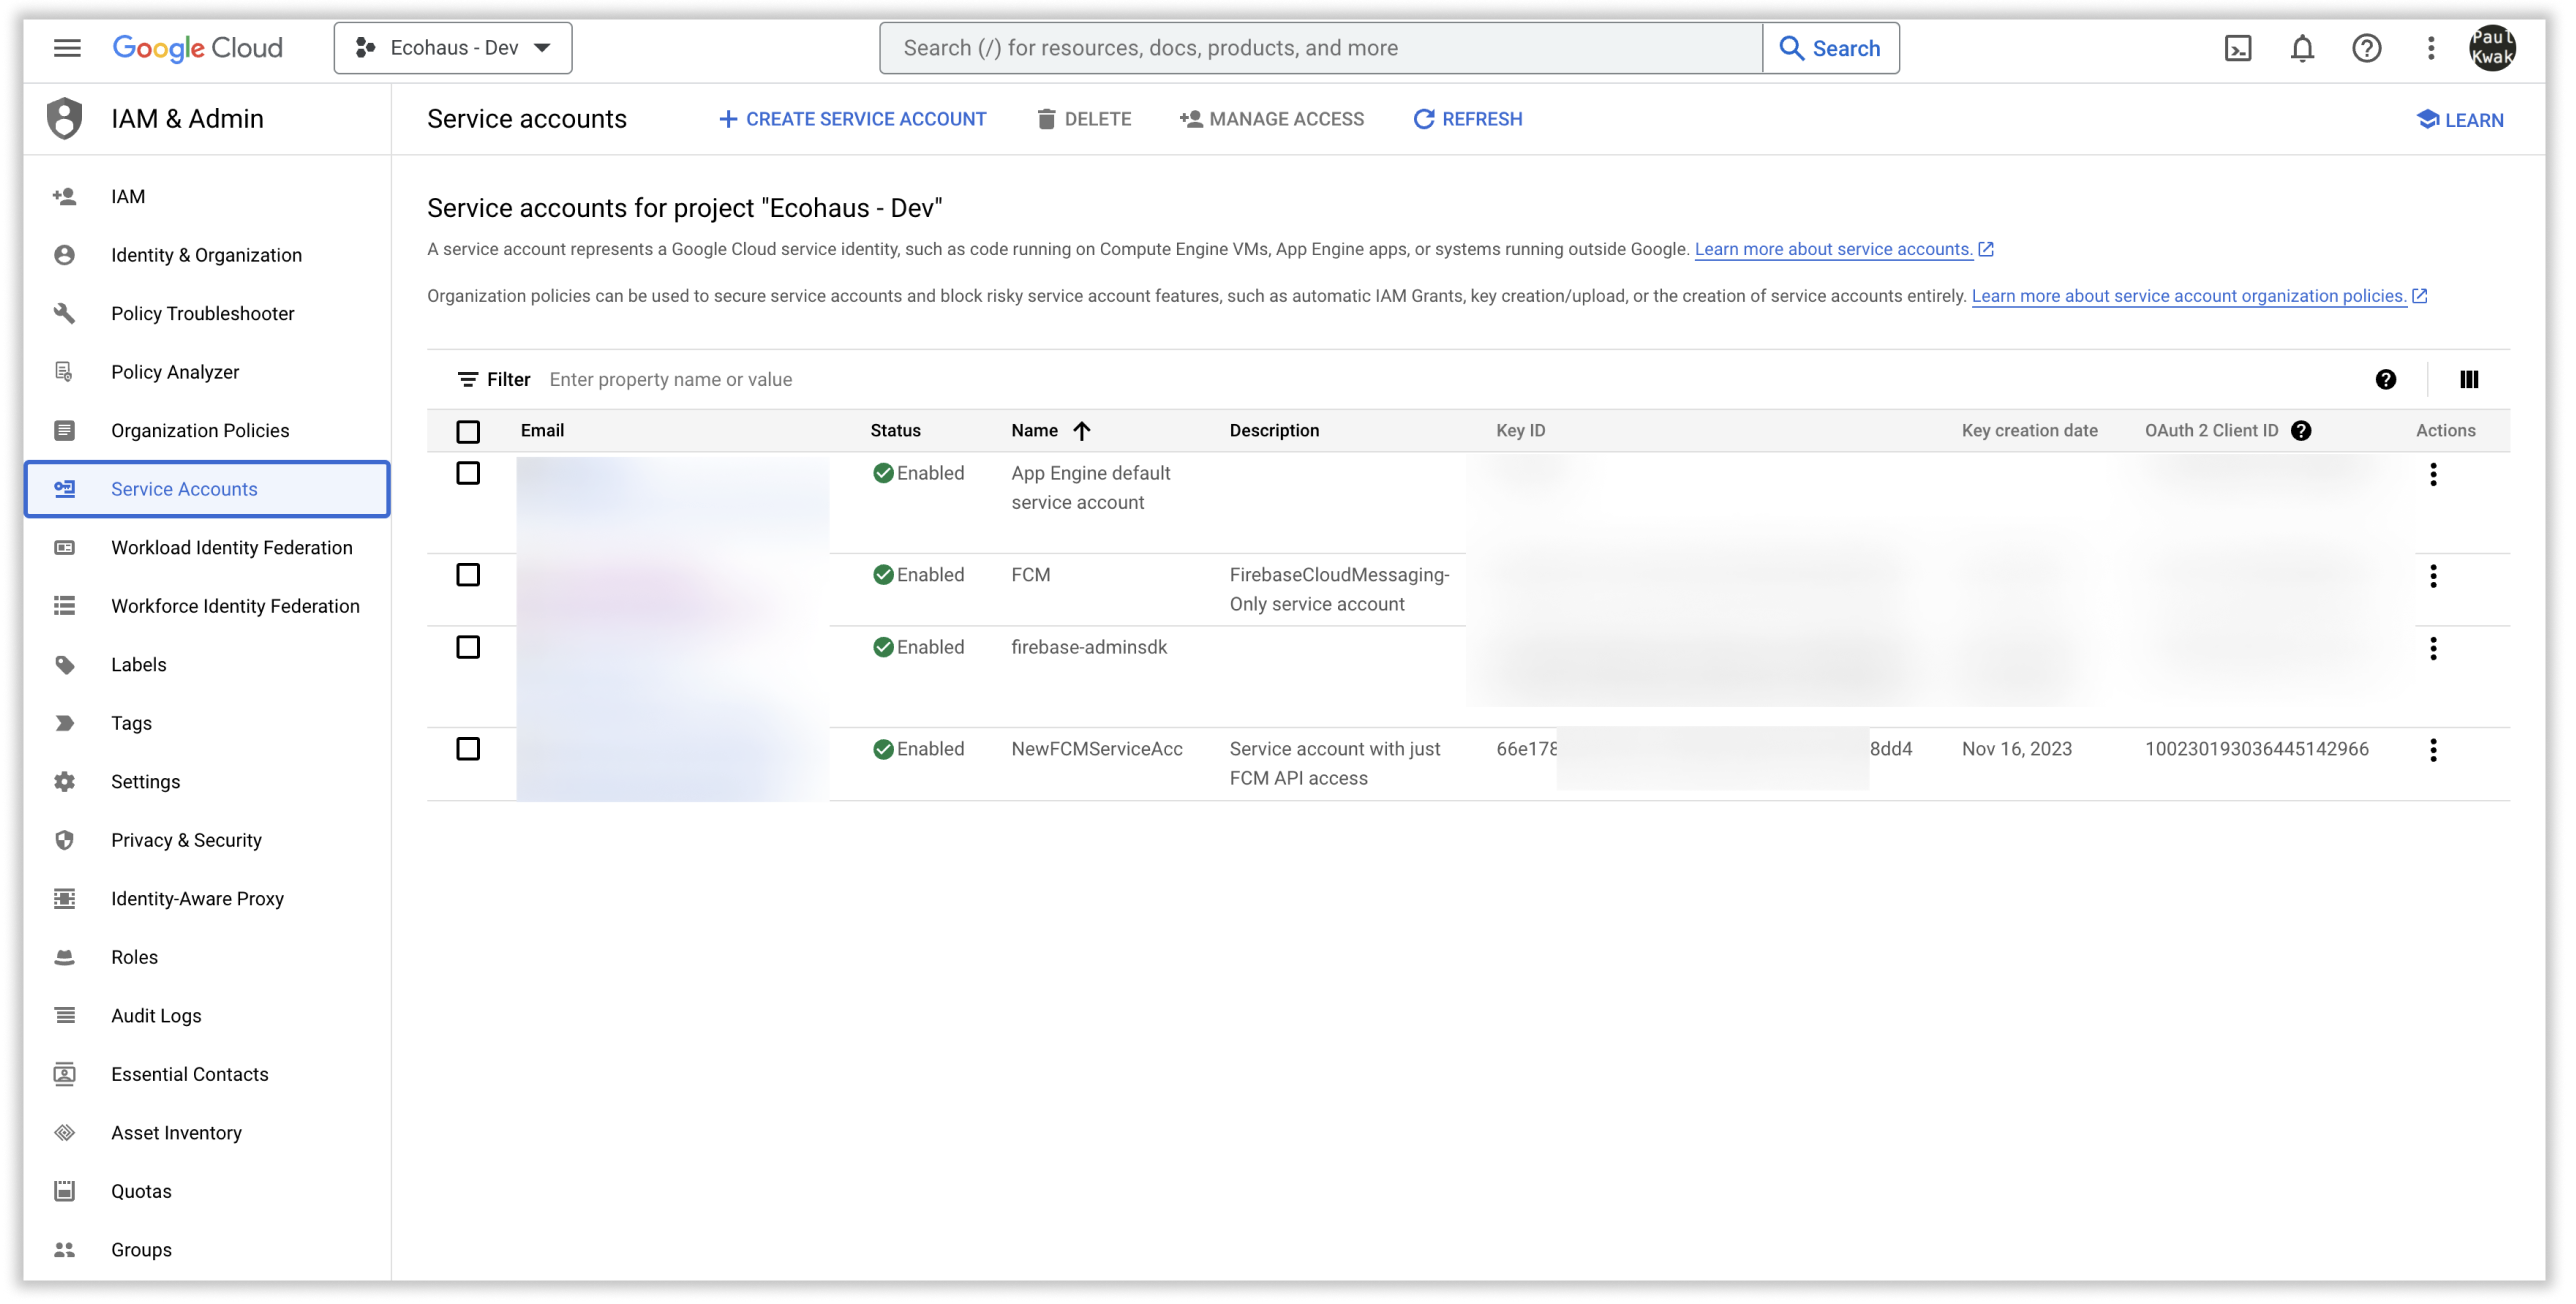
Contact Khoros Support and provide them with your service-accounts JSON file for uploading it to Brand Messenger.
Step 2: Setting up your FCM Legacy server key
- In your firebase console go to Settings > Project settings
- The server keys should be available in the Cloud Messaging tab
Contact Khoros Support with your FCM Legacy server key for uploading it to Brand Messenger.
Step 3: Enabling FCM in your app
Adding FCM in your application
If you already have a Firebase account and code to retrieve the firebase registration token for the client app instance, skip to this step
- Add Firebase to your Android project.
- Edit your app manifest by adding the following to your app's
AndroidManifestfile:
<service android:name="com.brandmessenger.core.KBMFirebaseMessagingService" android:stopWithTask="false">
    <intent-filter>
        <action android:name="com.google.firebase.MESSAGING_EVENT" />
    </intent-filter>
</service>
- To Update token to Brand Messenger server, setup the
registerForPushNotification taskby adding the below lines of code inonSuccess()callback method ofBrandMessengerManager.login[Refer here]
if (BrandMessengerUserPreference.getInstance(context).isRegistered()) {
    FirebaseMessaging.getInstance().getToken().addOnCompleteListener(new OnCompleteListener<String>() {
        @Override
        public void onComplete(@NonNull Task<String> task) {
            String token = task.getResult();
            BrandMessenger.registerForPushNotification(context, token, new KBMPushNotificationHandler() {
                @Override
                public void onSuccess(RegistrationResponse registrationResponse) {

                }

                @Override
                public void onFailure(RegistrationResponse registrationResponse, Exception exception) {

                }
            });
        }
    });
}
if (BrandMessengerUserPreference.getInstance(context).isRegistered) {
    FirebaseMessaging.getInstance().getToken()
        .addOnCompleteListener(object : OnCompleteListener<String?> {
            override fun onComplete(task: Task<String?>) {
                val token: String? = task.getResult()
                BrandMessenger.registerForPushNotification(
                    context,
                    token,
                    object : KBMPushNotificationHandler {
                        override fun onSuccess(registrationResponse: RegistrationResponse) {}
                        override fun onFailure(
                            registrationResponse: RegistrationResponse,
                            exception: Exception
                        ) {
                        }
                    })
            }
        })
}
If you are already using Firebase in your application
- In your
FirebaseMessagingServiceonNewToken(String registrationId)method get the FCM Registration token and pass it to the Brand Messenger SDK method:
@Override
public void onNewToken(String registrationId) {
    super.onNewToken(registrationId);

    Log.i(TAG, "Found Registration Id:" + registrationId);
    KBMFirebaseMessagingService.setNewToken(registrationId, this);
}
override fun onNewToken(registrationId: String) {
    super.onNewToken(registrationId)
    KBMFirebaseMessagingService.setNewToken(registrationId, context)
}
- Add the code below in
BrandMessengerManager.loginonSuccess()method [Refer here].
if (BrandMessengerUserPreference.getInstance(context).isRegistered()) {
    FirebaseMessaging.getInstance().getToken().addOnCompleteListener(new OnCompleteListener<String>() {
        @Override
        public void onComplete(@NonNull Task<String> task) {
            String token = task.getResult();
            BrandMessenger.registerForPushNotification(context, token, new KBMPushNotificationHandler() {
                @Override
                public void onSuccess(RegistrationResponse registrationResponse) {

                }

                @Override
                public void onFailure(RegistrationResponse registrationResponse, Exception exception) {

                }
            });
        }
    });
}
if (BrandMessengerUserPreference.getInstance(context).isRegistered) {
    FirebaseMessaging.getInstance().getToken()
        .addOnCompleteListener(object : OnCompleteListener<String?> {
            override fun onComplete(task: Task<String?>) {
                val token: String? = task.getResult()
                BrandMessenger.registerForPushNotification(
                    context,
                    token,
                    object : KBMPushNotificationHandler {
                        override fun onSuccess(registrationResponse: RegistrationResponse) {}
                        override fun onFailure(
                            registrationResponse: RegistrationResponse,
                            exception: Exception
                        ) {
                        }
                    })
            }
        })
}
- For Receiving Notifications in FCM: Add the following in your
FirebaseMessagingServiceononMessageReceived(RemoteMessage remoteMessage)method
@Override
public void onMessageReceived(RemoteMessage remoteMessage) {
    Log.i(TAG, "Message data:" + remoteMessage.getData());
    KBMFirebaseMessagingService.triggerBrandMessengerNotification(message, this);
}
override fun onMessageReceived(remoteMessage: RemoteMessage) {
    Log.i(TAG, "Message data:" + remoteMessage.data)
    KBMFirebaseMessagingService.triggerBrandMessengerNotification(message, context)
}
Notification click handling and passing data to your activity
Brand Messenger can handle the showing of chat notifications and it will pass the data to your activity once you click on the notification to open.
Add the below metadata in your app Android Manifest file
and pass your activity package name with an activity name that activity will receive the data of the message object
<meta-data android:name="activity.open.on.notification"
        android:value="<YOUR_ACTIVITY_FULL_PACKAGE_NAME_WITH_ACTIVITY_NAME>" />  //Change the value to your activity package
Note: Change the above metadata value to your activity package name
For getting data in your activity based on intent
Intent intent =   getIntent();
if (intent != null){
    String messageJson = intent.getStringExtra(BrandMessengerConstants.MESSAGE_JSON_INTENT);
    if (!TextUtils.isEmpty(messageJson)) {
        Message message = (Message) GsonUtils.getObjectFromJson(messageJson, Message.class);
    }
}
val intent = intent
if (intent != null) {
    val messageJson = intent.getStringExtra(MobiComKitConstants.MESSAGE_JSON_INTENT)
    if (!TextUtils.isEmpty(messageJson)) {
        val message = GsonUtils.getObjectFromJson(messageJson, Message::class.java) as Message
    }
}
Sync messages
Whenever the connectivity changes, for example the status of the internet connection, use call the below method to sync messages from the server.
SyncCallService.getInstance(this).syncMessages(null);
SyncCallService.getInstance(this).syncMessages(null)
Verifying a Brand Messenger notification
You can verify whether a remote message is a Brand Messenger notification or not and send it through to the SDK with the following code:
if (BrandMessengerPushReceiver.isBrandMessengerPushNotification(remoteMessage.getData())) {
    BrandMessengerPushReceiver.processMessageAsync(this, remoteMessage.getData());
    return;
}
Updated almost 2 years ago